Subaru Impreza WRC S5 '00 | Tamiya 1:24

05 April 2021

Author | Krzysztof Szpakowski

It's time to start a new project, this time it will be a miniature car of my favorite rally driver - Juha Kankkunen.
Subaru was the last car that KKK won rallies and stood on the podium, so I decided to start at the end when it comes to building the Flying Finn models.


Of course, I will use the well-known and loved by modelers Tamiya's kit.


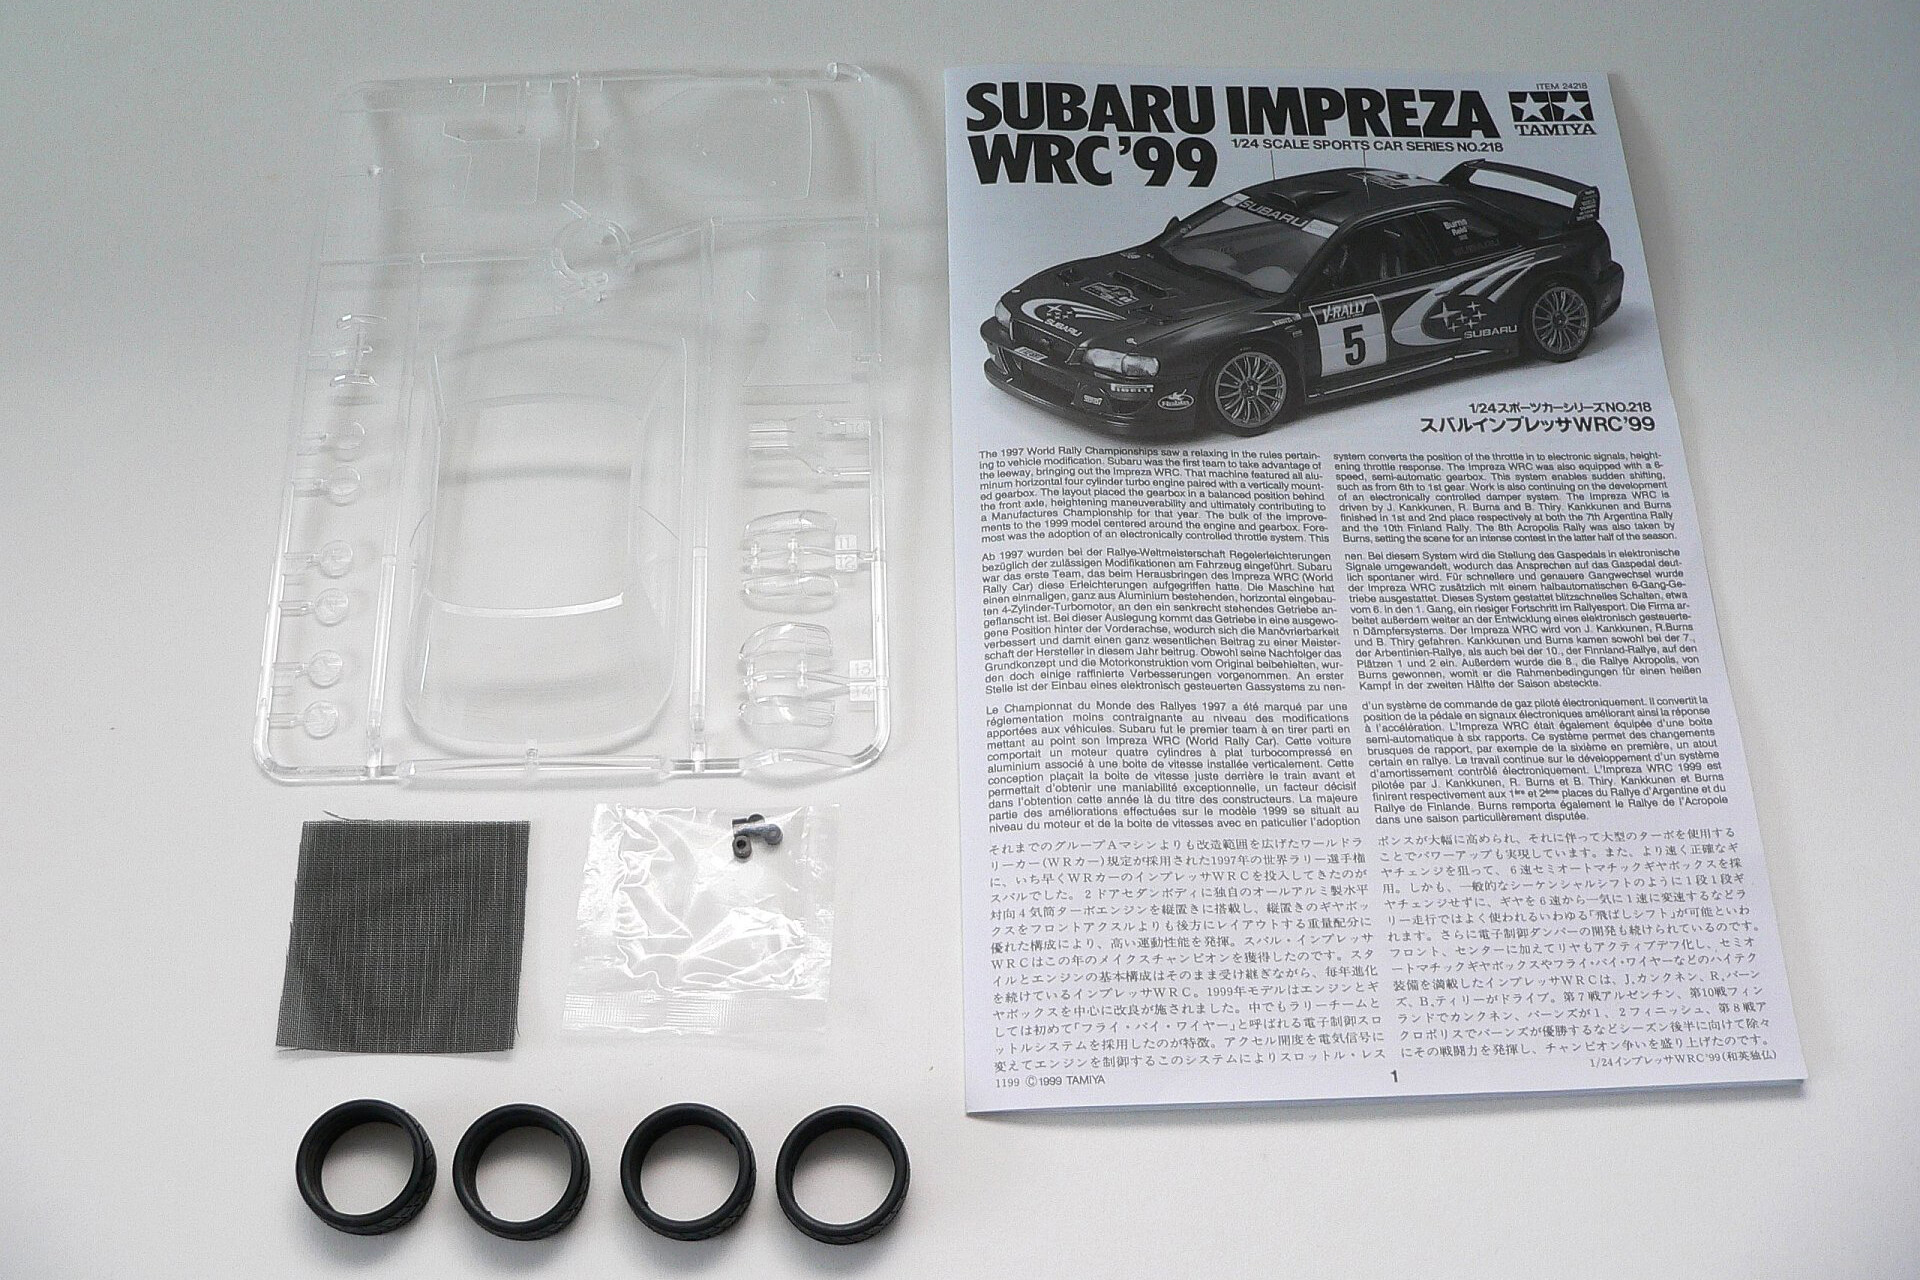
Let's see how the raw parts look like.


The model will be equipped with halogen lamps, I will use the lamps from the Subaru 2001 model.


To build a model in the Monte Carlo Rally 2000 specification I have to use a steering column with a gear lever from an Impreza 2001 model.


Additionaly I will use photo-etched set made by Hobby Design.


Another additional element needed to build such a model is carbon decals. The set made by C.B.COM does not have enough quality.
So I will use absolutely the minimum of that set and the rest will have to be taken from the Subaru 1998, 1999, 2001 kits.
In the photo below, the mentioned C.B.COM carbon decals and those from the Tamiya '99 set.


There will also be a lot of carbon and kevlar.


Color palette.


In general, there will be many modifications to get closer to the original 1:1. The body will be drilled, the radiator will be reworked, modeling rivets will appear, but I will write about all of that in on a regular basis in the next updates.


As always at the beginning, the seams and all unnecessary elements need to be removed from the model.
In the photos below, removed the turn signals, broached holes for rally pin stands and locks in the doors.


Removed pins on the hood and broached holes for screws fastening halogens.


Removed tailgate pins and drilled bumper for new fasteners.


Antennas bases removed.


Removed original bulbs and drilled covers for halogens in the bumper to put mounting bolts.


The next stage of work is the fitting of new bulbs and fixing screws.


Fitting the new turn signals.


The next stage is the filling with a putty of the rear spoiler gaps.


And sanding effects.


This way the model was ready to be painted with a primer. Here are the effects after the first visit to the paint booth.


After removal the radiator, the floor was also painted.


In today's update fittings of halogens and air intakes on the hood and roof of the model.


Taking this opportunity, I will say a few words about the issue that comes back very often when working on the Subaru S5 - it is about the front bumper and halogen lights. In the case of making the Prodrive Subaru S5 factory car from 1998 to 2000 (the first three rallies of the 2000 season), i.e. the last two evolutions of the S5, if we make a model without halogens then filling the bumper with the putty.


If you make car version for the night stages, do not fill up the bumper and halogens cover plates with the putty. These are covers screwed onto the bumper with the bolts. Picture from the Prodrive parts catalog.


Next work focused on reworking the roll cage. The Subaru in the '99 specification had additional connections between the cage and the windshield pillars. The roll cage itself also had more pipes, which I tried to reproduce.


Priming.


Another changes to the roll cage included the removal of two of the four side protectors.
The photo below before mods.


All the roll cage elements primed.


Another modified detail of the model is the trunk wall. Tamiya made a very nice rear shelf, while wall remained empty. So the drilled wall gained 24 rivets and two additional holes for fuel lines that will go to the model at later stages of work.


The model is ready for another visit to the spray booth.


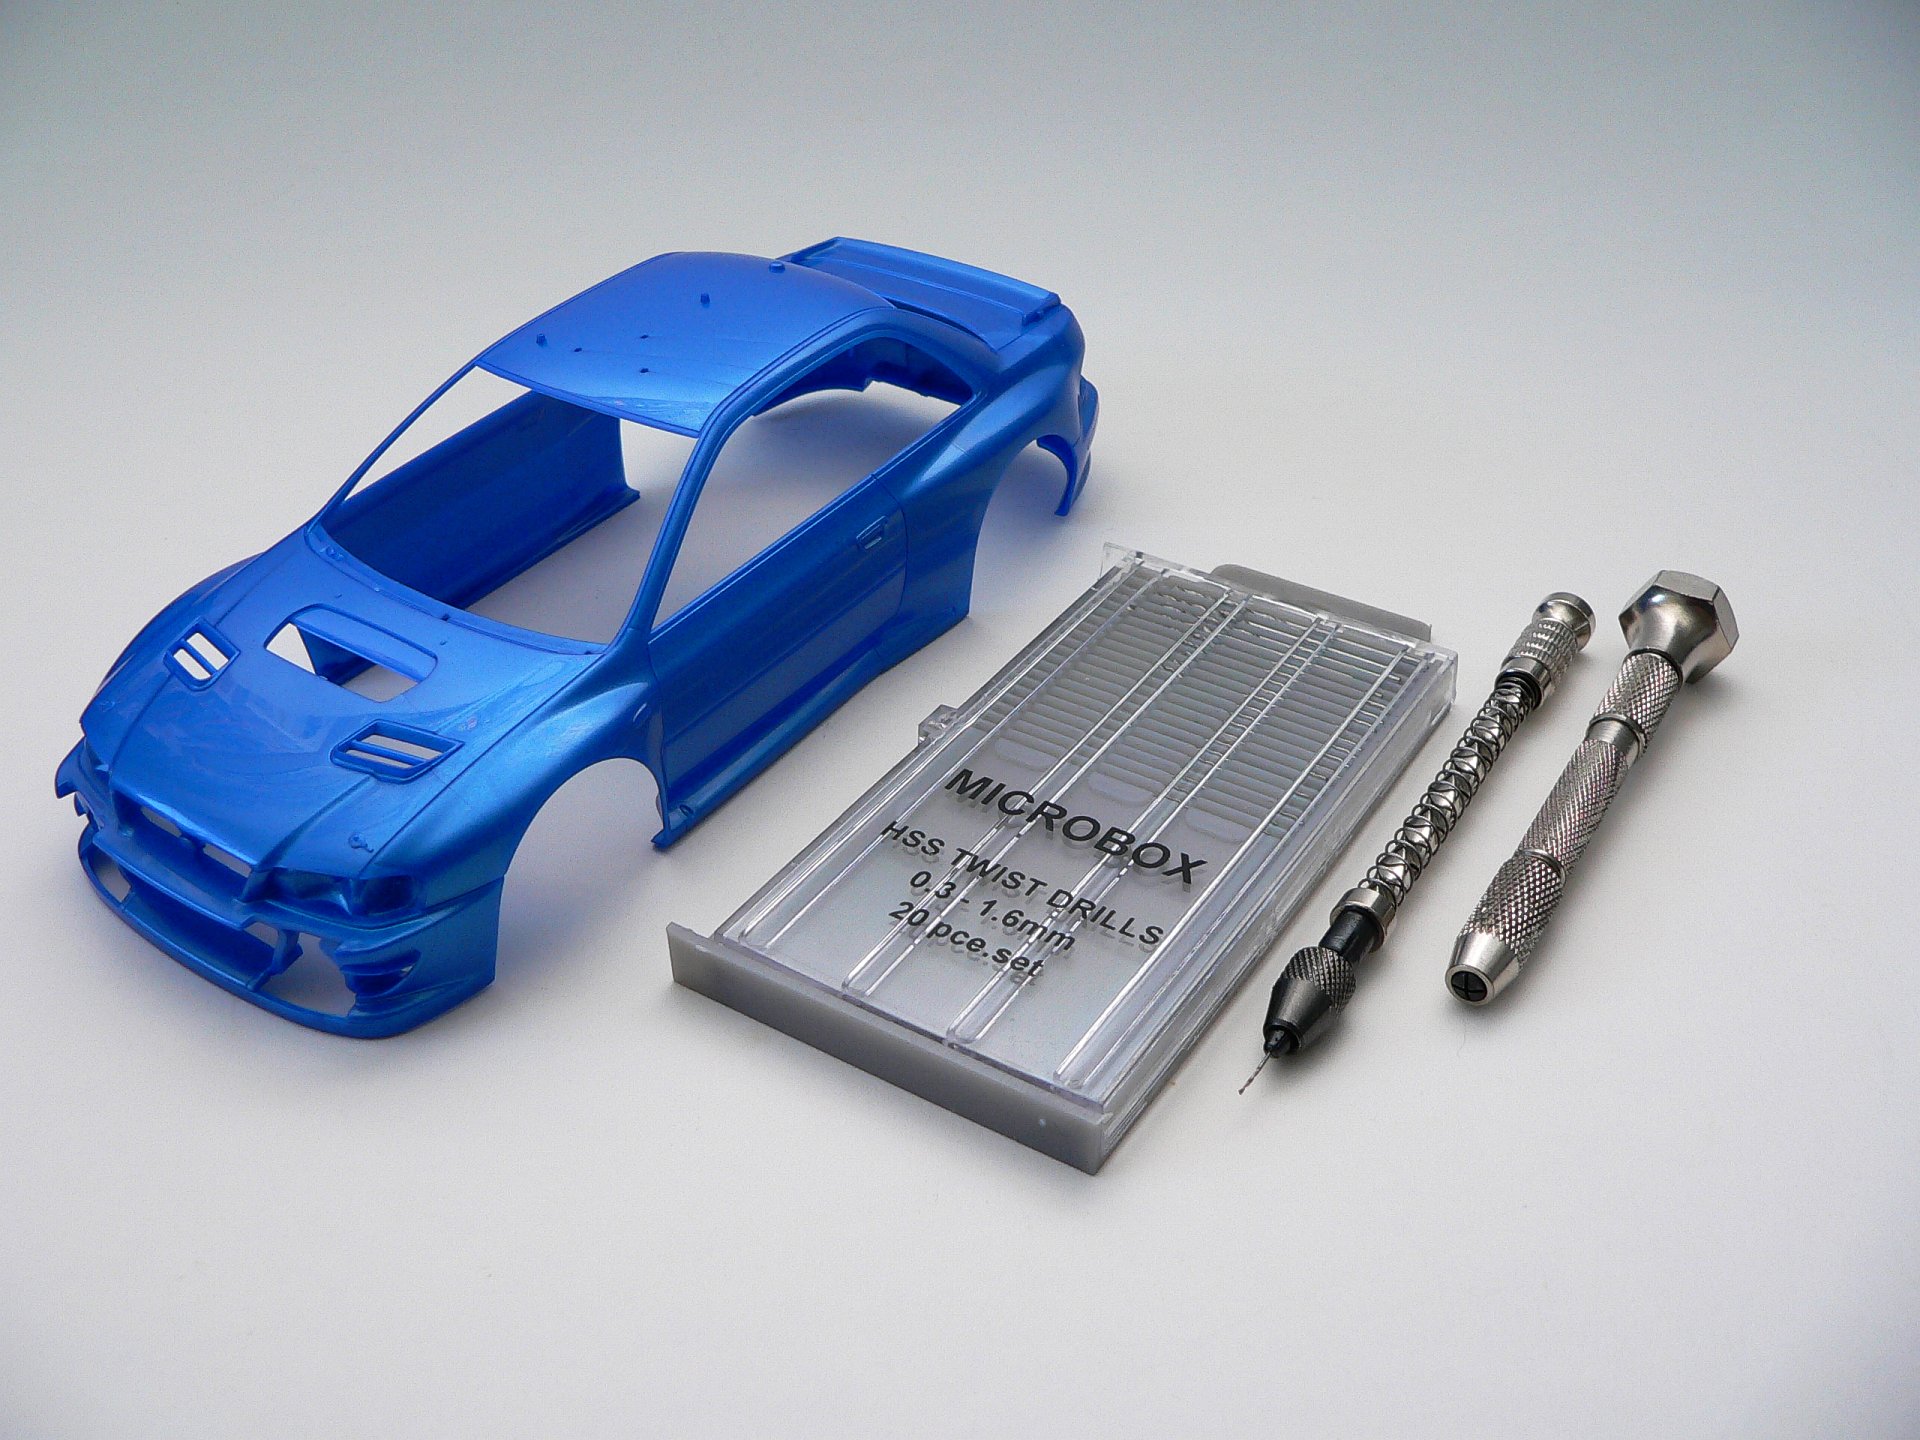
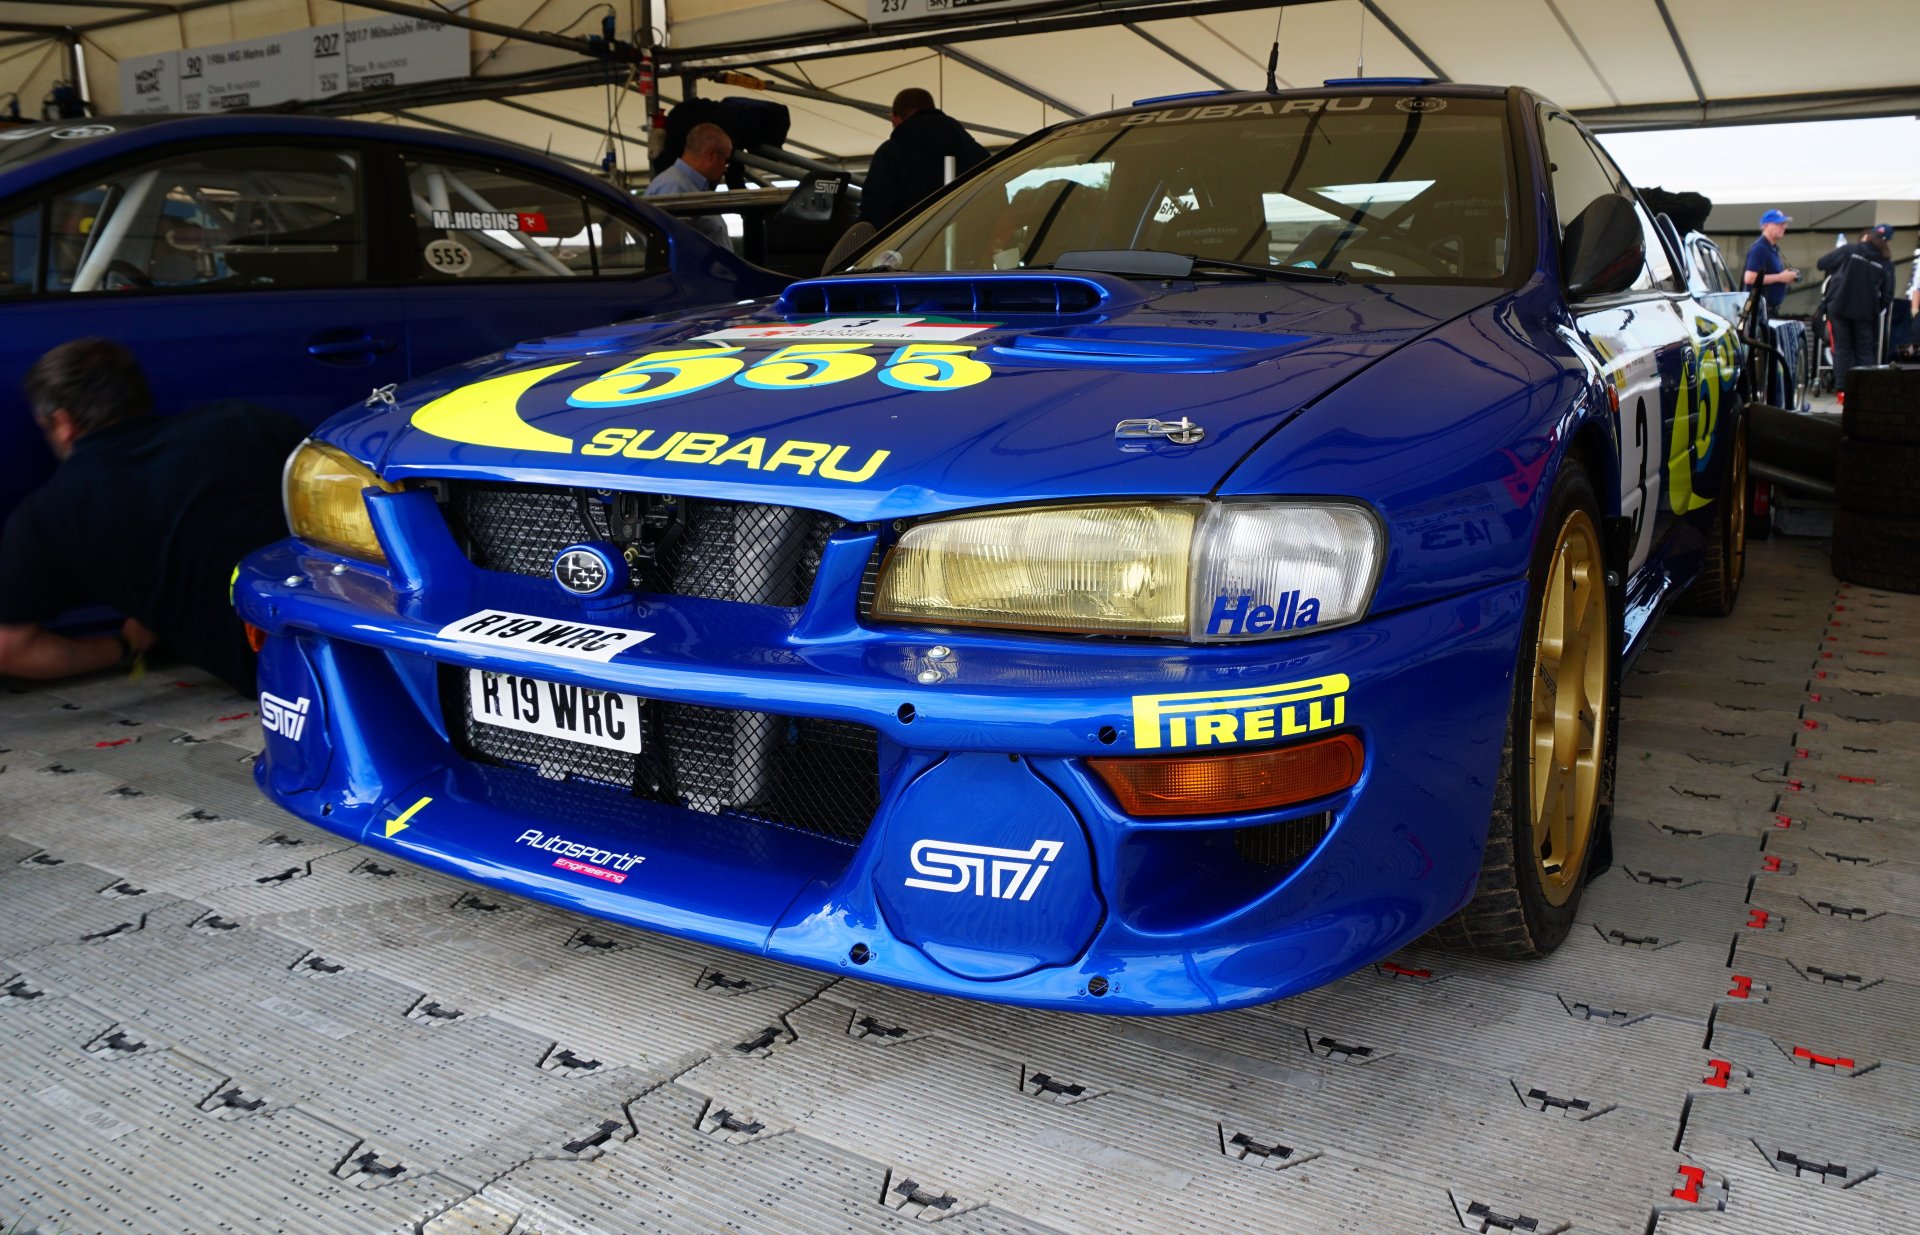
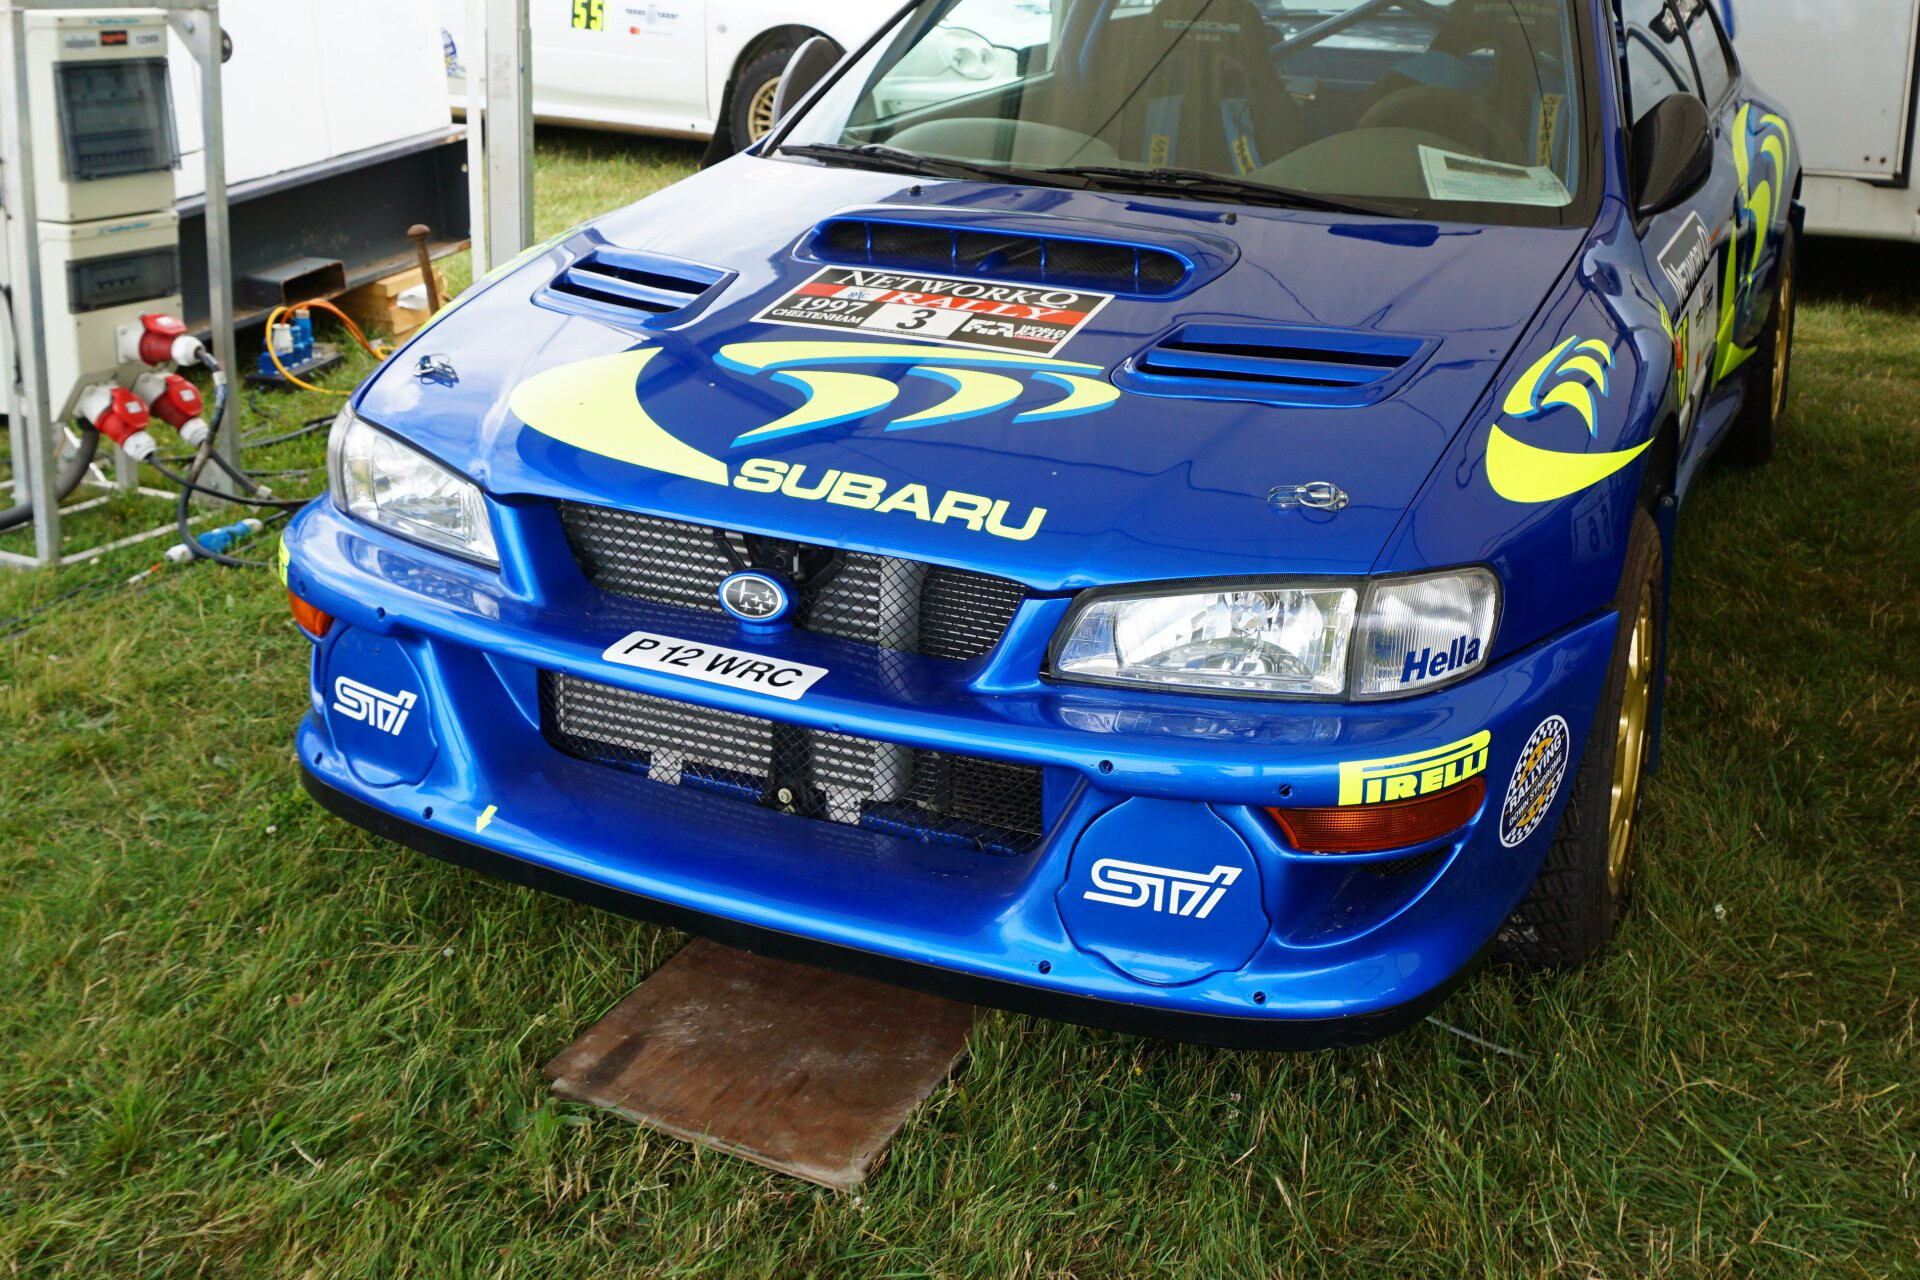
Photo after visiting the spray booth.


The detail that caused me some problems was the panel line of the halogen housing.
It was difficult to shape it so that it was even, but finally it worked.


Thanks to the vigilance of my colleague Maciek (Madmax), it was possible to correct the error in the roll cage. I had to remove two reinforcements in its upper part. Here are the effects.


Now I would like to present a report on the work on Subaru rims, which were initially narrowed to make them look more credible after installing the tires.


Original rim size and after tapering.


Primer painting.


Target color and tire fitting.


Finally, a few photos from the suspension and rim fitting. All this to check whether the color of the rims will be appropriate.
I also had to measure how much I would like to lower the suspension.


I will start today's update where I finished recently, i.e. on the rims. Delicate screws wash, OZ decals, added air valves, rubbed off tires and here is the final effect.


The next stage of work is wrapping the model. It took me five days in total. It took a lot of time to figure out what decals to use to get the effect as close as possible to the Monte Carlo Rally 2000 specification. The decals on this model come from six different sets:

• Subaru Impreza 1999 (France Rally) Tamiya - 2 sheets
• Subaru impreza 1998 (Monte Carlo Rally) Tamiya
• Subaru Impreza 2001 (Monte Carlo Rally) Tamiya
• Ford Focus 2000 (Monte Carlo Rally) Revell
• Subaru Impreza 2000 (Monte Carlo Rally) C.B.COM
 
As for the product C.B.COM is generally not much useable. The pleiades are the wrong color and are wrongly scaled. There are funny mistakes in the subtitles themselves, such as the "alkon" advertisement written "alkom". Unfortunately, these decals are necessary to make this model correctly, which I will describe below.


Front bumper and hood:
• Prodrive at the radiator inlet - C.B.COM
• Alcon i Robin - Impreza 2001
• Pirelli, arrow and a pleiads on the grill and on the hood - Impreza 1999
 

Front wheel arches:
• Spot-On, Motul i Pirelli - Impreza 2001
• NGK - Impreza 1999


Side sections:
• White plastrons - Impreza 1999
• Plastrons from the Rally Monte Carlo - Ford Focus
• www.subaru-france.fr - C.B.COM
• Pleiads - Impreza 1999


I was not satisfied with the arrangement of pleiades around the door handles, so I decided to apply one more layer to them, so that's why I mentioned above that I used two sets. The effect is not perfect but decent.


Roof:
• White plastron - Impreza 1999
• LinelTEX - Impreza 1998
• Plastron Monte Carlo - Ford Focus 2000


Rear bumper, flap and spoiler:
• Advertisements on the sides of the spoiler - Impreza 1999
• Robin, pleiades and arrow - Impreza 1999
• Pirelli, Prodrive, www.subaru-france.fr - Impreza 2001


And here are the effects of wrapping.


Update 5 | 20.10.2020

In today's update, the clear paint and model polish effect. As standard, in my case, Tamiya products.


Here is the effect.


Today's update will focus on the lamps. To make lampshades, gaskets and reflectors, I used the materials shown in the photo below.


At the beginning, a lamp and a parking lamp. Lampshade seals made with a black Sharpie marker, reflectors painted with Molotow Liquid Chrome markers.


The next stage of work was painting turn signals lampshades on the TS-73 with minor X-26 corrections. The reflectors are XF-56. I chose the color so that the indicator has a darker shade and looks like the real thing. In addition, I have already put on the halogen mounting caps.
The rear lampshades are TS-74 with X-27 corrections, reflectors made of silverware from a cigarette pack.


Today's update continues to fine-tune the Subaru's exterior.
The biggest visual change is the finished panel lines and painted gaskets. Halogen covers in the bumper got mounting bolts, mesh and air intake in the hood, and the air intake for the cabin on the roof. The model officially became a Kankkunen's car thanks to license plates and competition numbers from the Monte Carlo Rally.


Update 8 | 20.12.2020
It's time to start working on the model's chassis.
At the beginning, work related to painting the engine and a series of photos entitled "Mask, paint, repeat".


Painting effect after minor corrections.


Final effect after wash.


Gearbox work, painting, wrapping, wash.


Finally, try on the gearbox with the driveshafts to the engine.


Propeller shaft, rear covers, fuel tanks and insulating covers.


Today's update continues the work on the model's floor plate. In the beginning, duct thermal insulation.


Work on the rear diffuser and suspension arms.


Work on the elements of the front suspension.


Try-ons.


Another detail, that took me two days to work on, are brake discs with calipers. To make this element of the model, I used photo-etched plates from the Hobby Design set. From the instruction side it looked like this:


The front disc with a caliper consists of 14 elements, while the rear - 15 elements.
Work on the first disc and caliper.


The surface of the disc has been sanded with sandpaper for a more real effect. Everything looked great so far until I put together the second disc, realizing that the manufacturer of the plates in the set used the same cuts on both discs. Therefore, installing such a set, I would have correctly cut the discs on the left and incorrectly on the right side. You can see in the photo below.


Without losing my enthusiasm and following the motto 'where there is a problem, a problem has a problem', I started to work and drilled one of the discs so that after turning it, it had cuts in the right direction.


After assembly, it will look like this, that there will be no trace of the Hobby Design mistake.


The same problem in the case of the rear discs, but here both discs had cuts adapted to the right side of the car. I write about it as a warning to other colleagues who decide to make a model using the HD set. Finally, a photo of the reworked discs and painted calipers. For the sake of certainty and in order to avoid mistakes, I described where what should be.


Update 10 | 30.01.2021

Today, the next stage of work on the Subaru suspension. First, the MacPherson strut and the rear axle suspension.


The suspension was lowered by 2 mm and then painted.


The next stage is work on the model's exhaust.


The end of the exhaust has been reamed.


Then I painted the exhaust system.


According to the instructions, it would be the end of the work, but I decided to valorize the exhaust by adding a thermal bandage according to the car's specifications. Finally wash and exhaust ready.


Below are photos of all parts of the driveline and suspension.


Try-ons for the model floor plate.


Afterwards the work focused on the engine cover and underbody cover.


And the final effect.


Subaru coolers are the next stage of work. In the photo below you can see three coolers behind the front grille.


These are the radiator, intercooler and (the smallest) brake fluid cooler.


Tamiya unfortunately put only one in the model, which I divided into two. The third was made from scratch.


Painted and put in place.


Update 11 | 20.02.2021

Here's what I'm going to do in the next few weeks:


At the beginning, the already partially made elements of the safety roll with panels that had to be taken care of. Sanding of already painted protective panels, filling and another sanding.


In this way, the carbon panels will be on both sides of the roll cage, which unfortunately is not a 100% representation of a real car, but it will definitely add aesthetics to the model.
The next stage of work is masking, black painting and wrapping the panels with carbon. The decals were painted with TS-71 Smoke to darken their shade which was too silver. Then several layers of TS-13.


I put sponsorship ads using decals from Subaru WRC 2001 (only those from the Rally Monte Carlo 2000), painted the protectors on the cage, and on the pilot's side there were stickers with the roll cage homologation.


The next stage of work is the side panels from the model door.

The nets, pocket recesses and the handle on the driver's side had to be removed from side panels, as these did not match the specification of the model I am making. The whole was painted with black mat, then masking and half-mat painting of the door panels.


Template, carbon wrapping and painting TS-71 i TS-13.


The last stage is painting the remaining elements of the rear padding, adding window handles that come from the Subaru WRC 2001 and painting the door handles.


Impact wrench to change wheels.


Another detail is the pilot's footrest plate, which was subsequently covered with carbon and painted TS-71 and TS-13.


Then I added anti-slip 'dots', buttons, stickers describing the buttons and inserted a fire extinguisher and an impact wrench along with a mounting made after technical consultations with Piotr STI22B.


As for the safety cage, I painted the protectors, added an on-board camera and flashlights to read the route description during night OSes.


Update 12 | 12.03.2021

Today, another series of works on the interior of the model. This time the work was focused on the driver's side. To fit the specification of the car from the 2000 season, I had to put the on-board fire extinguisher in front of the driver's seat. I used the one from Subaru 2001. In addition, instead of the metal cover placed on the channel on the right side, I made a reservoir with a filler. The foot rest was drilled and in place of the metal plate I put painted sandpaper, thanks to which I obtained a rough effect. The clutch and brake pedals got anti-slip mats.


Then the work focused on the X8 panel from which I removed all computers and cables. The panel has been painted, covered with carbon (I managed to cover it with one cut-to-size decal) and once again painted. The next step was to put the dataloger, on-board computer and ECU on the board.


Another interior detail is the carbon-covered battery cover.


X8 board and battery try-on.


The work has focused on the wires. Here are the first effects.


And now work on the handbrake, in which the frame has been drilled, the lever has been bent upwards and wrapped with carbon. The last changed detail is an inserted spring.


Handbrake has been inserted along with the wires. In addition, there were fuel lines and a brake cooling water pump (if I was correctly informed) along with a cable. The photos below also show the carbon cover in place of the gearshift lever and the Prodrive sticker that finally hit the rear shelf.


Another element of the interior is a basket and a sponge case for helmets. Basket made of wire, but the sponge effect was achieved with a black wash and a clear matt.


Finally, a few photos from the try-on of the basket and foot rest.


Helmets.


The final effect of work on the seats.


Below, a reamed rear shelf and a new cab decompression cable.


And now headphones. In the photo below they are missing a cable that will be added later.


Another interior detail is the steering column and its elements covered with carbon, and wires.


Update 13 | 23.03.2021

In today's update, work on the dashboard, which was drilled for buttons and switches, then painted and covered with carbon.
In addition, I added a map compartment and a cover for the pilot's console.


The next stage of work is the manufacture of belts and intercom with wires.


It's time to put it all together. The headphones hit the mirror, the wires are connected, the cage is stuck together.
This is what the interior looks like after less than two months of work.


Update 14 | 05.04.2021

It's time for the last update. Windows painted and wrapped, chassis attached to the body.


The next stage of work is the assembly of the suspension and drive system.


Before mounting the suspension and drivetrain, I had to make carbon wheel arches.


Suspension assembled.


A breakthrough moment in the model building is putting it on wheels. However, I will start with photos of the engine and chassis covers.


Below Subaru on V.1 service stands from scalecars.online (SCO-R033).


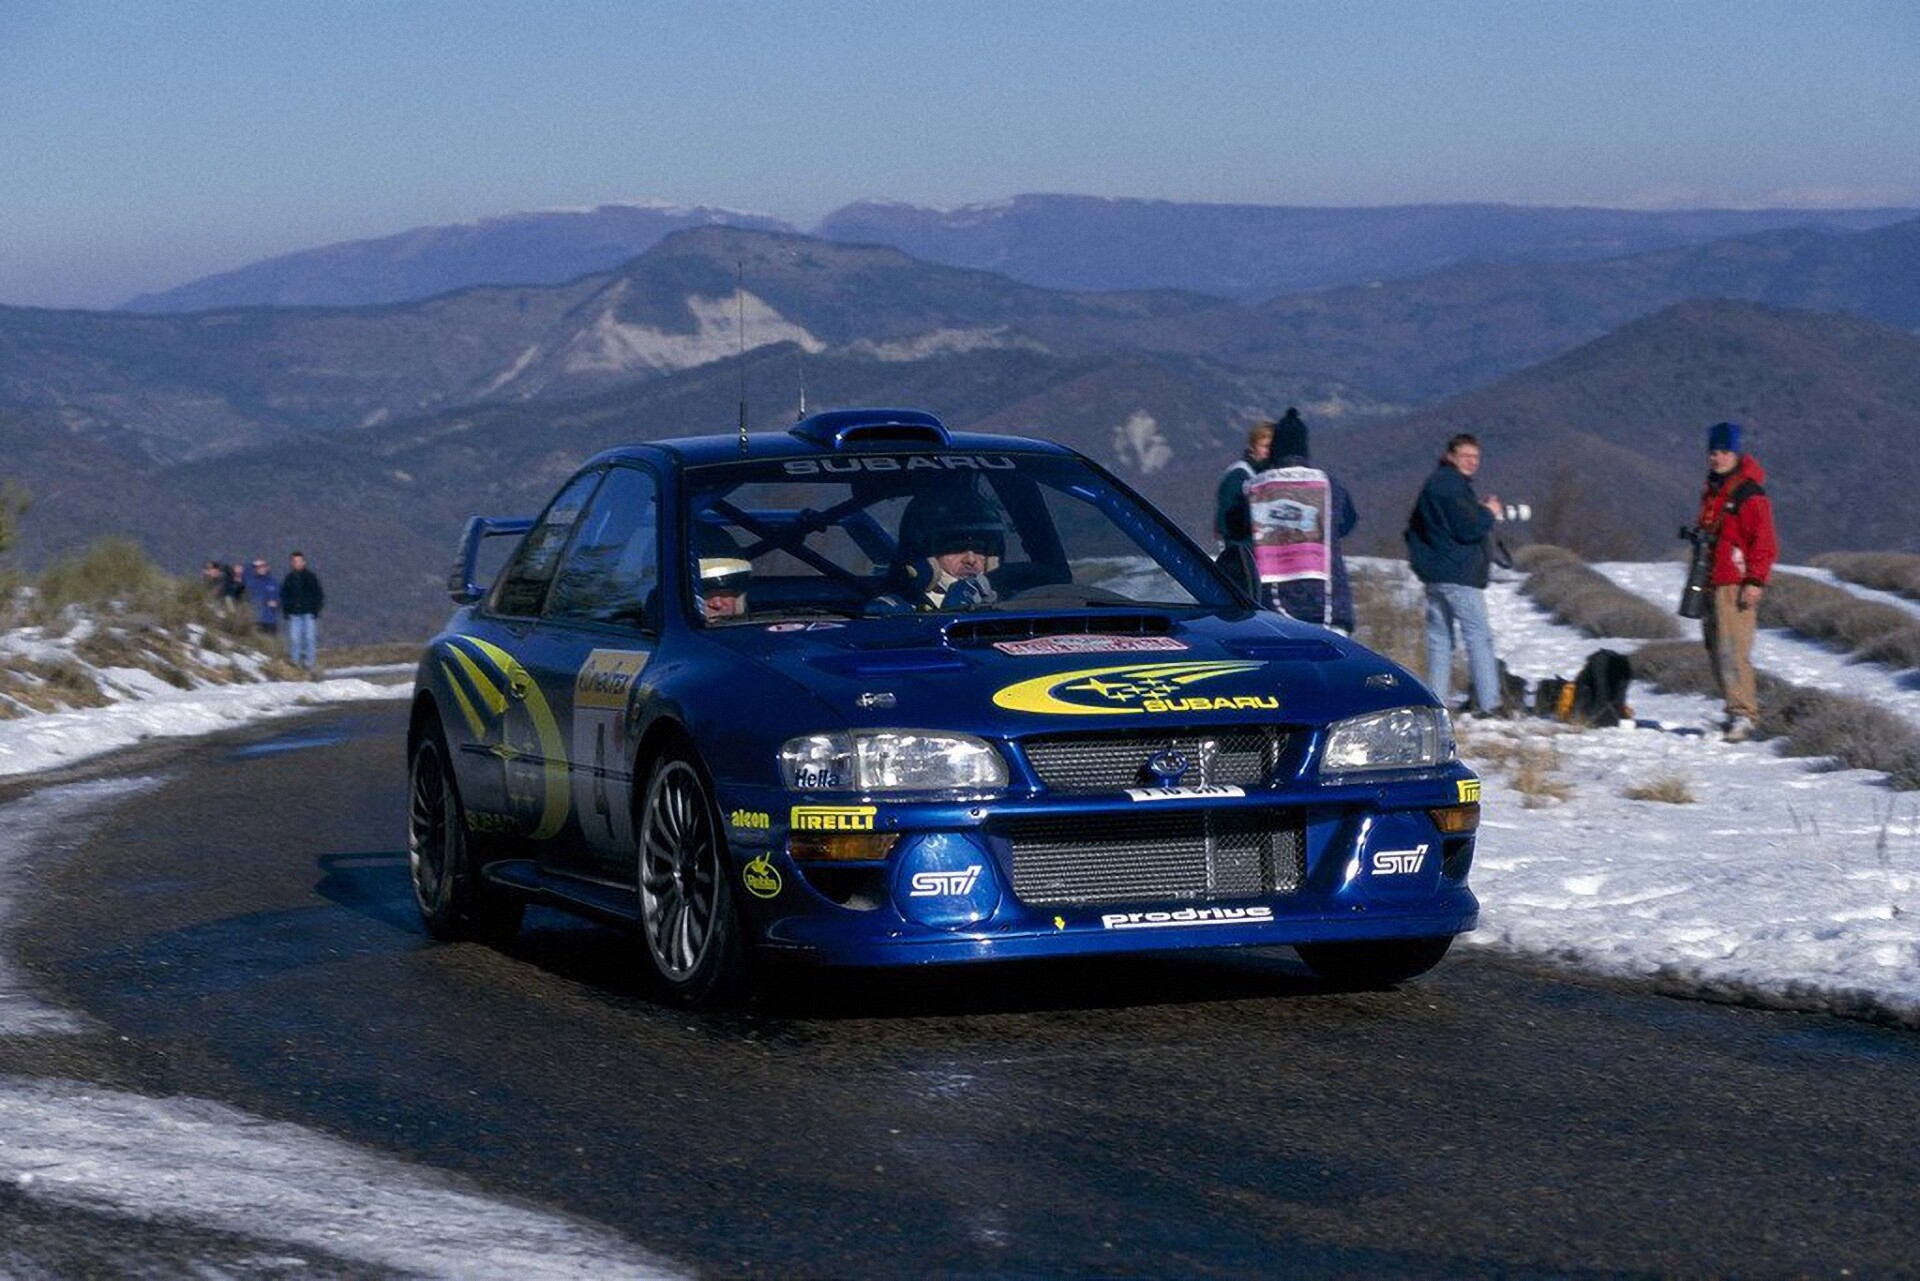
Source: prodrive.com


And this is how it looks on wheels.


The clasps on the hood and the lid are on, the mirror and the antennas too, so the workshop ends here.
Finally, a photo of the finished model. Currently, work is underway on the final gallery and Subaru Impreza presentation.


More photos of the completed model here | Gallery

Author | Krzysztof Szpakowski