
Skoda Fabia S2000 | Belkits 1:24
Author | Sergey Savrasov | Instagram
Now it's time for a new project - Skoda Fabia S2000 EVO. Very beautiful car in my opinion.
I will build a car driven by J. Hänninen and M. Markkula during Barum Czech Rally Zlin in 2012, which they won. It will be a daylight version of the car, without those big additional headlights from the box art. The kit is very good and detailed. The only cons are shallow panel lines and decals - it will be hard to put this livery with them and the quality of the printing is not perfect.So I decided to paint the livery without using decals. It will be very challenging. And the first question is what color to use for those green stripes of the body. Any suggestions? I know that Zeropaints has special product for this kit, but I was wondering if I can use some paints from Tamiya palette? I came to TS-20 and TS-52, but still can't decide what will suit better.

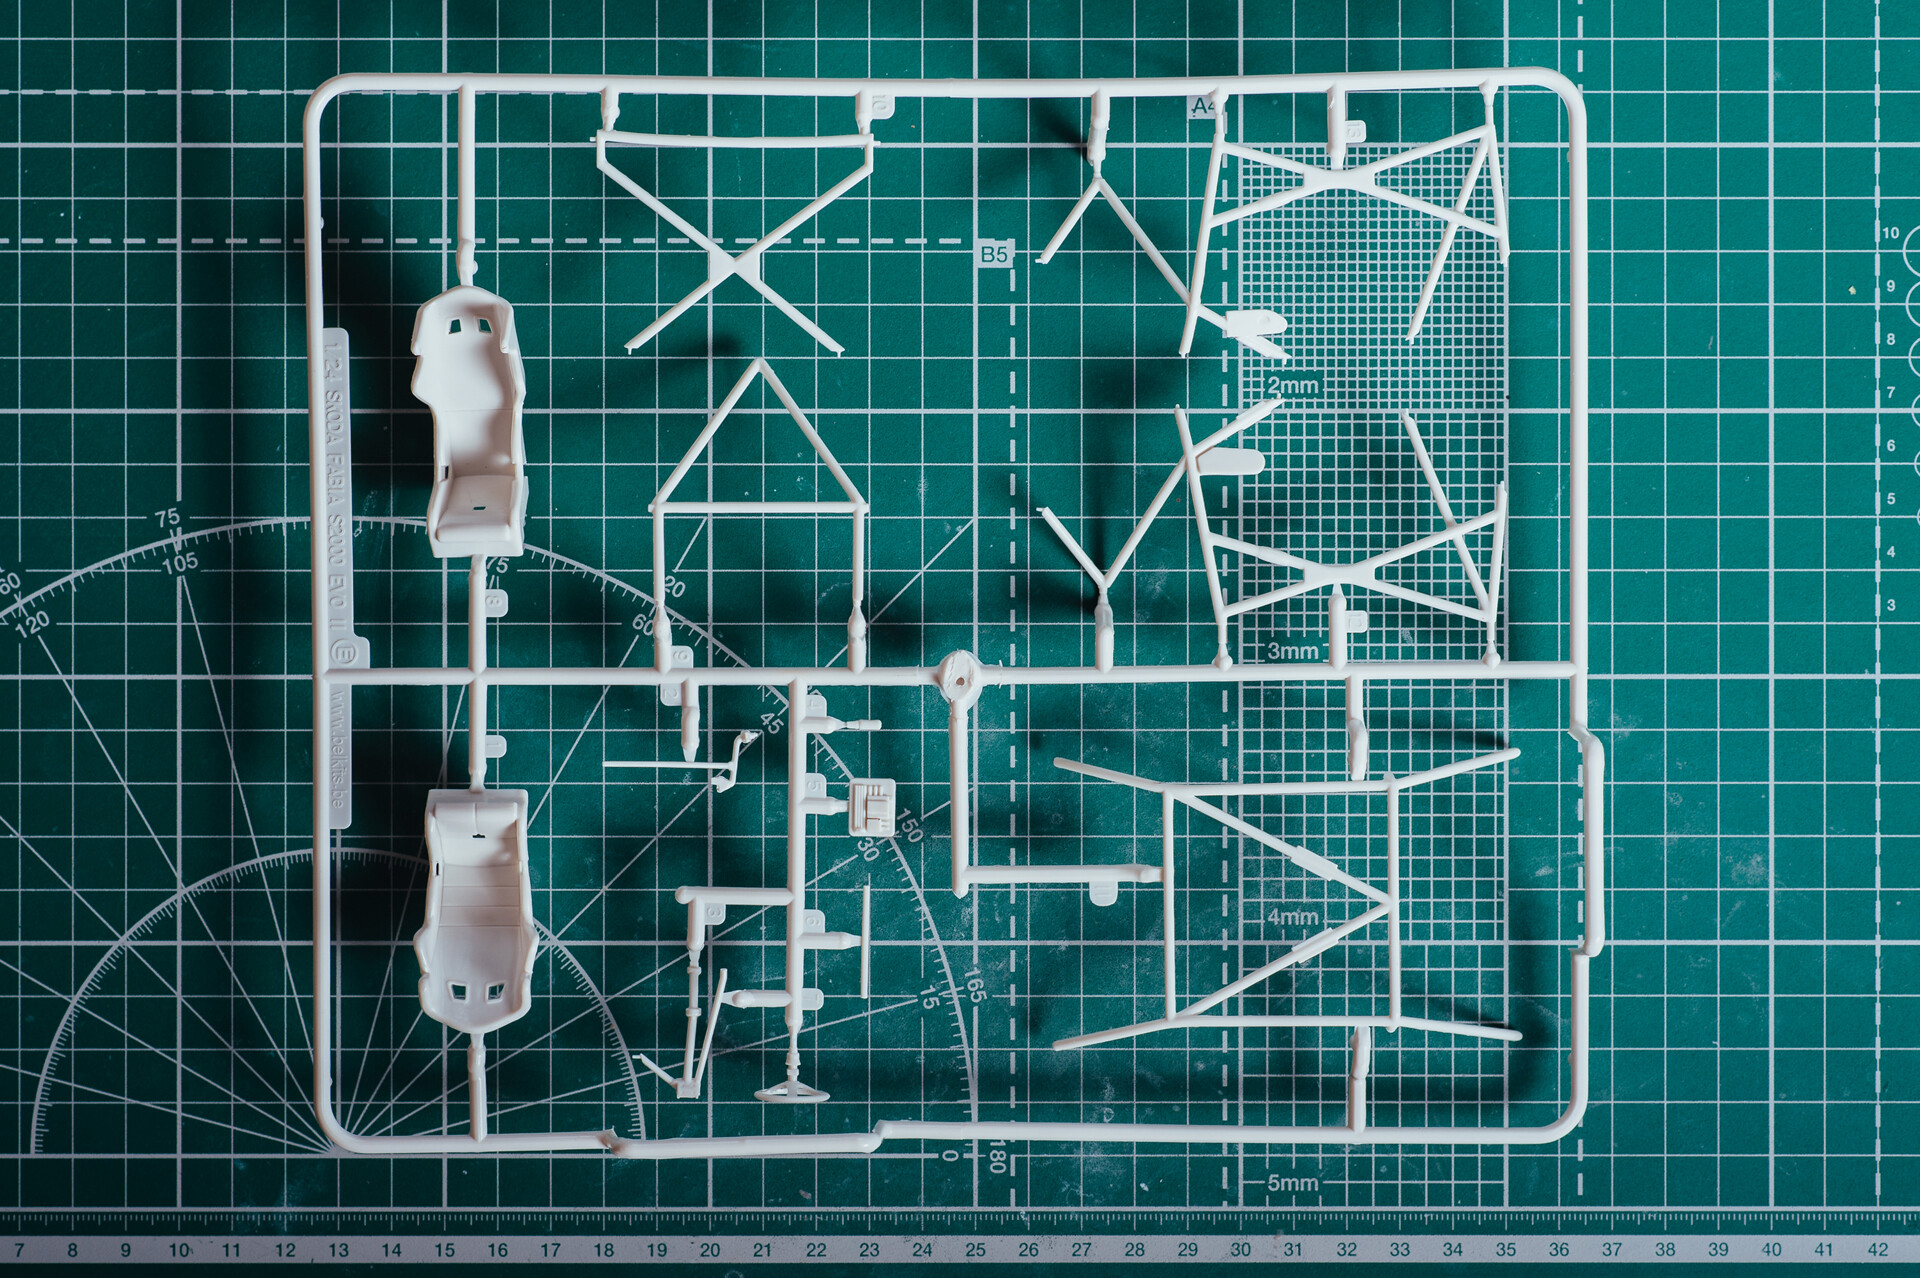
Below is a series of slides with the contents of the box.


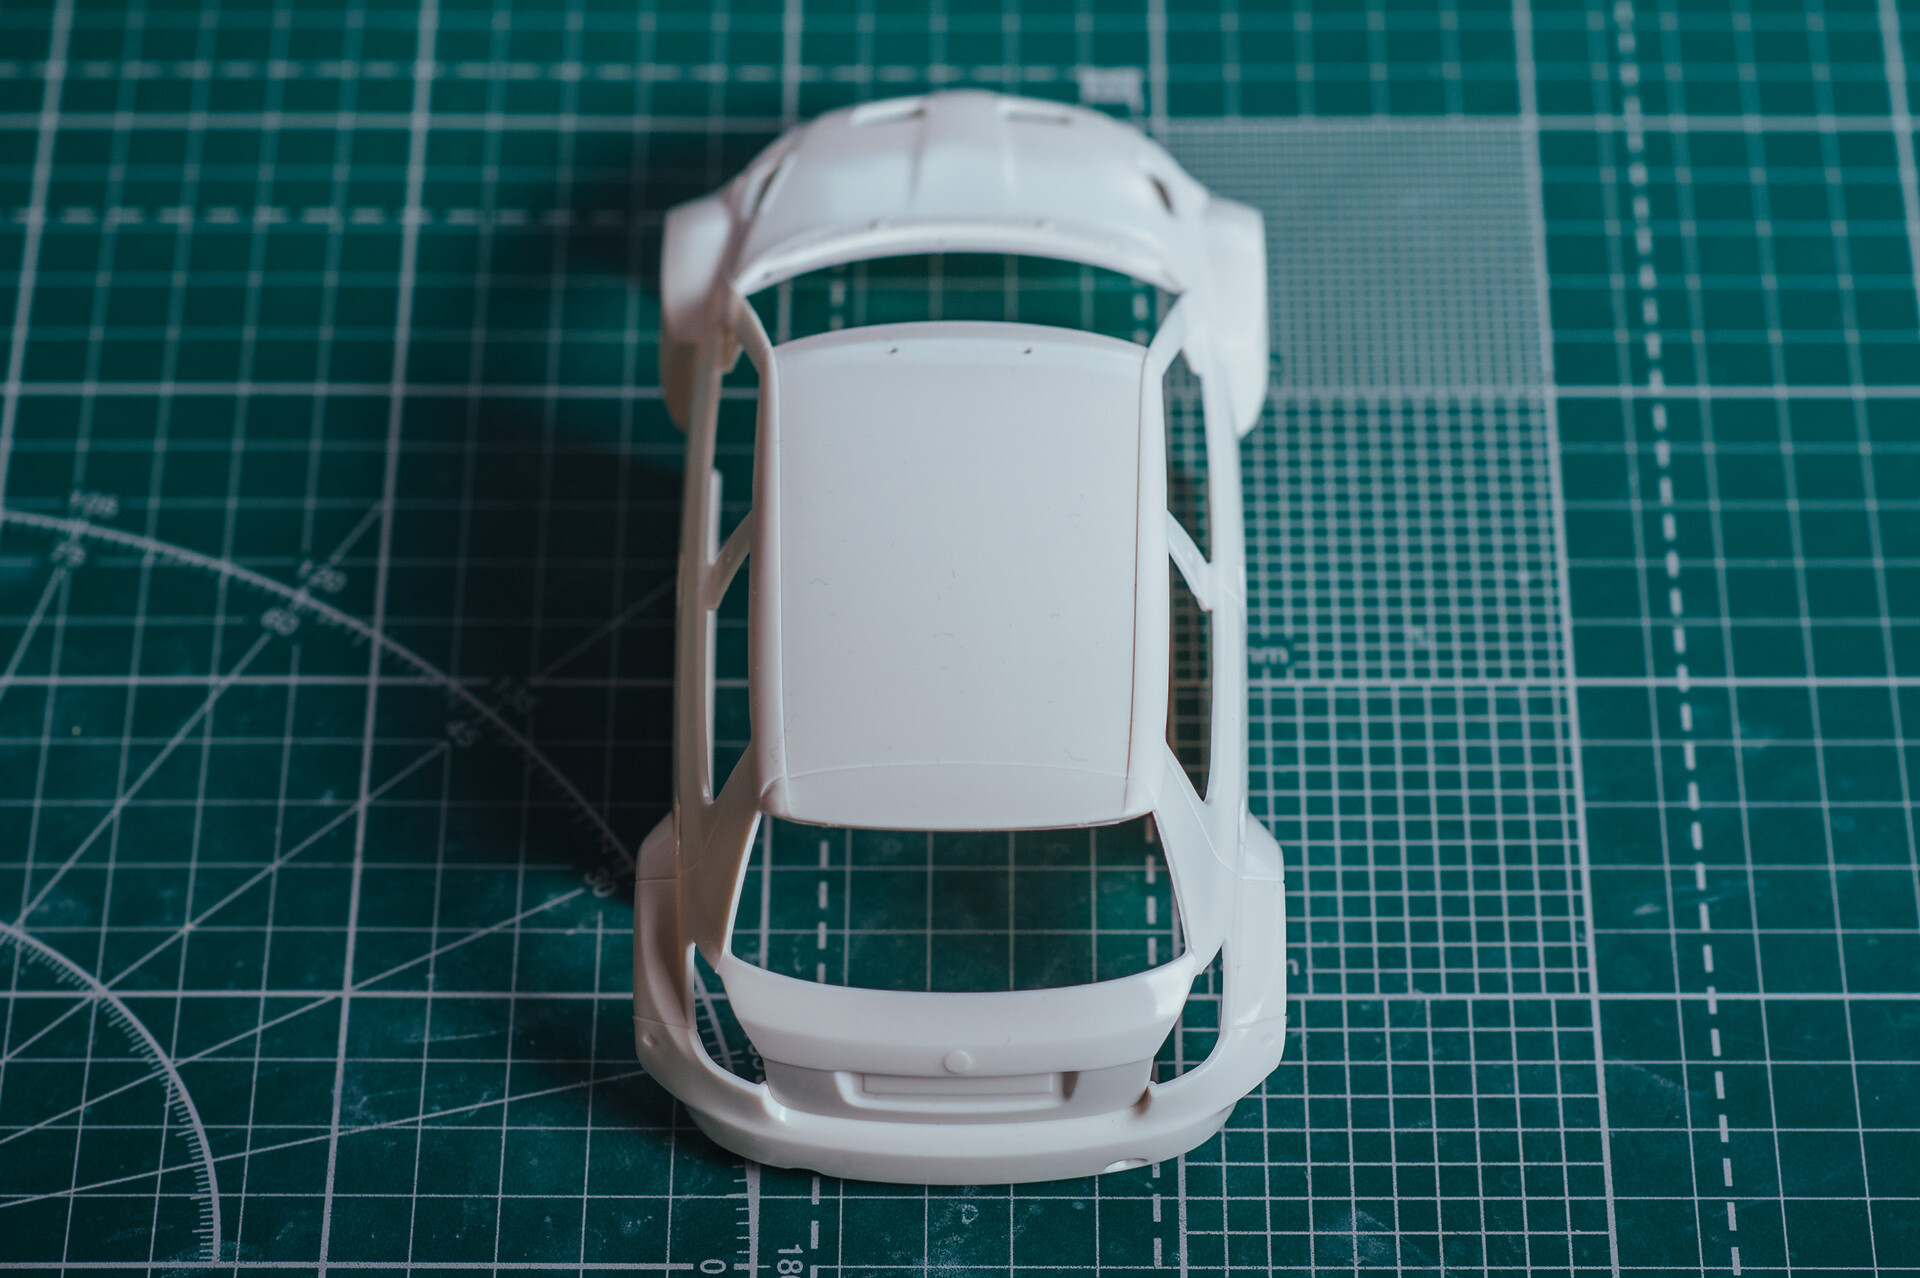


Body is ready for priming. I drilled out all rivets on the body. Also removed the wipers panel from the body with photoetched saw blades - it will make painting easier. Applied some putty on some parts of the body. Drilled holes for different antennas on the roof. Made holes for engine and front brakes air ducts. Here you can see a dry fitting result.


Made imitation of engine and front brakes air ducts from sheet styrene and dry fitted them to the body.


Glued styrene strip to wipers panel. It will be used for glueing this part to the hood once everything will be painted and ready for assembly.
Updated shock absorbers with Top Studio set. It really looks awesome!


Body painted in the base color.


Lots of masking just to paint it green...


Green stripes were painted. But I had some dust and had to sand it out. So I will have to repaint it. More than that, during sanding I've got some green flakes deep down in white paint. And now I need to remove them somehow. Modelling is all about the troubles.


As far as I wasn't happy how the painting of the body went, I decided to repaint it. I used isopropanol to get rid of the paint.
In the pictures below you can see the body in white primer prepared for base color coat. Some of you may be observant enough to notice that I used panel accent paint already on this stage. It's the technique I heard of from my buddy @vovaryzhov. It's based on the same principle as pre-shading in avia modeling. And it might give a more realistic look to panel lines in the end - we'll see if i'm gonna make it.


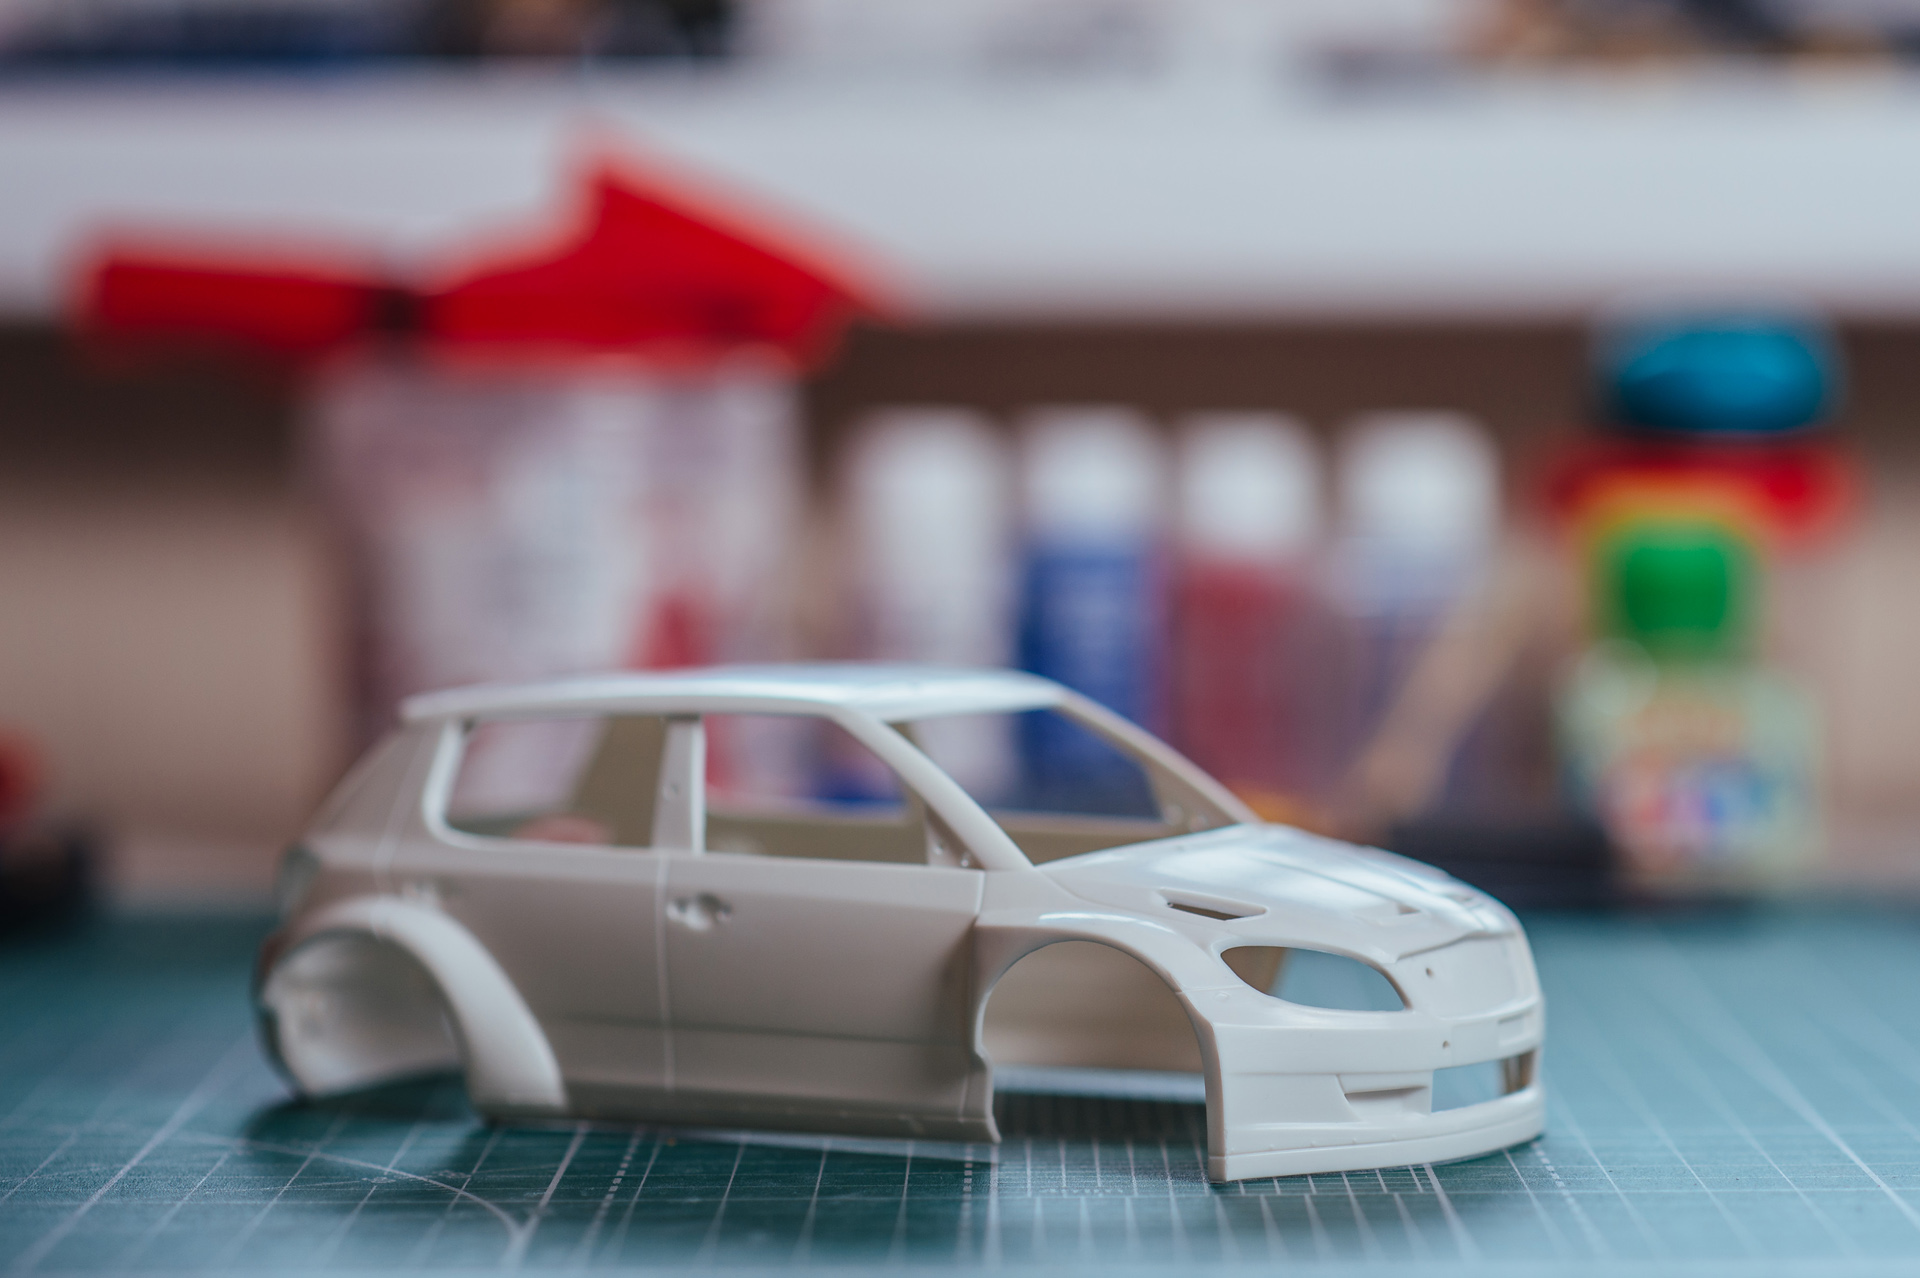
The body is already painted white and waiting for masking to be finished for painting it metallic green.
In the meantime I started working on chassis now. I'll keep you updated. Stay tuned!
Undertray and interior tub are painted. I used Tamiya TS-17 decanted from a spray can.
I added those black stripes on the undertray after doing some research on the real car photos. So keep it in mind if you will build this kit.
Front part of the undertray was a little bit modified - I cut off a piece of it so my handmade engine air duct would fit in.


All suspension and transmission parts are ready to be installed.
Take a look at shock absorbers that we’re made using Top Studio detail-up set - they are really beautiful :)

Look at these brakes guys!
Thanks to @zhuwang1062 for making such a good photo-etched detail-up set for this kit. It really looks amazing and fits perfectly. The only question I have to this PE set is manual being not so clear sometimes. And I also had some parts left too which were not supposed to be used with this car. But overall it’s very good.


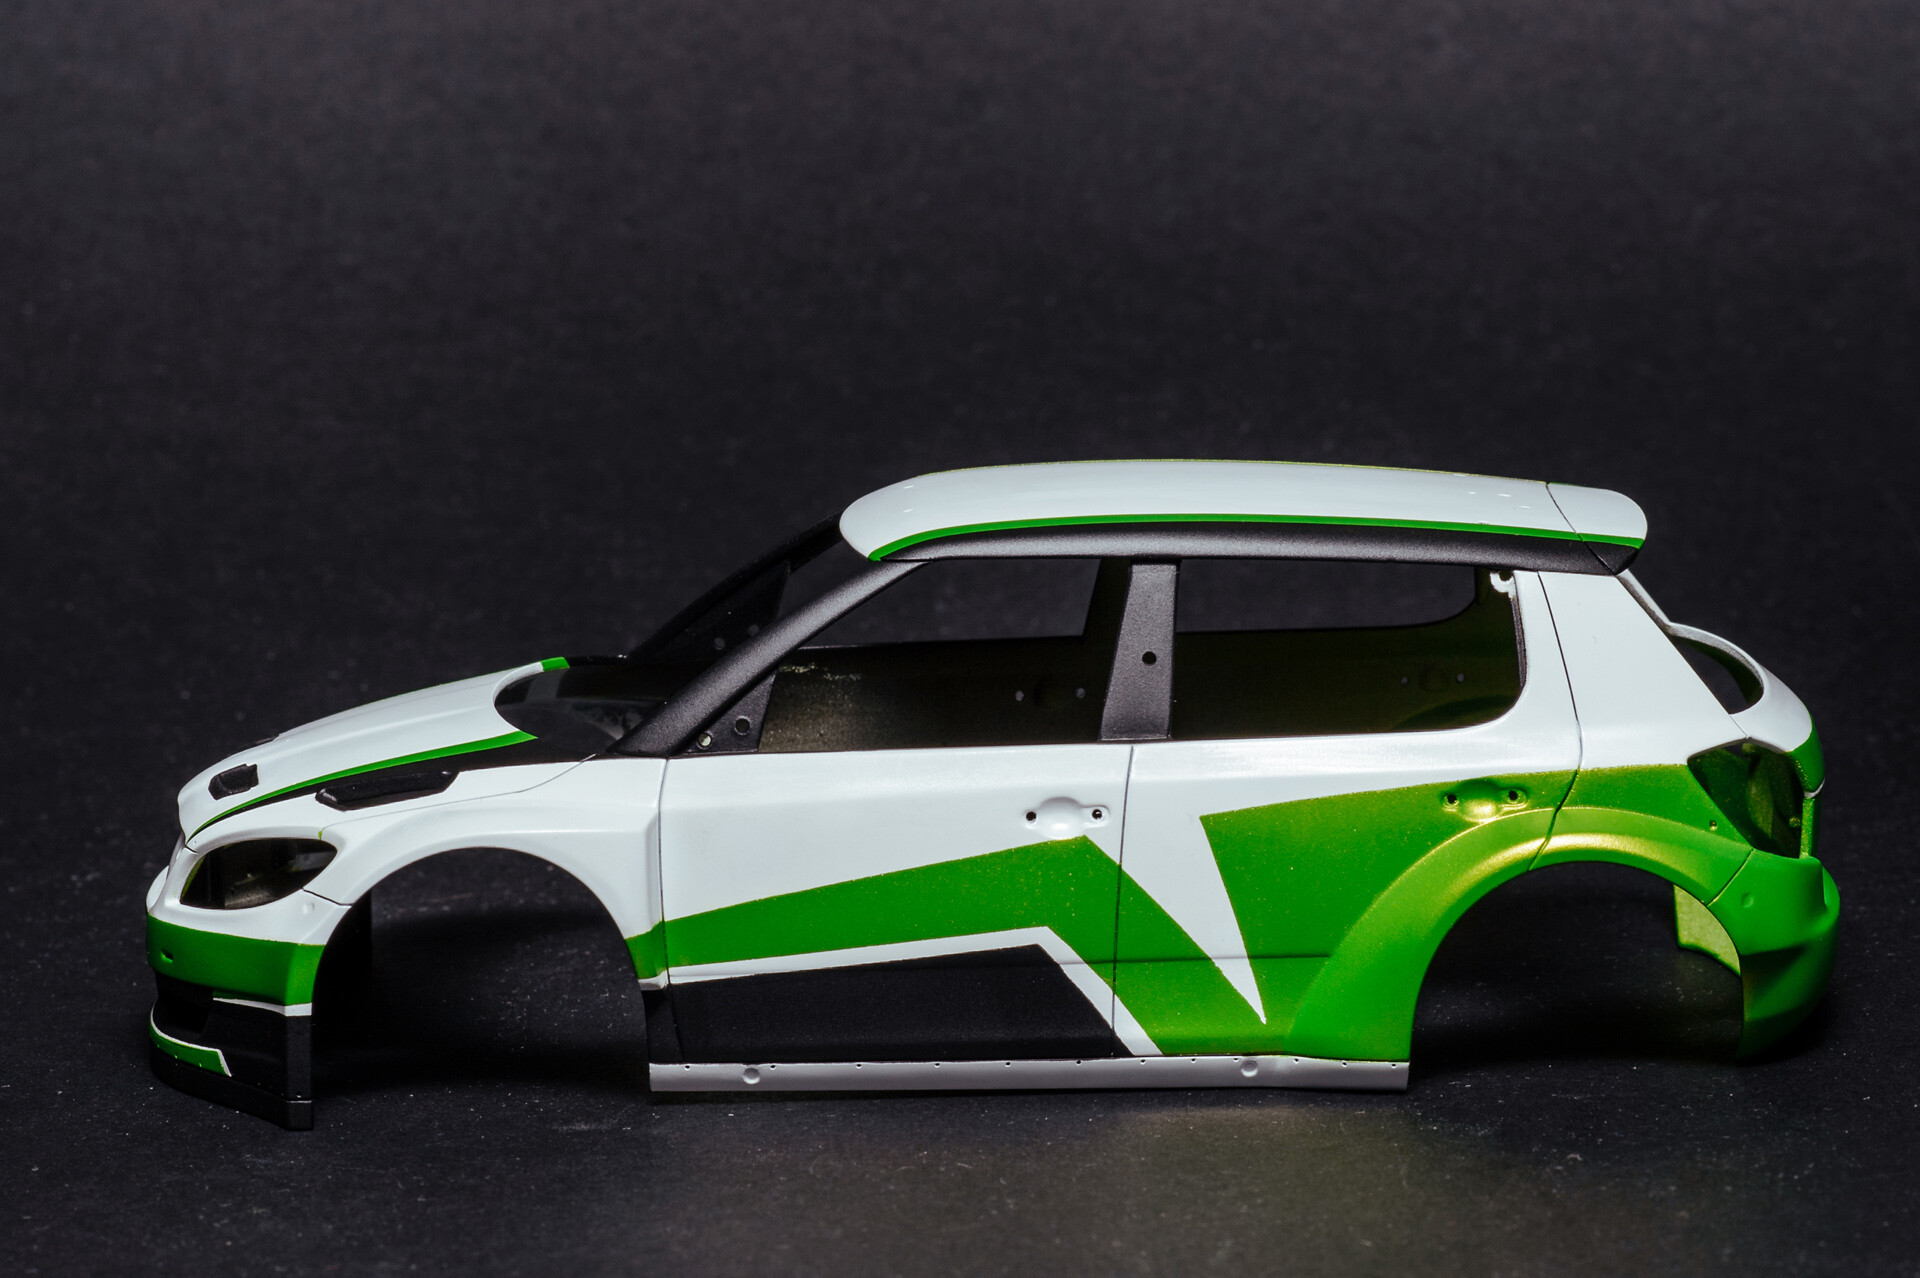
Part of the livery is done. After two times of remasking and repainting I’m finally satisfied with the result. Now it’s time to add some black. And then on to the decals.
Masking drives me crazy with this build. Here’s an example of amount of work I did just to paint it black. It took about 3-4 hours of work to complete masking just for 20 minutes of painting.
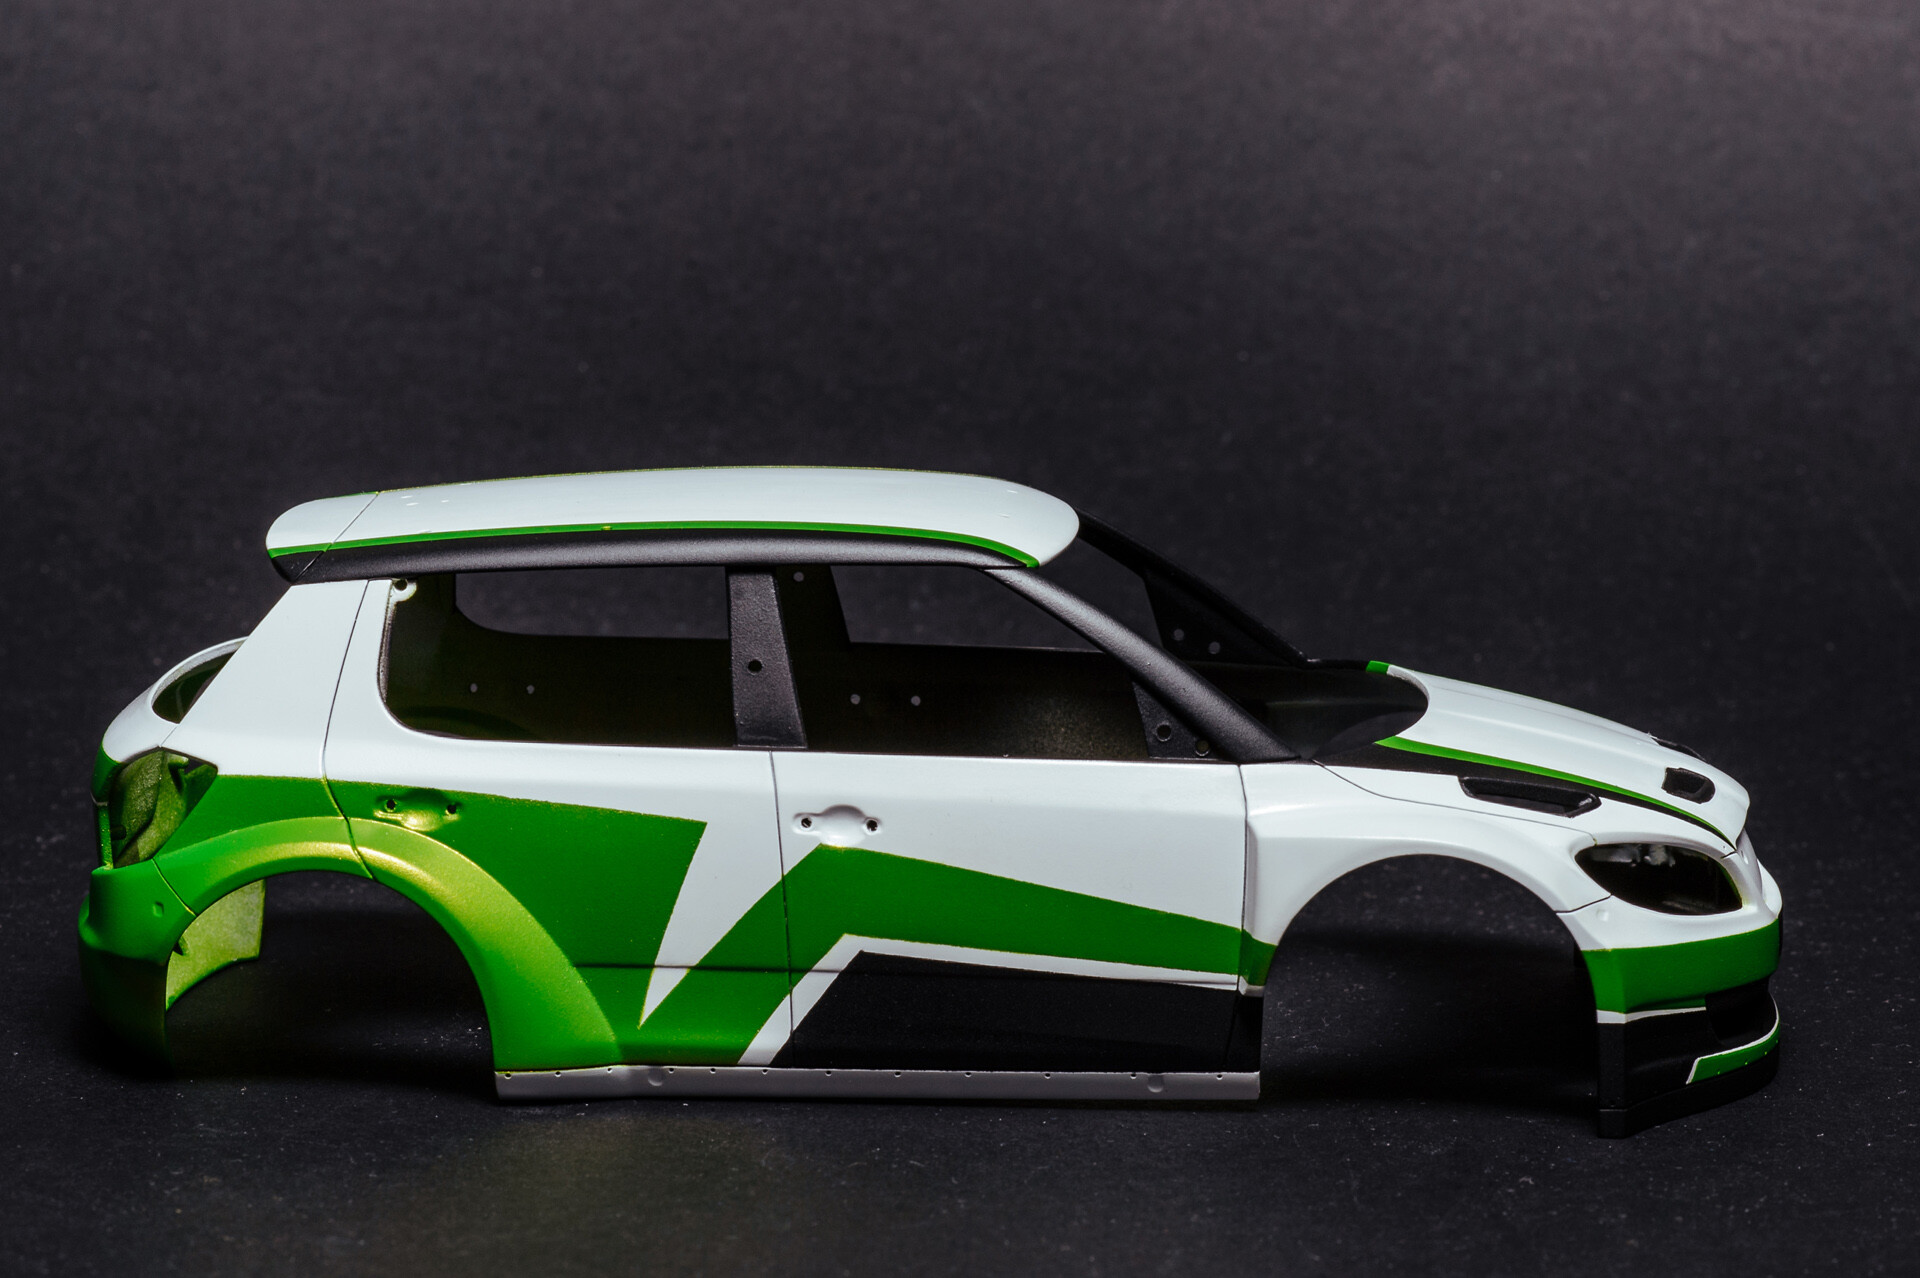


I’m done with masking and painting for now (I hope). Black parts added a great contrast giving a cool look to the whole body. I had to repaint some parts 3-4 times. Now I’m 95% satisfied with the painting. It still has some minor imperfections but I think I have to stop now where I am.
Decals done. What can I say, decals are the weakest part of this kit. The print quality is really poor including some ink mess with tiny parts of livery. Some decals even had dust printed in and chipped paint already right on the sheet. Some lines have uneven edges (especially it can be seen on tiny black lines above green color). At the same time decals are thick. I used lots of SOL there.
But it has its bonuses - I had an issue only with one decal - it teared apart in 3 pieces, but I managed to reassemble it without any noticeable cracks. I don’t know, maybe it’s only my kit has such bad decals.


Undertray has been assembled. Still has to add some washing and maybe some dry brushing.
I also made a heat shield from a piece of metal foil from chocolates I guess. Anyway it looks good and just like it is on a real prototype.
Right now I’m working on some small parts of the interior and glass parts.


I was working on those tiny but important parts of the model, that make it look like a real car. And of course I mean the interior of the car.
In the next few days I will show you what I did with cockpit of this racing machine. And today I’ll start with the steering wheel. I added yellow strip on top of the wheel as it is on the actual car. And used Hobby Design 0,35mm black wire for imitation of actual wiring. Also there are some handmade fittings and clamp hoses made from shrink tube and different cable sheath.


When you’re in a car you don’t want to get caught on fire, right? So for those badass rally drivers I made fire extinguishers. First one has PE hose clamps and the second one’s were painted with Rust-Oleum Mirror Effect. To me it looks almost as cool as real metal parts. Totally recommend this paint. But be aware that it gives a real shine only if you paint it over gloss dark surface.


Onboard computer screen. I added glass of the screen made from thin clear plastic. Mounting and metal rivets came from HD PE set.
And I also added wiring made from 0,35mm HD black wire. Fitting was made from cable sheath.


I made the main part of rally car - handbrake :) Also there are some sort of cockpit fan (don’t know what for this part is) and heater blower. For blower I handmade a corrugated air duct from wire and metal foil as it is on prototype.


Dashboard is ready to be installed too. I used PE indicators (on the left) instead of the one that came with the kit, because it was completely wrong. I studied a lot of photos of real cars and never saw the version that came with the kit. It seems like Belkits got it from their minds. Central display section was painted to achieve look of original part. Kit manual said to leave this part black. And there’s no decal for it also. So be careful when assembling model cars - always check photos of the original car.

Another part of the cockpit is break balance remote adjustment cable. It is totally handmade from styrene except mounting and rivets - they came with HD PE set.


I didn’t use carbon decal for rear of the seats that came with the kit - Belkits made it wrong again. I mean the weave is not right - they made plain weave carbon, meanwhile prototype had twill weave carbon on the seats. Carbon fiber was coated with 2k clear and polished of course. Another story was how I was rescuing Sparco decals on the back on the seats. After masking for applying 2k clear part of the decals went off with the masking tape, some of them were torn in 2-3 pieces. Thank god Belkits made thick decals for this kit. I managed to peel the parts of decals off the masking tape and restored the decals 99% successfully. You can still see some imperfections though if you look thoroughly. But I’m so happy that I managed to avoid the total disaster.


Last parts of the interior, door panels and roll cage.
Firstly I removed wrench bags (I guess) from the doors that were made on each of front doors - prototype didn’t have them. Then I made holes for door strap handles. Then I painted it all and added nice 1/43 scale carbon fiber. Door handles were made from masking tape painted black.
Moving to the roll cage - be careful to paint front tubes of the cage in black. Manual says to leave it all in aluminum, but on prototype these parts are black. And it makes sense I guess - black tubes won’t distract driver from the road and won’t make any sunlight reflections.
P.S. I know that I placed this black part between right hand doors upside down. I already fixed it.


Cockpit assembling process.


More cockpit details.


Full view of the cockpit with roll cage assembled. Plus added some washing to the undertray.
Next moving to the body again.


Now it’s time to move to exterior details. Wheels are ready to be installed.
And I also finished painting the front grill. Chrome imitation is Rust-Oleum Mirror Effect. If it’s painted with thin layers on gloss black surface it really looks cool.

Rear window was painted with Rust-Oleum Mirror Effect from the inside instead of using metallic sticker from the kit. I’ve found it easier to do, than precisely placing the sticker.
Middle sections of the doors are covered with 2K clear, because they are glossy on the prototype. Headlights are covered with CF decals as they are made from carbon on real car. Cornering lamps on the mirrors were scratch built from transparent sprue. If you’re observant enough, you can see metal foil reflectors underneath them. Next step - assembling the body.


The body is polished. Unfortunately I sanded through few decals on the sides. But taking in mind thickness of decals it’s not a big surprise for me. I left it as is. Next time I will be more accurate.


I’m happy to say that this project is finished!

More photos of the completed model here | Gallery
Author | Sergey Savrasov
Next workbench | Ferrari Testarossa

© 2025 | Cookies Policy | Terms & Conditions