
Ferrari Testarossa | Tamiya 1:24
Author | Mateusz Uścinowicz
After a dozen years of break, the impulse inspired me to return to modeling. I used to deal mainly with military vehicles and figurines in. This will be my first approach to the car model. After reviewing the options available in modeling stores at reasonable prices as for the first kit the choice fell on Ferrari Testarossa from Tamiya. The objective was to assemble it from the box as a training model, properly without any modifications. However, looking through various photos, I couldn't resist trying to add elements that would bring the model closer to its real counterpart. You will not find here a valorization in the form of commercial photo-etched elements, I'm trying to do everything with homemade methods from materials that are widely available. Additionally, it will be my first contact with the airbrush. I assume that I will not be able to avoid smaller or larger mistakes. While eliminating them, there will probably be a lot of thoughts and conclusions with which I would like to share on a regular basis.

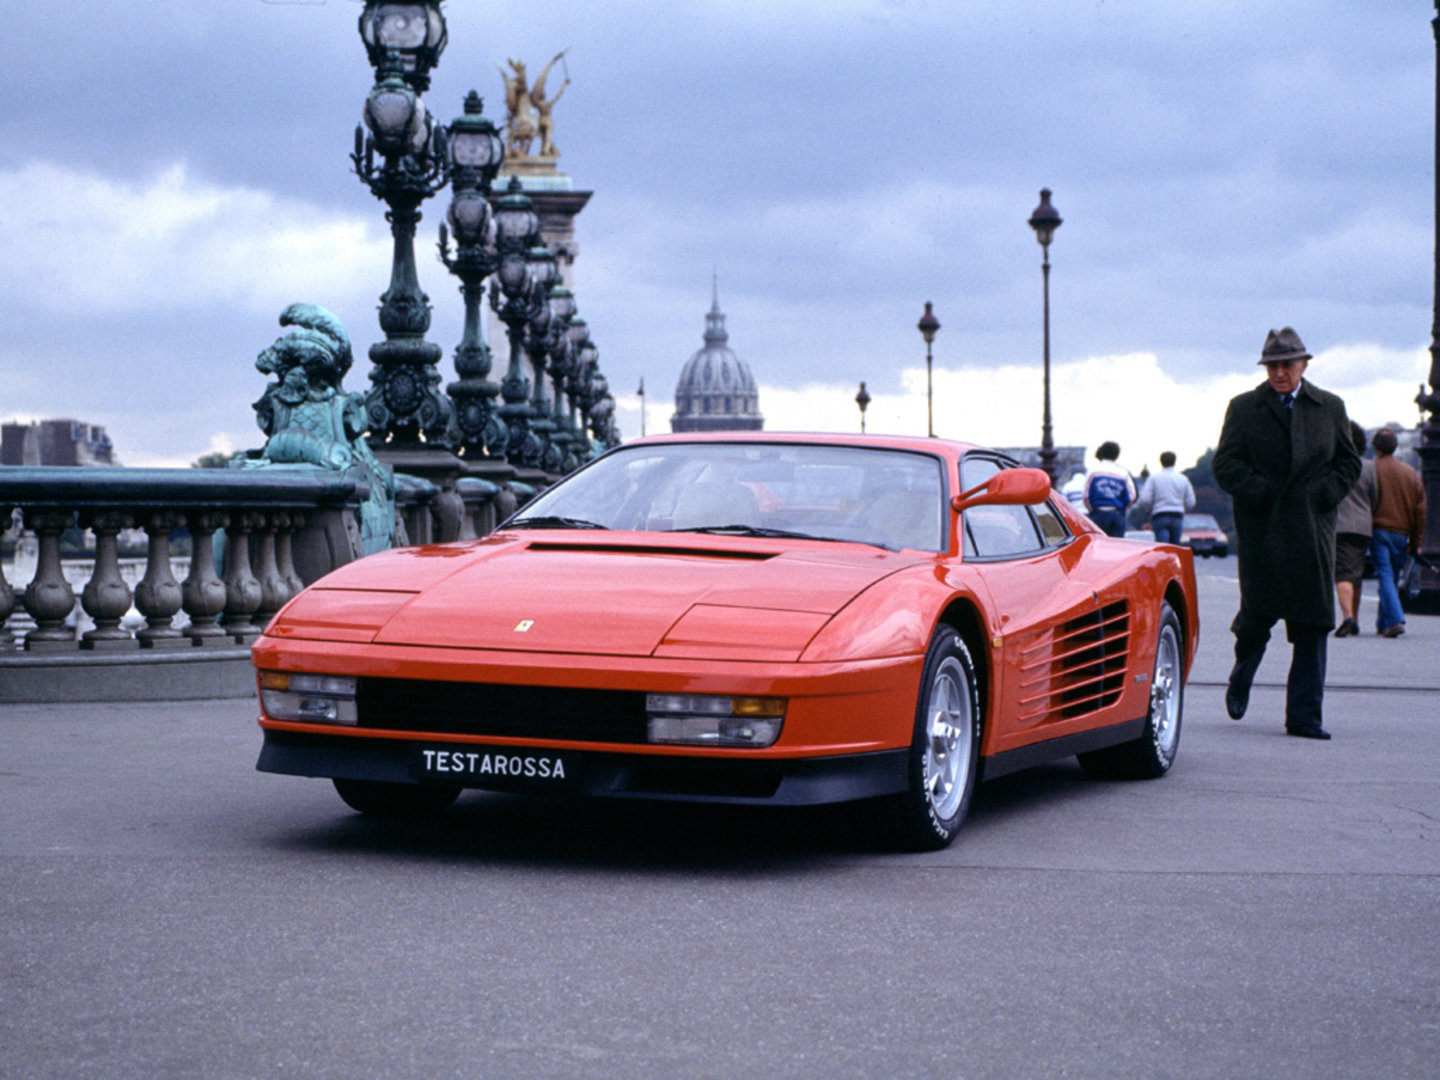
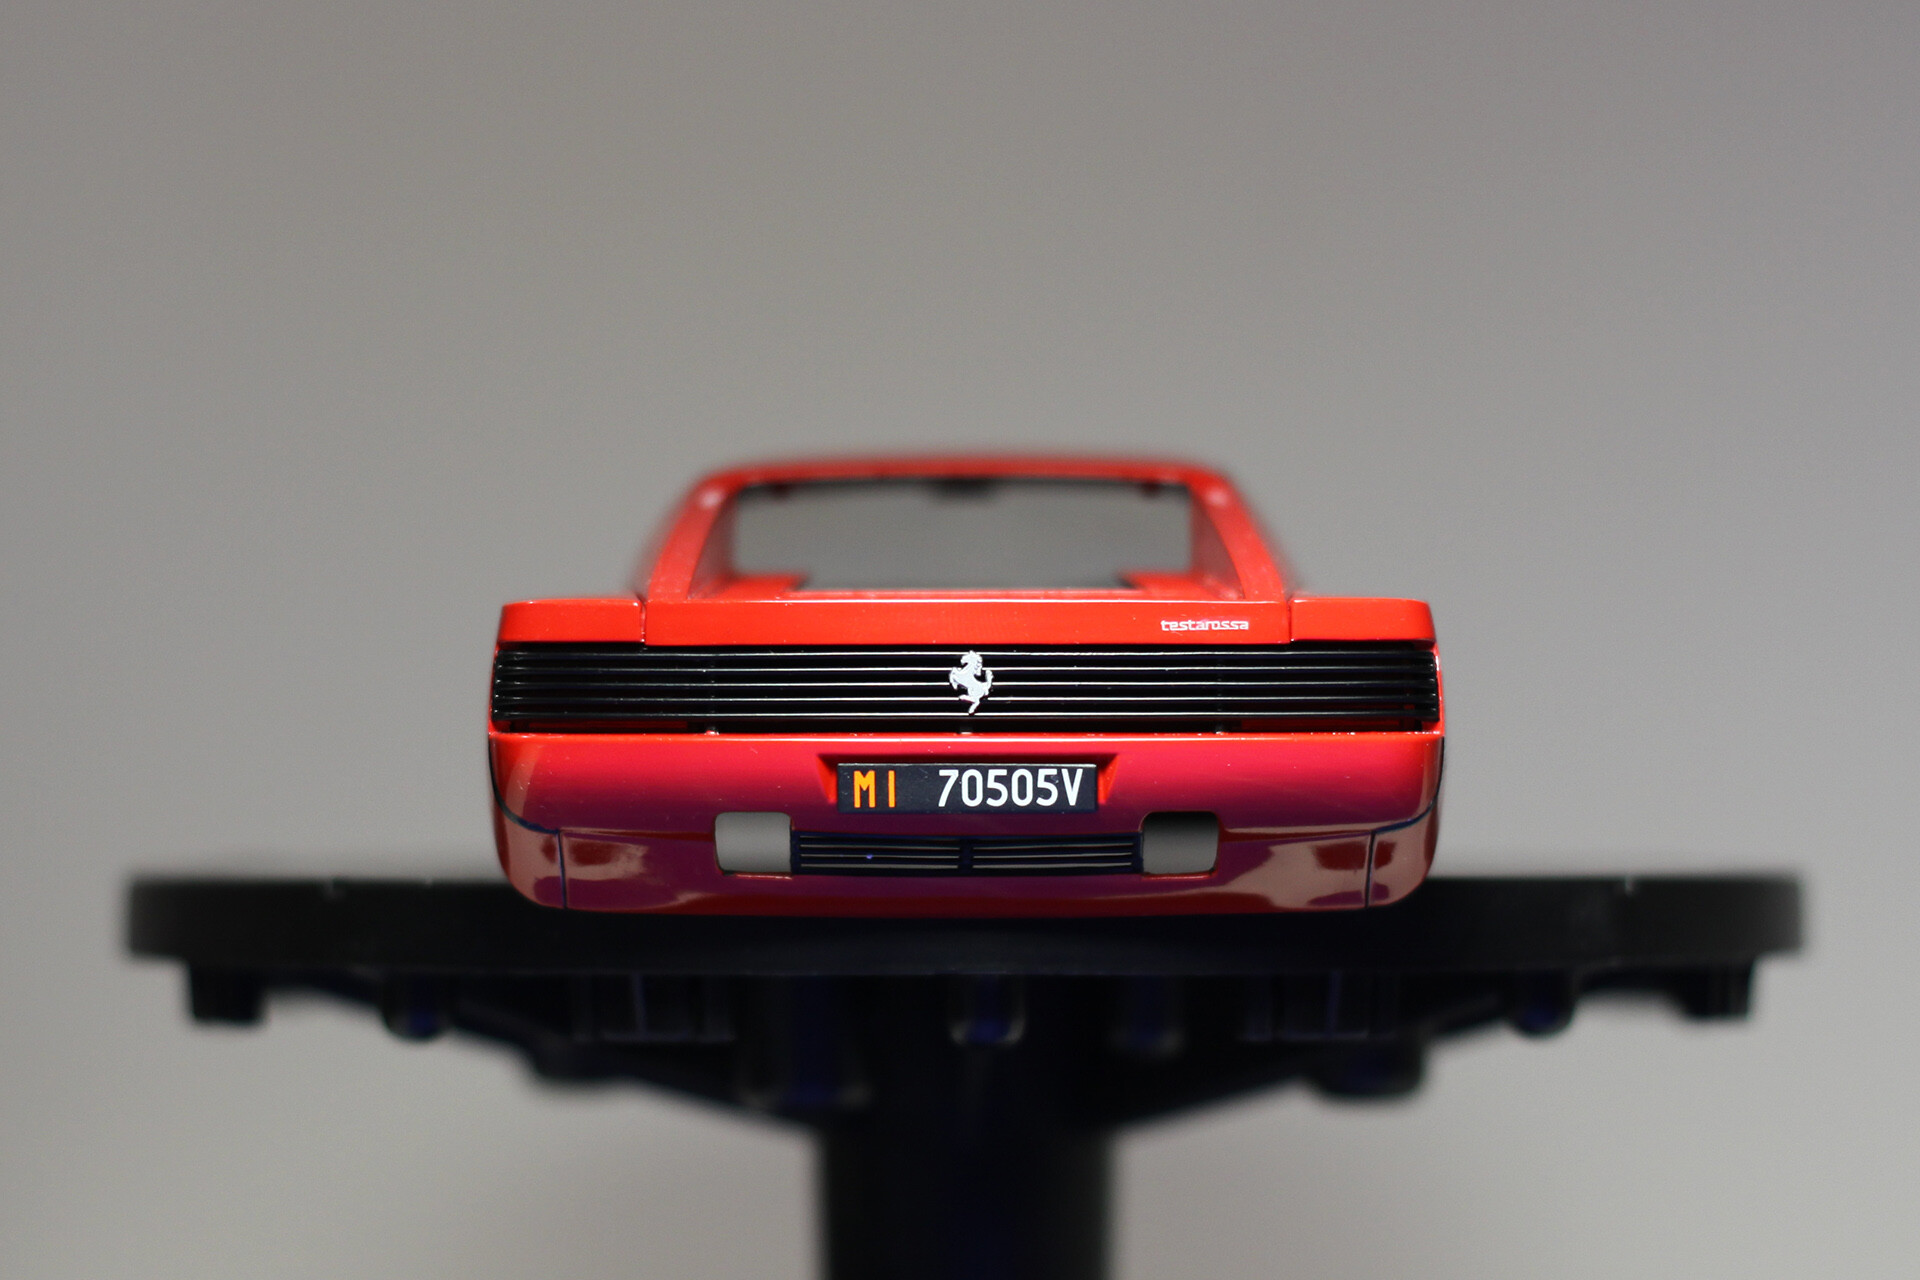
The car was presented for the first time at the Paris showroom in October 1984. The Pininfarina design replaced the 20-year-old Berlinetta Boxer. It broke with tradition and introduced freshness to the Ferrari design. A characteristic element was the door, which with its shutter-like design brought air to the radiators located behind the driver's cabin.

Source: ferrari.com
The element that caused a bit of controversy was the side mirror (only one), mounted in the middle of the driver's A-pillar. In later years this changed and two-door mirrors began to be mounted. The design of the car was based on a steel frame, and the motor used was a flat twelve, it means twelve cylinders with an opening angle of 180°, giving power of 390KM with a capacity of 4.9l. The body was mainly made of aluminum in addition to steel doors and the roof. The car was equipped with characteristic, five-arm stars metric rims with a central nut. However, in '88 they were replaced with five-bolt rims.
Source: ferrari.com
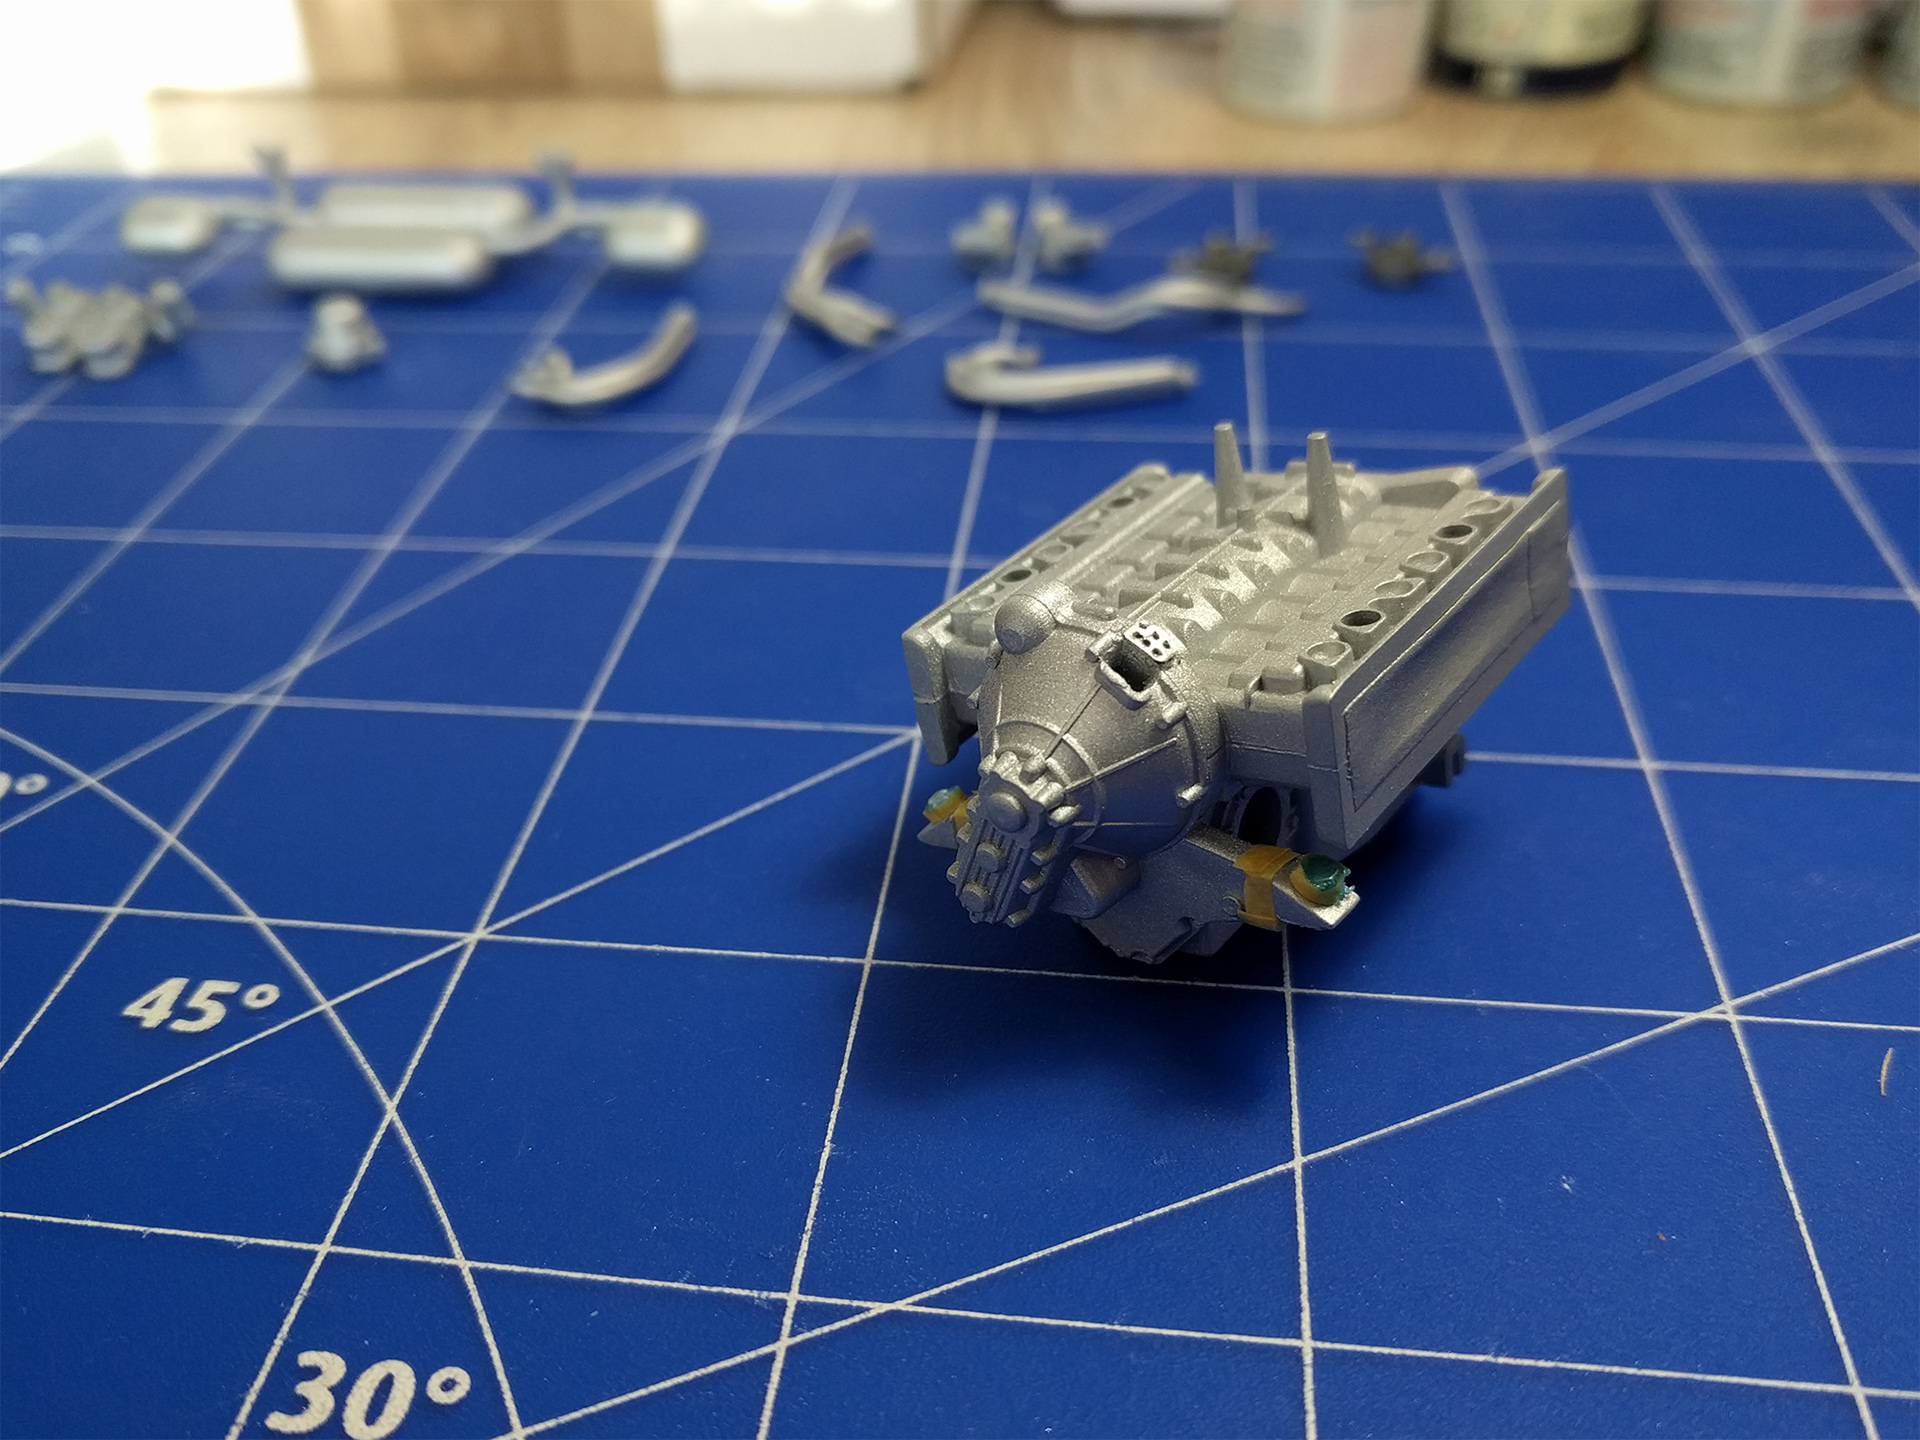
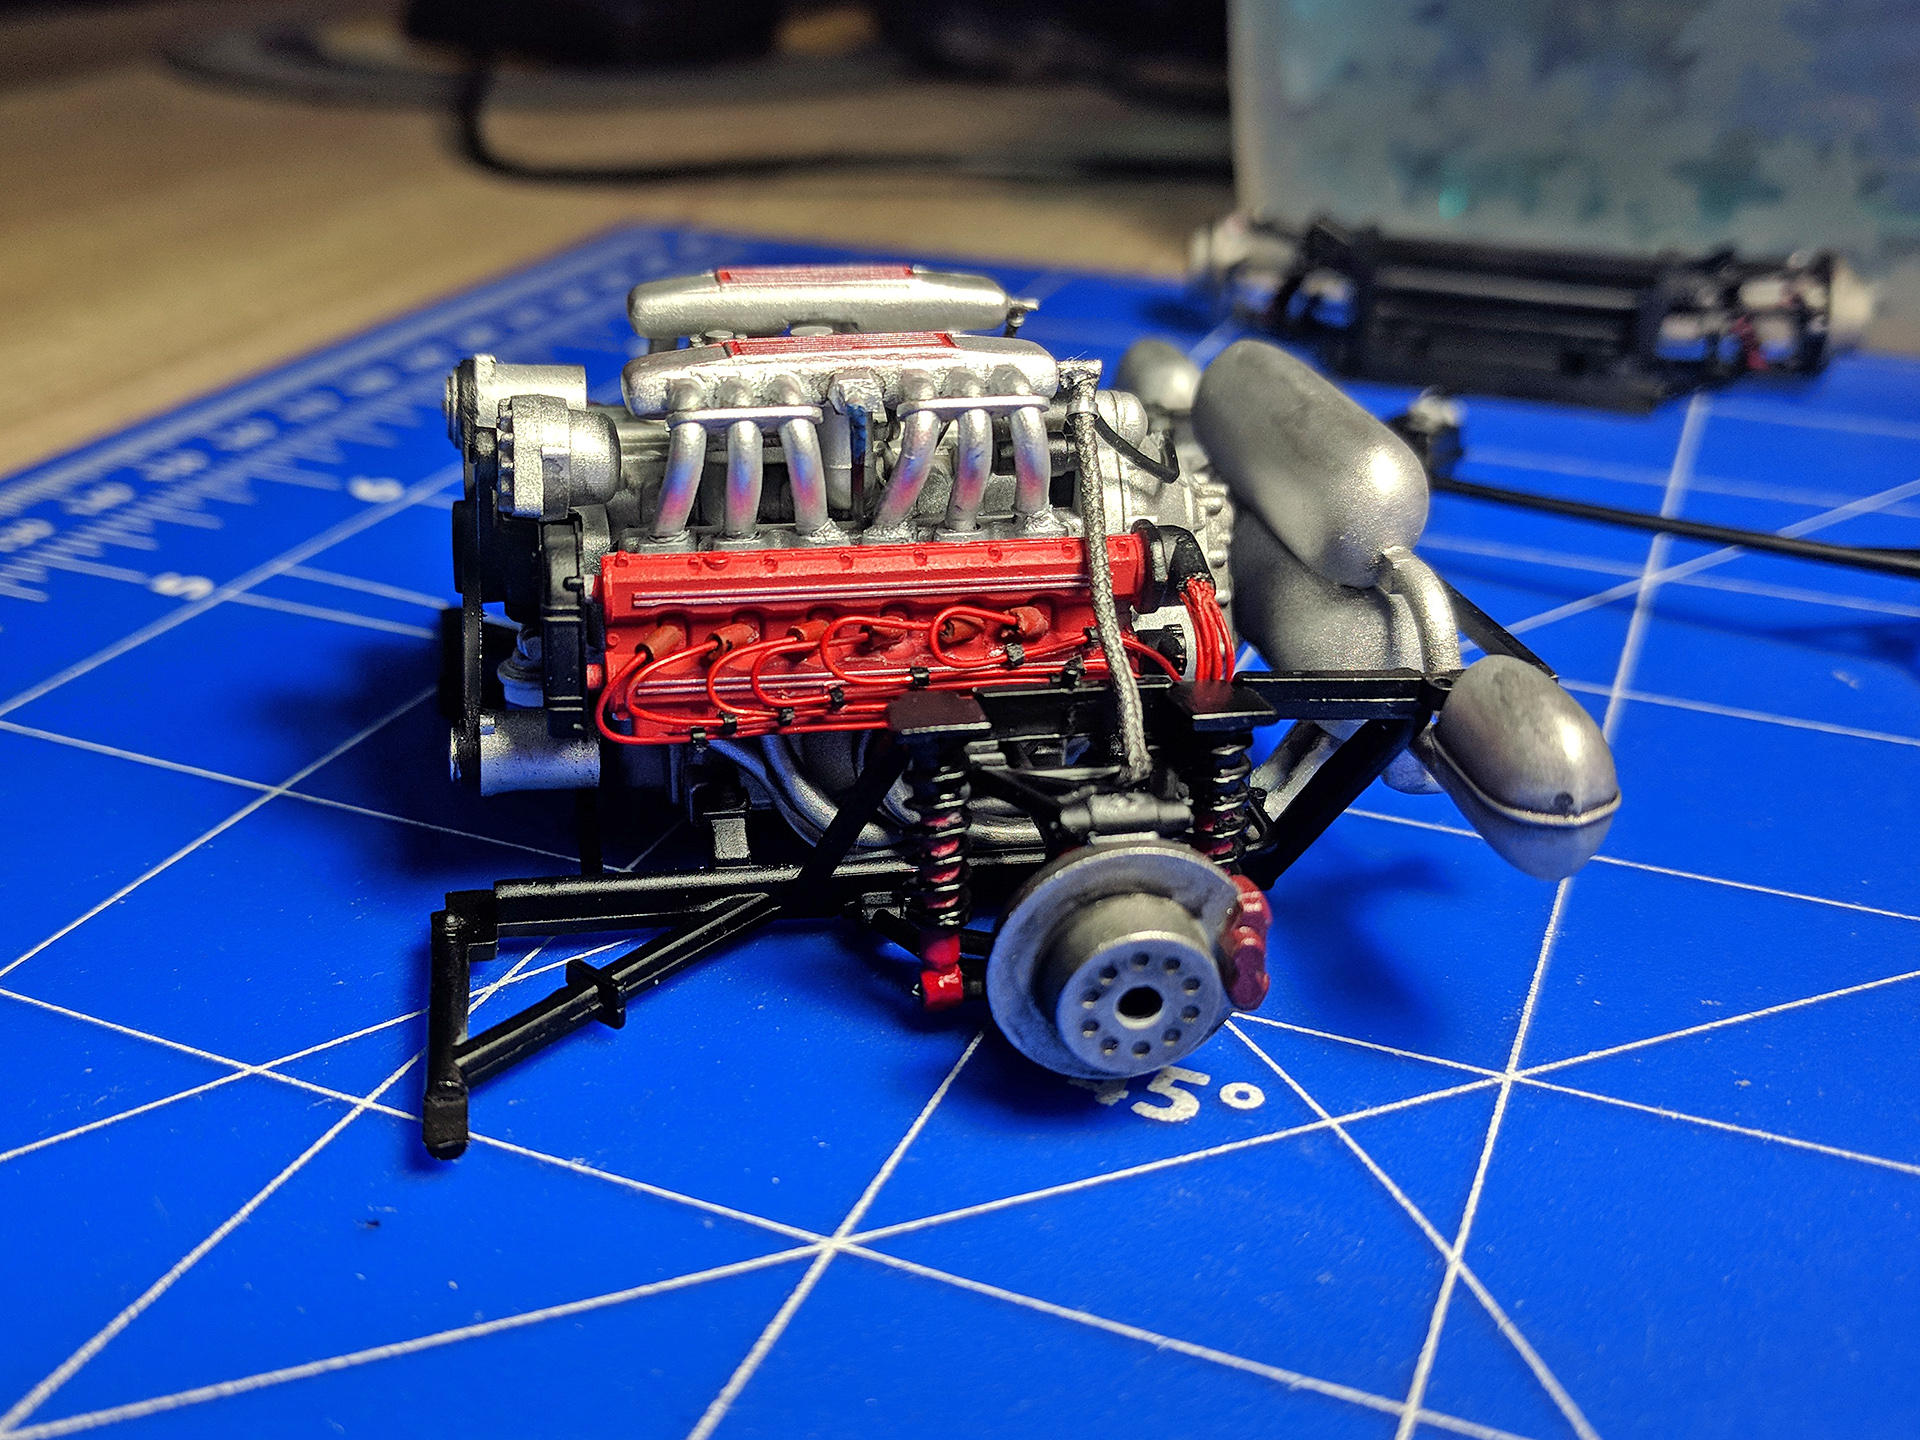
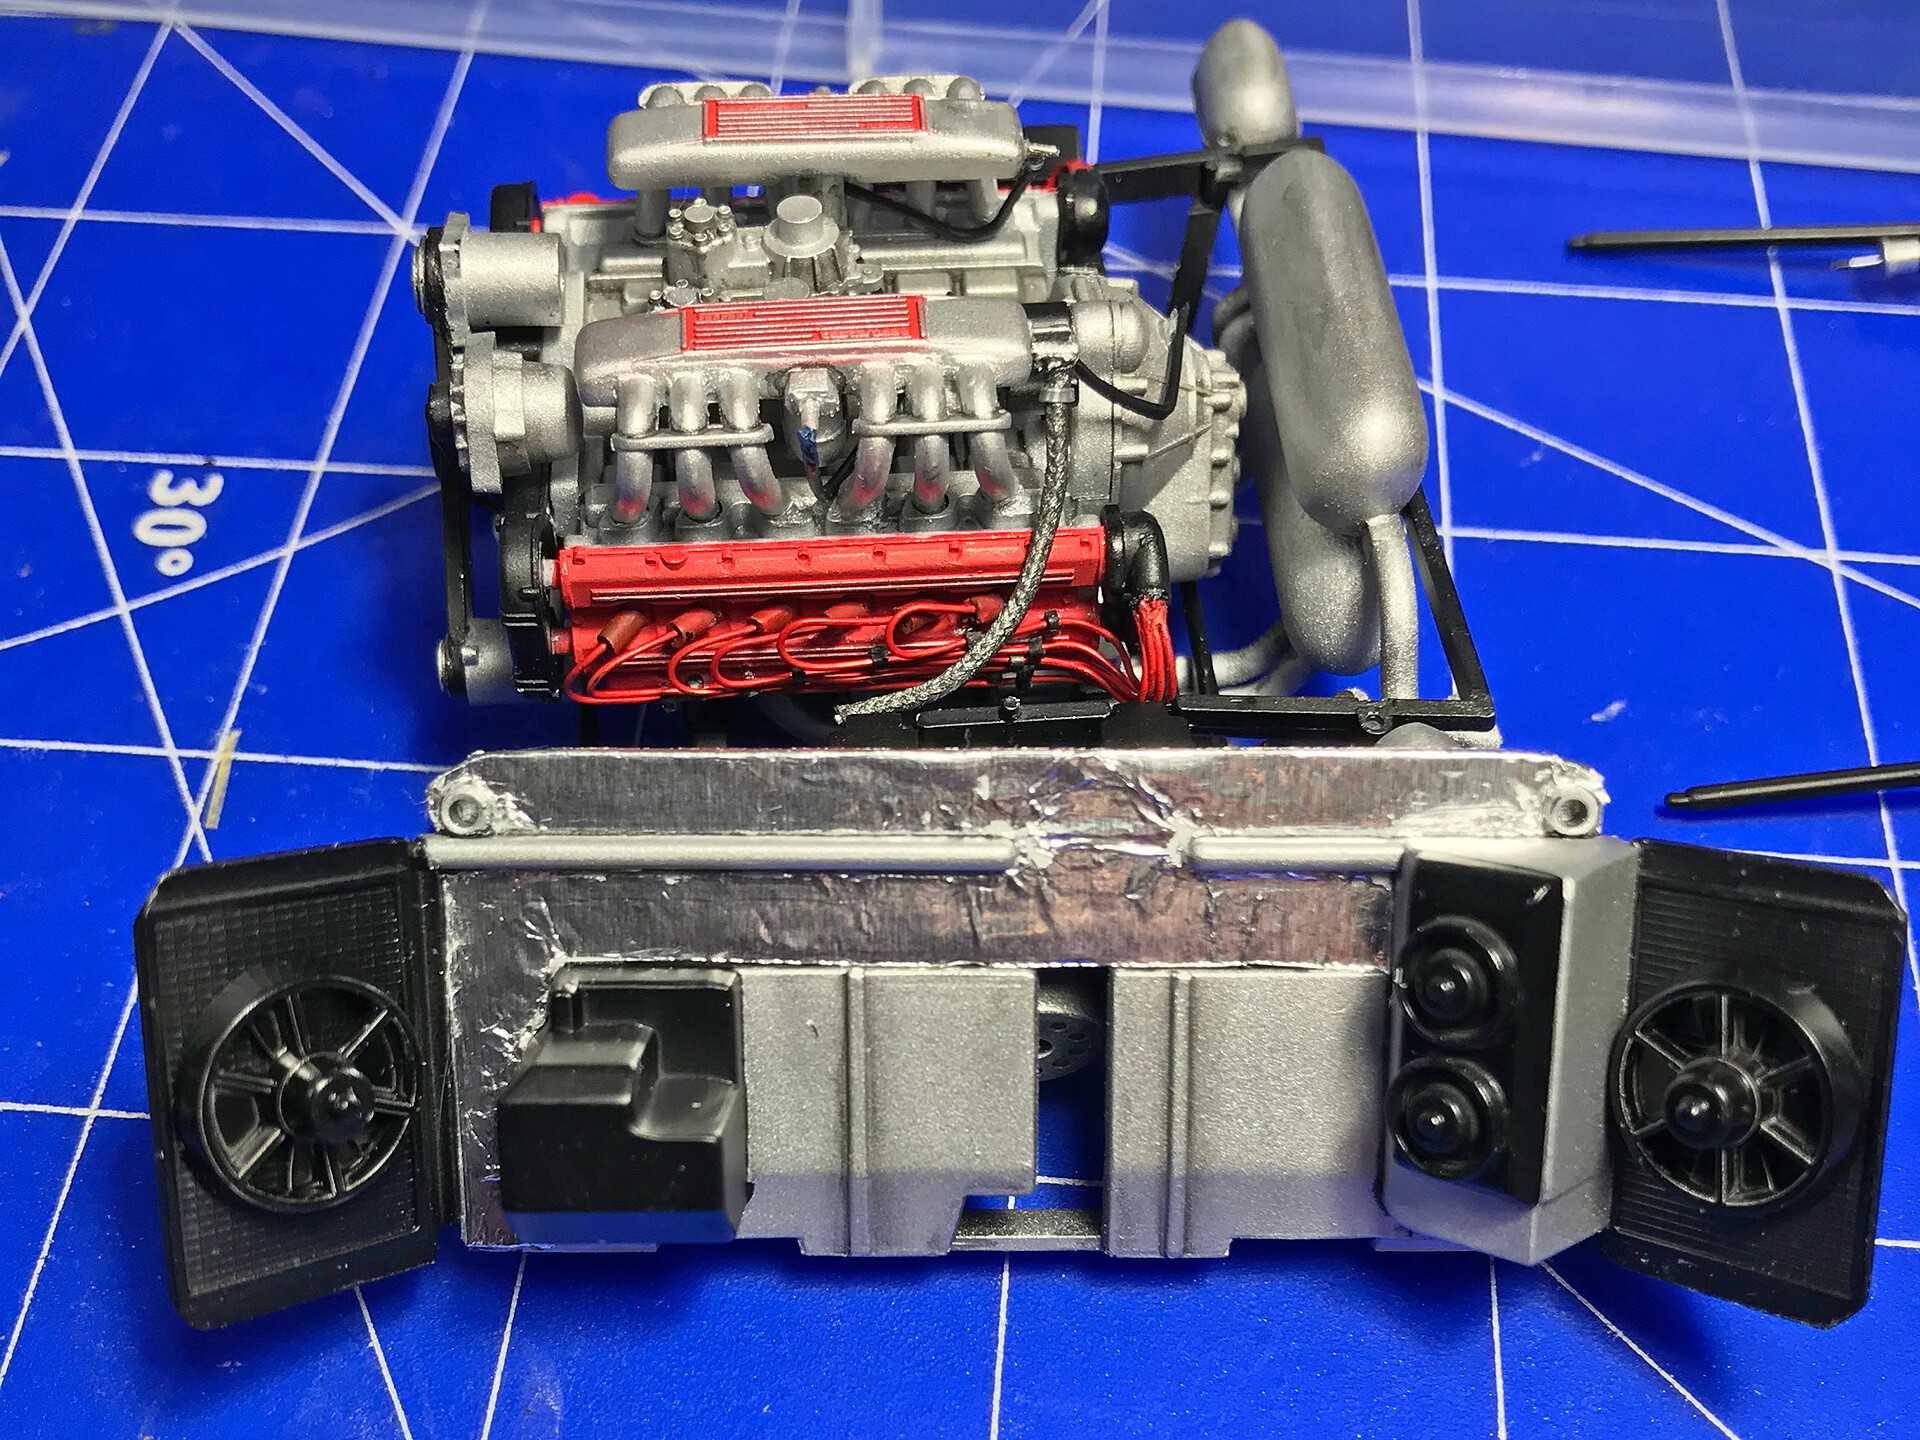
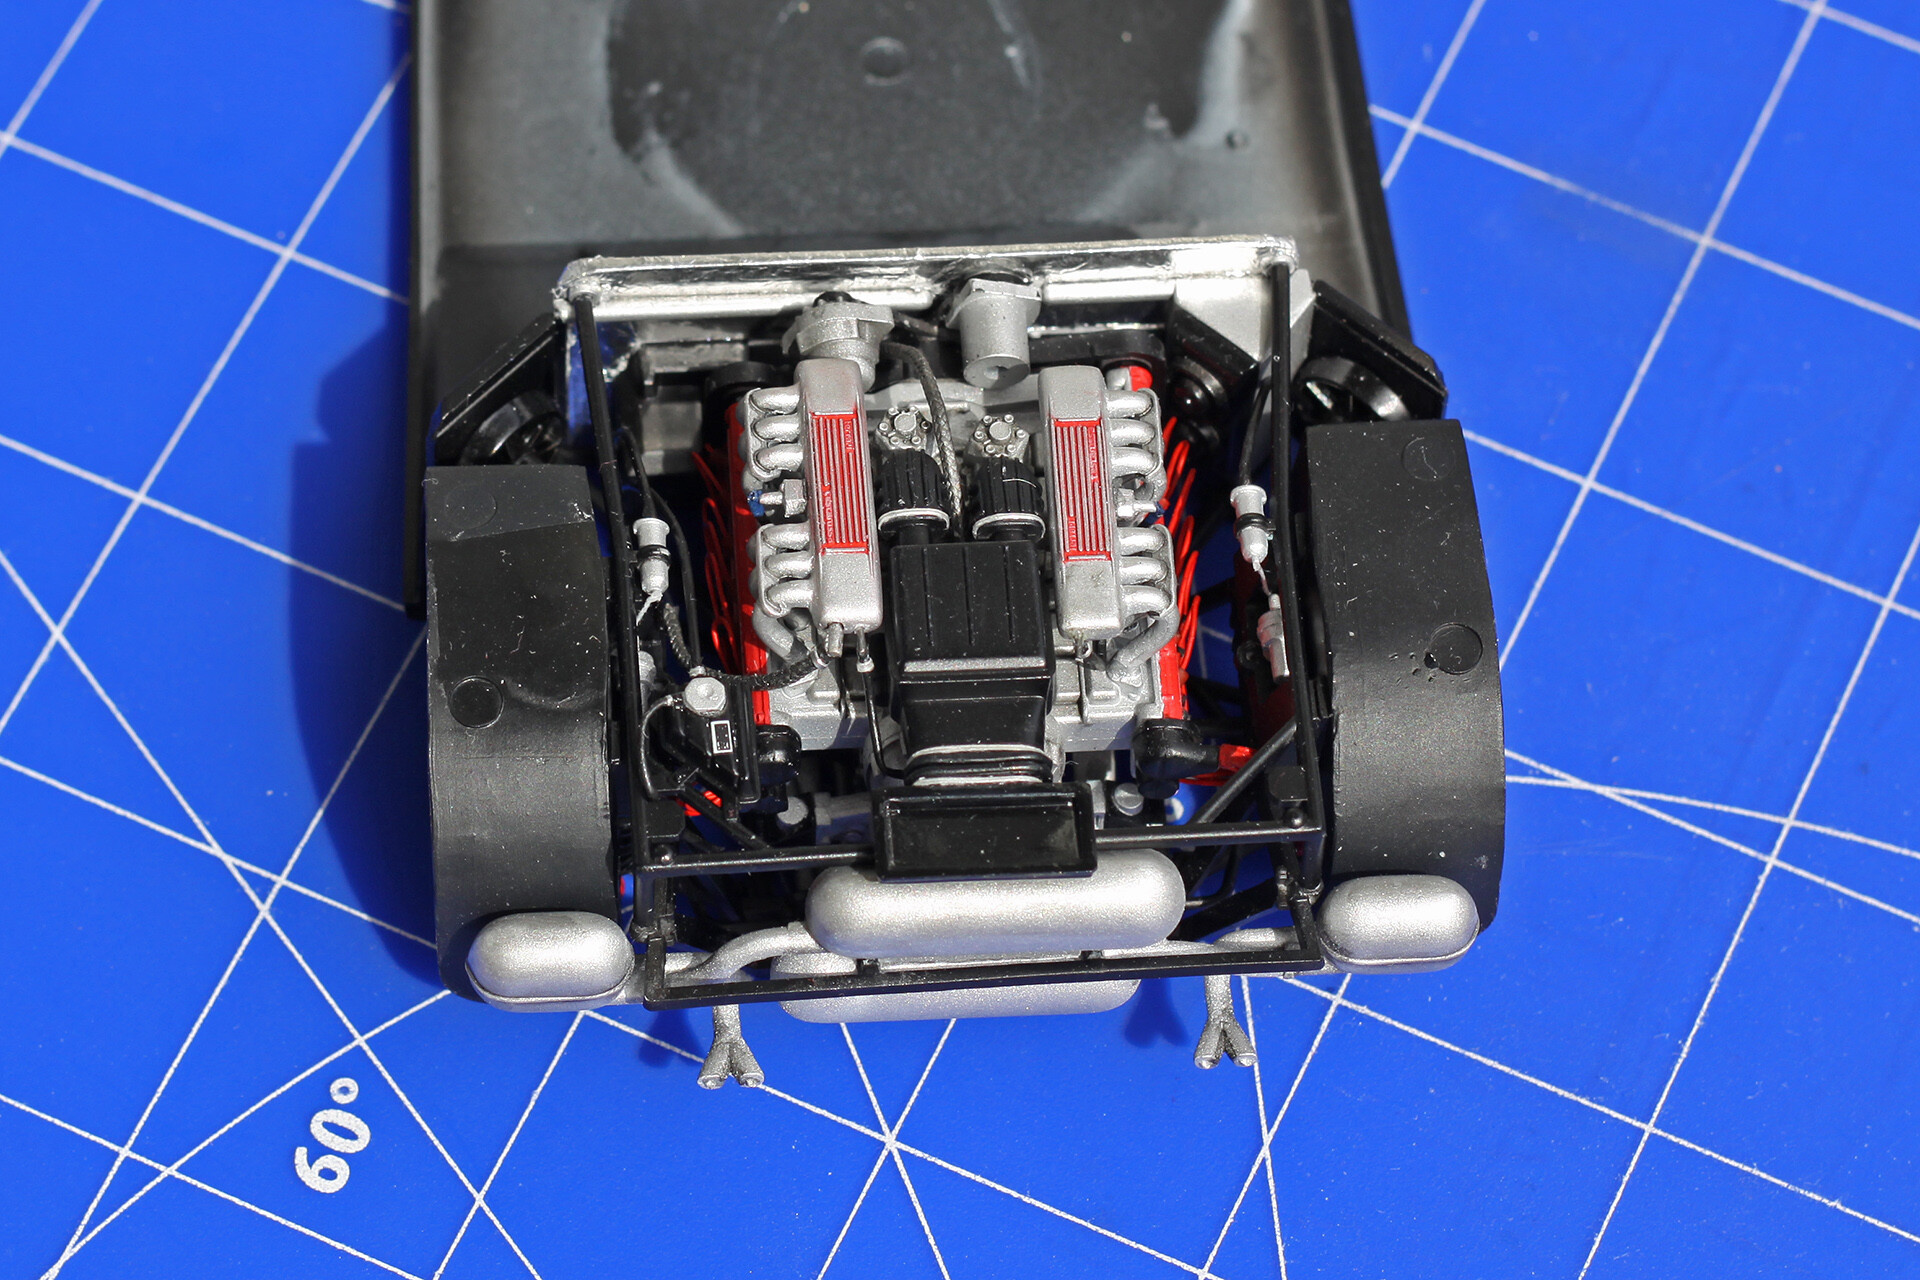
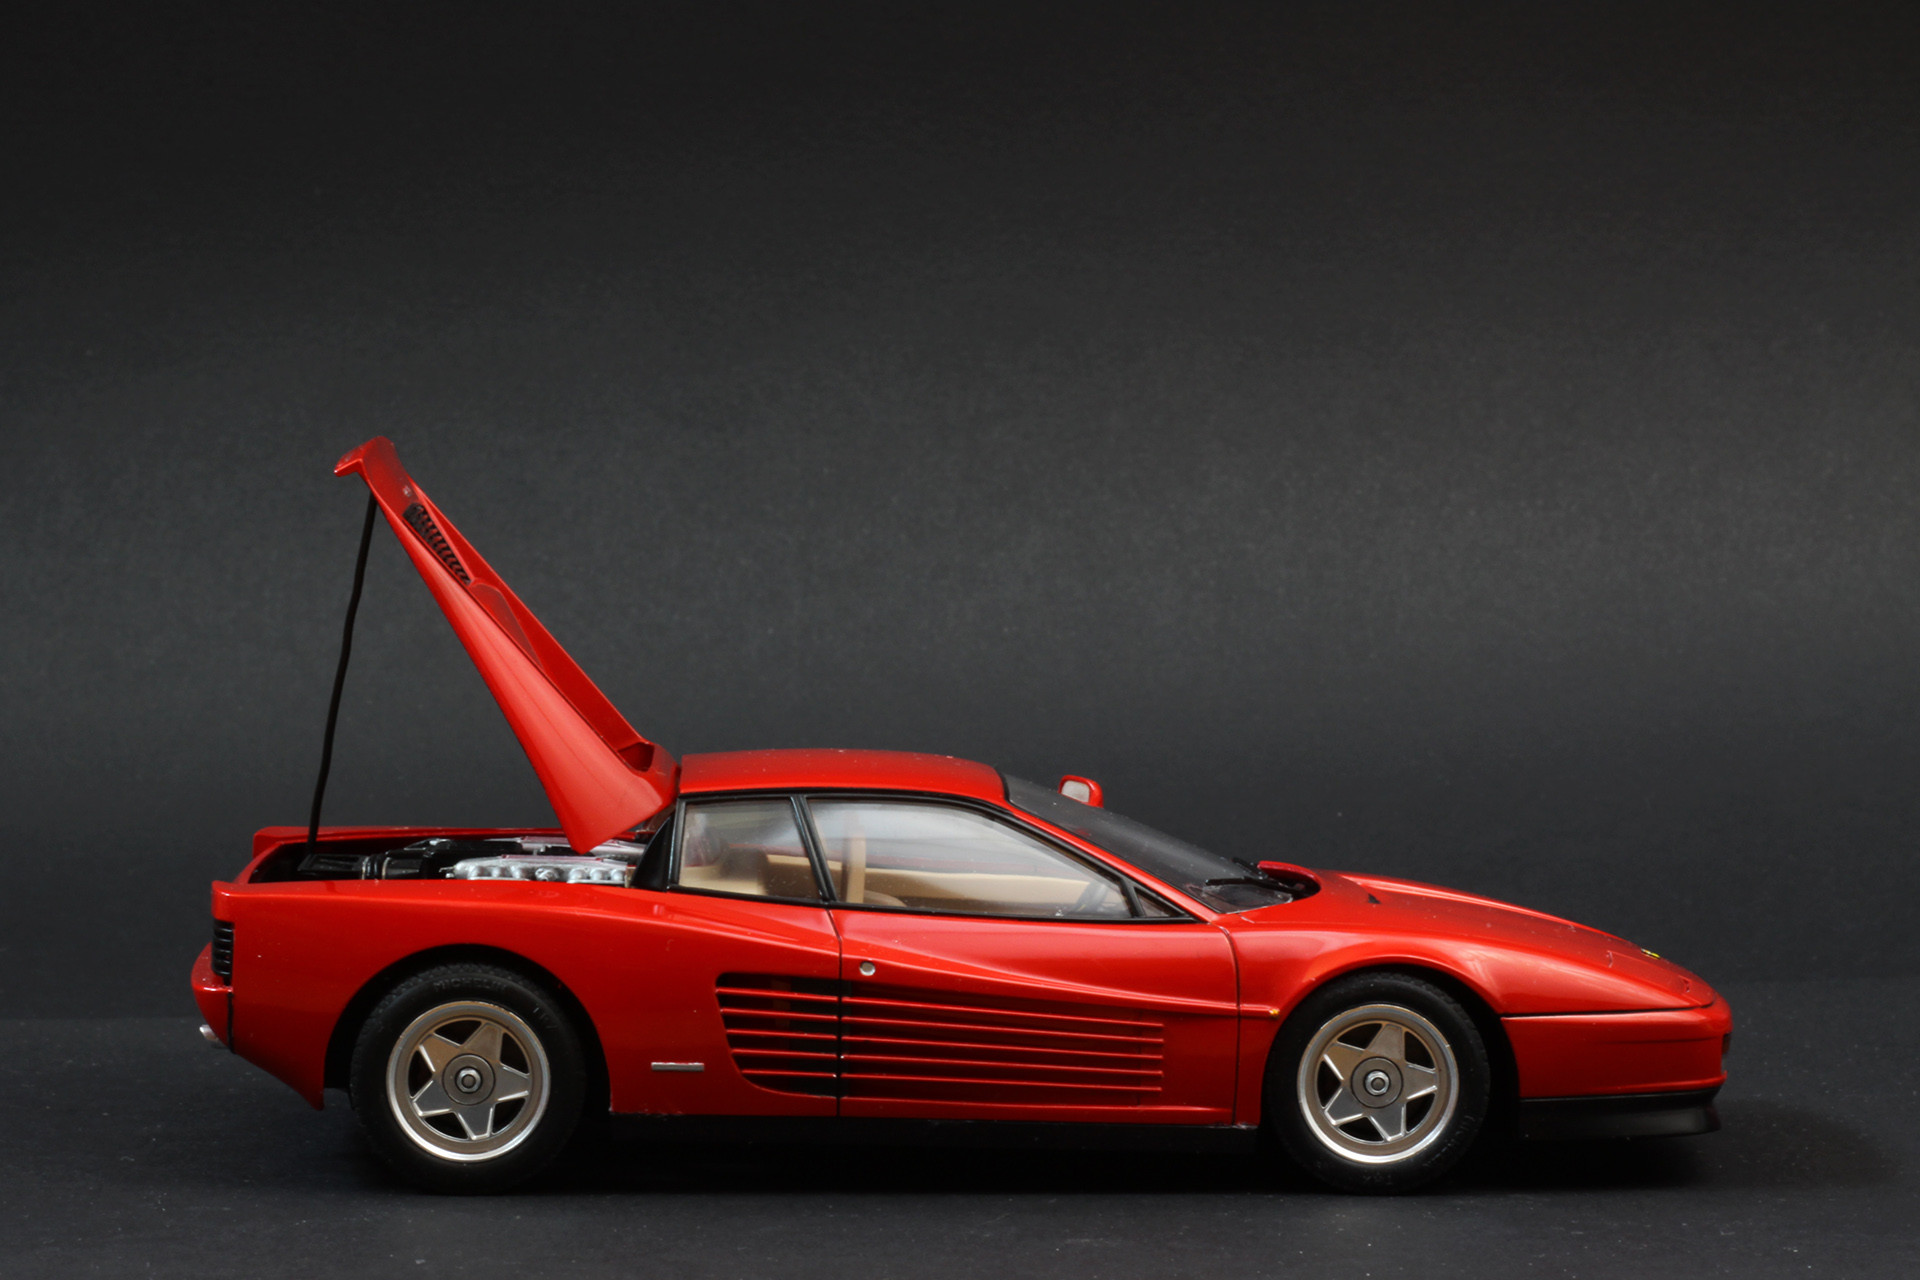
I started work with the engine, which is really detailed in the Tamiya model.


After cementing the intake manifolds, large gaps remained, which I filled with Wamod putty. That was the only one I had at that time. It is really difficult to apply, it doesn't want to stick to plastic nicely. In addition, when sanding, he likes to crumble, that's why I decided to buy Tamiya's putty.

I decided to deviate slightly from the original assumptions of making a model out of the box. Ignition cables are an element that strongly animates the model and I could not resist to make this step. I've been looking for the right material for a long time. What limited me was the diameter of the hole into which the cable bundle enters. I drilled it maximally, however, taking into account the fact that there are as many as 6 cables there (remember, we're dealing with a twelve-cylinder engine) the maximum diameter of one cable could not be greater than 0.4 mm. In addition, the cables had to be flexible enough to bend strongly. After many attempts with various cables, and even with tin wire,
the choice fell on copper cables. I painted them with Tamiya XF-7 acrylic paint, first to test if the paint will stick to them at all and whether it will not crack during bending. The effect surprised me a lot because the paint turned out to be really flexible. I cut the ignition cable plugs from the insulation removed from the cable and pasted onto the copper cables with cyanoacrylate glue. However, I began to wonder how to glue the ignition cables to the valve cover later in an aesthetic and robust enough way. I did a test on a sprue - the combination of copper and plastic with cyanoacrylate was so weak that I had to look for another way. I decided to cut out small grommets from the insulation
from another cable, which I then put on the painted ignition cables. The attempt to connect them with CA glue came out very well. An additional advantage was the fact that the actual ignition cables were attached to the valve cover in a similar manner.

The cables prepared in this way went on the shelf and wait their turn until the valve covers are ready for the assembly.
Then I covered all the parts with Mr. Finishing Surfacer 1500 White. The engine block and all silver elements were painted with Tamiya XF-16 acrylic. It is quite specific. When applying a 1: 1 thinned paint by applying a dry layer with an airbrush, one of the subsequent layers covered the element with a kind of metallic dust formed from paint particles. Therefore, it is better to thin it more. While on small parts it is difficult to see, it was quite visible on the exhaust.

Originally, there is a characteristic plate at the clutch. I cut it out of aluminum from the drink can. I made holes with sharp tips of tweezers. I tried to drill them with a hand drill, but with such a small diameter, the material turned out to be too hard. I rounded the corners with a file. In addition, I recreated the inlet at the clutch, which in the Tamiya model is one solid with the entire engine block.
A hand drill with a 0.4mm bit made its job here.
I treated the engine and exhaust manifolds with Tamiya Panel Line Accent Color Black wash. The instruction recommends that the oil filter is painted blue (X-4). These filters were very rarely seen in Testarossa, the most common were white cans with characteristic blue stripes made by UFI and that was what I decided to do.
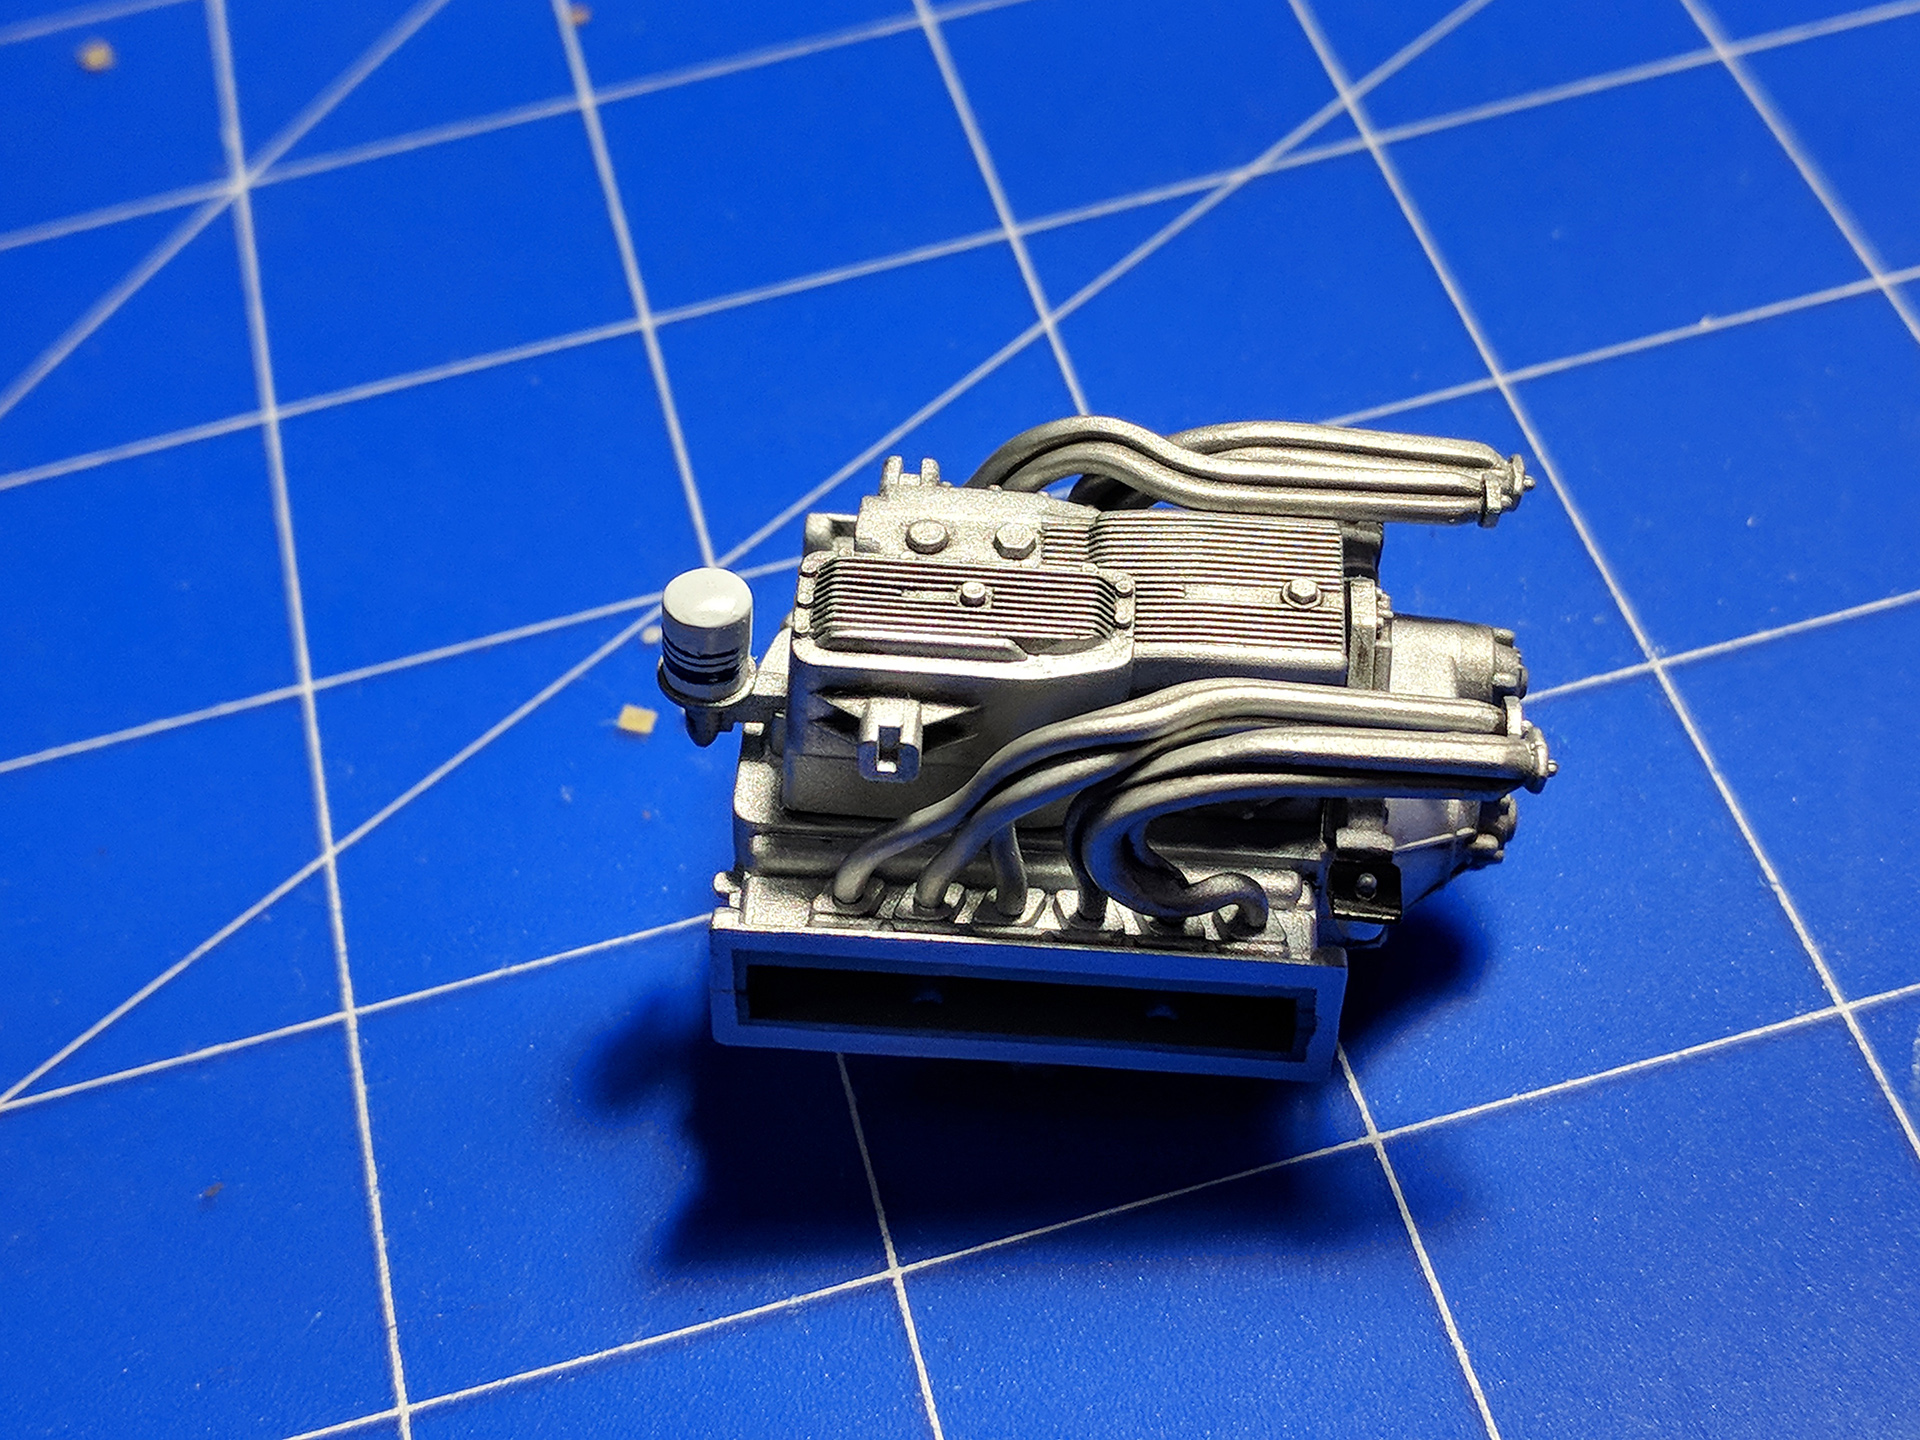
Both valve covers and intake manifolds have silver ribs with red filling. I wondered for a long time how to approach this topic. I rejected painting with a brush in the first place. I did not expect that the achieved effect would meet my expectations. Finally, both elements were painted first with silver Tamiya XF-16 acrylic, and when dried with red matte enamel from Revell No. 36. Then I rubbed the ribs gently with a cotton bud soaked in White Spirit. The red paint in these places has come off nicely revealing the silver color. The enamel thinner does not clean acrylic (unless we start rubbing it hard, then it may happen), so it is worth using two types of paint.

The ignition cables are in place. In the intake manifolds, I drilled holes for the wires coming out of them, which I made of thin cables, and the clamps I made of aluminum tin after a can of Coke.

After painting the frame and exhaust muffler, it;s time to glue them together. Assembling these elements turned out to be not so obvious, at the same time I had to synchronize the engine, muffler and exhaust manifolds. It would be easiest to glue the engine to the frame first, but then it would be impossible to insert a muffler because the hole in the frame would be too narrow. So I temporarily glued the muffler to the frame with adhesive tape, then glued the engine to the frame, to which I glued the exhaust manifolds, which then connected to the muffler. I attached the muffler to the frame at the very end.
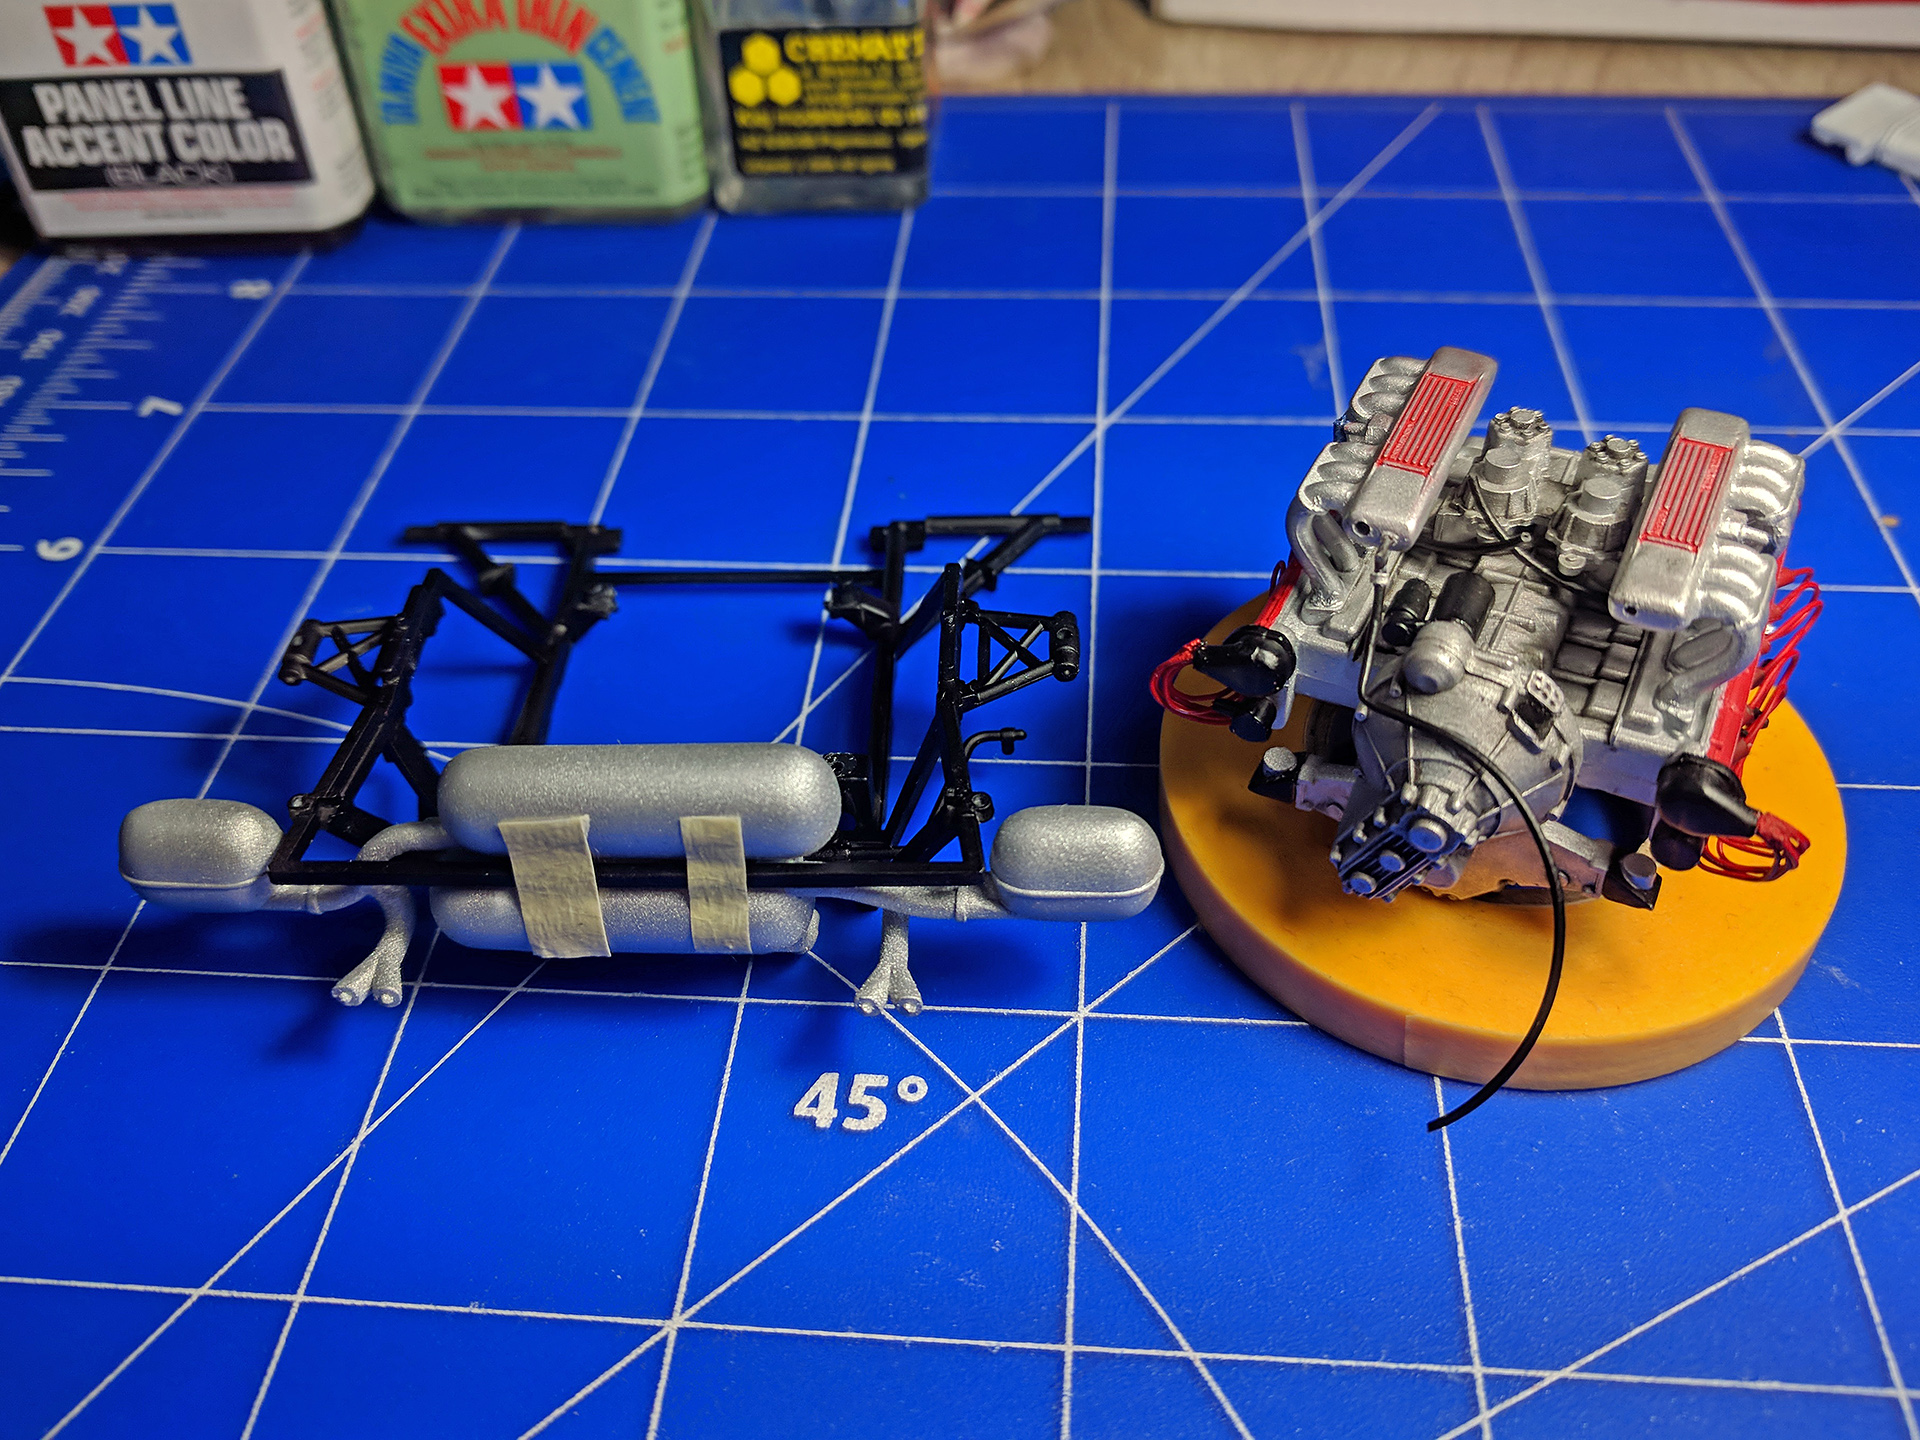
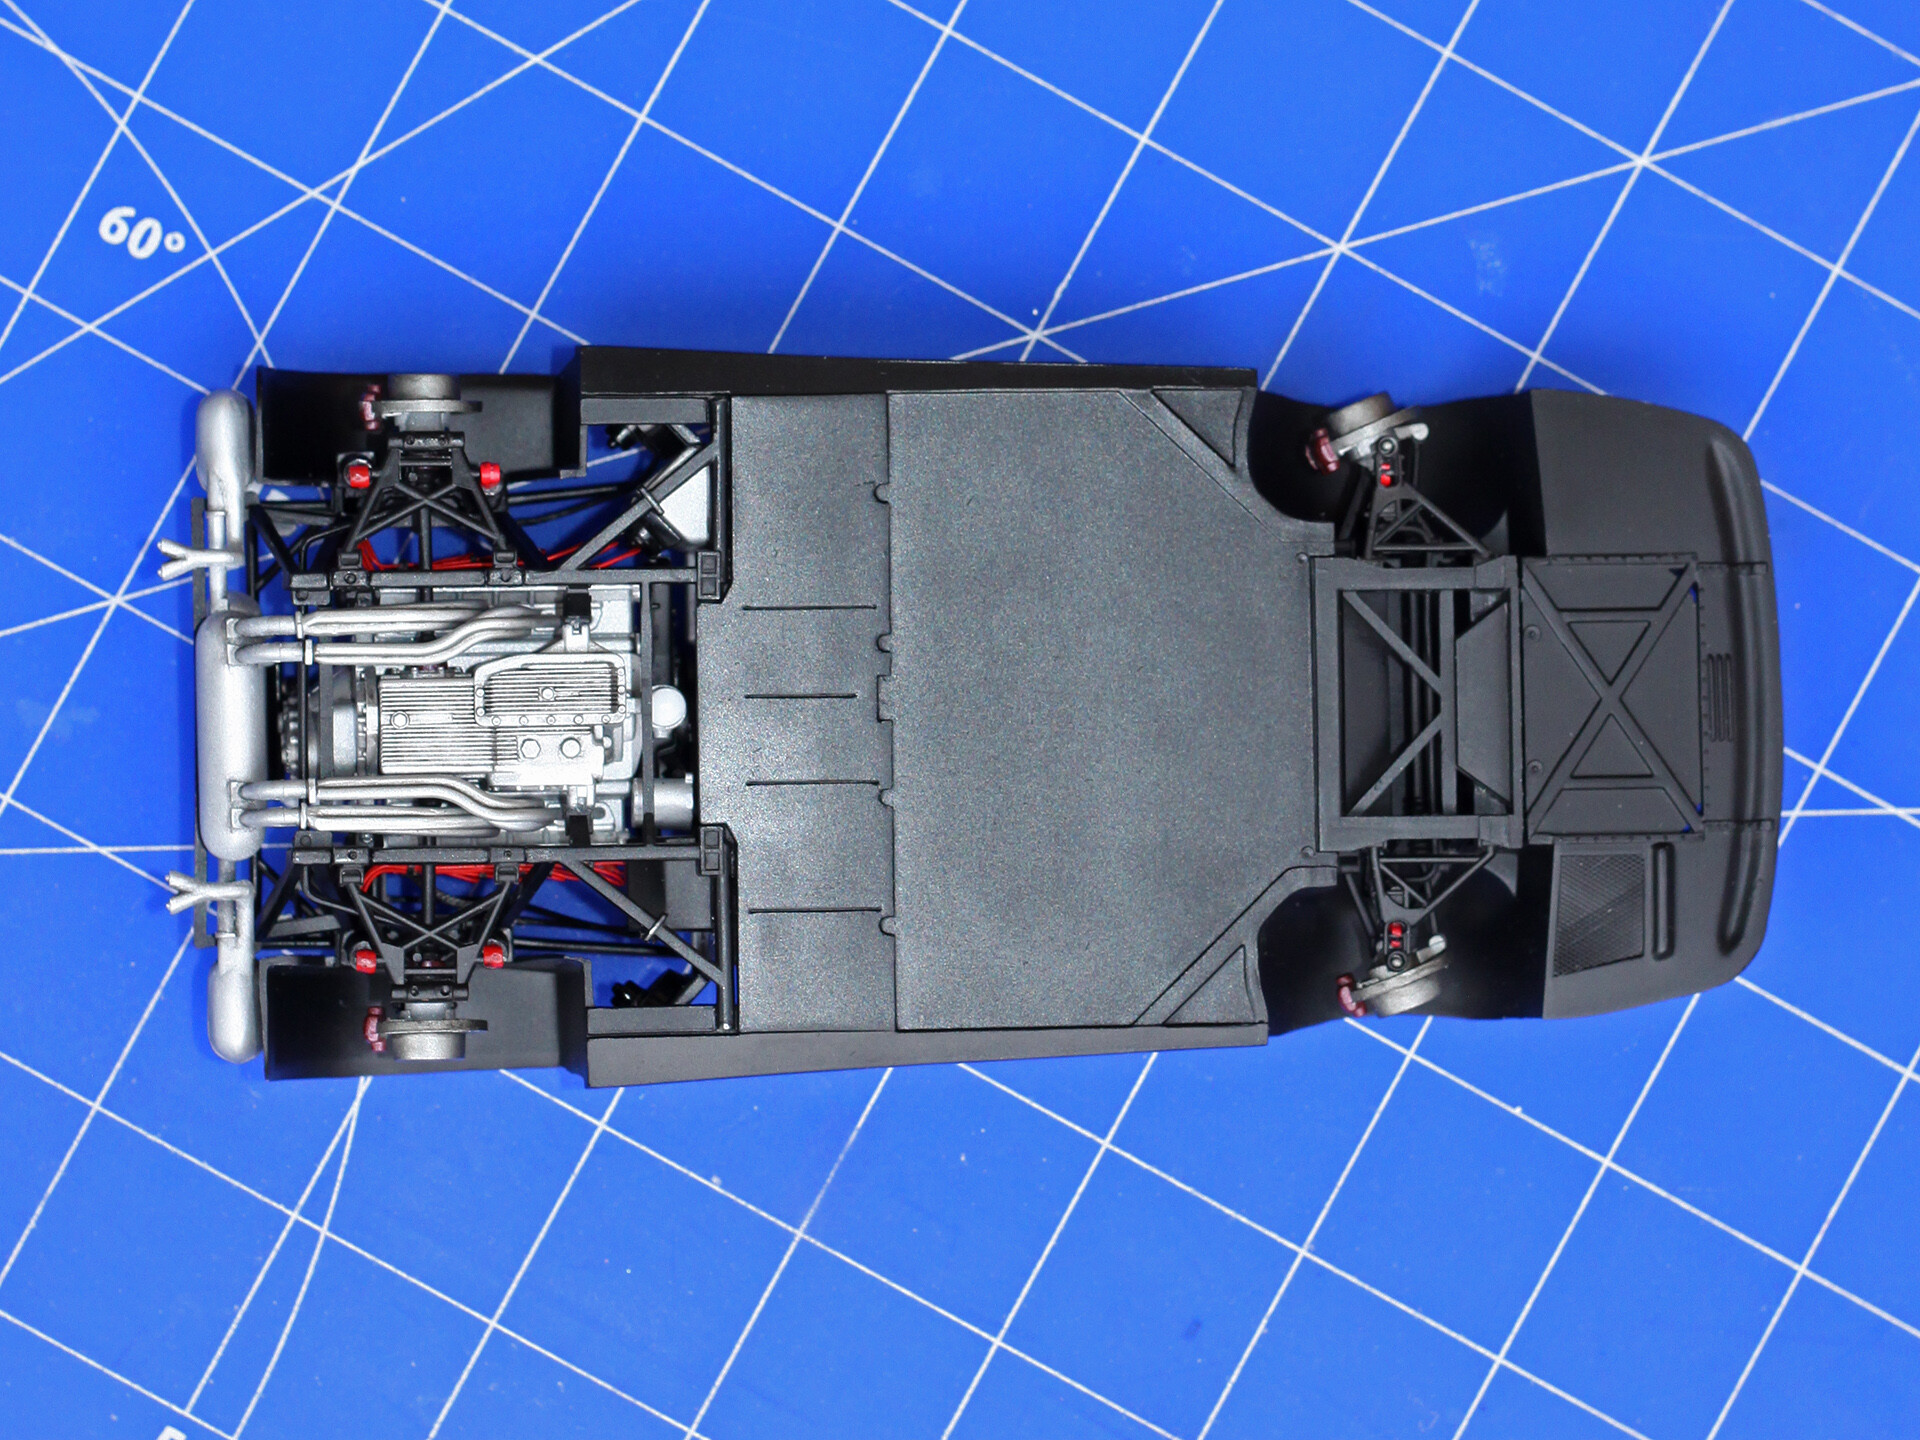
In the meantime, I took care of the rest of the engine compartment.


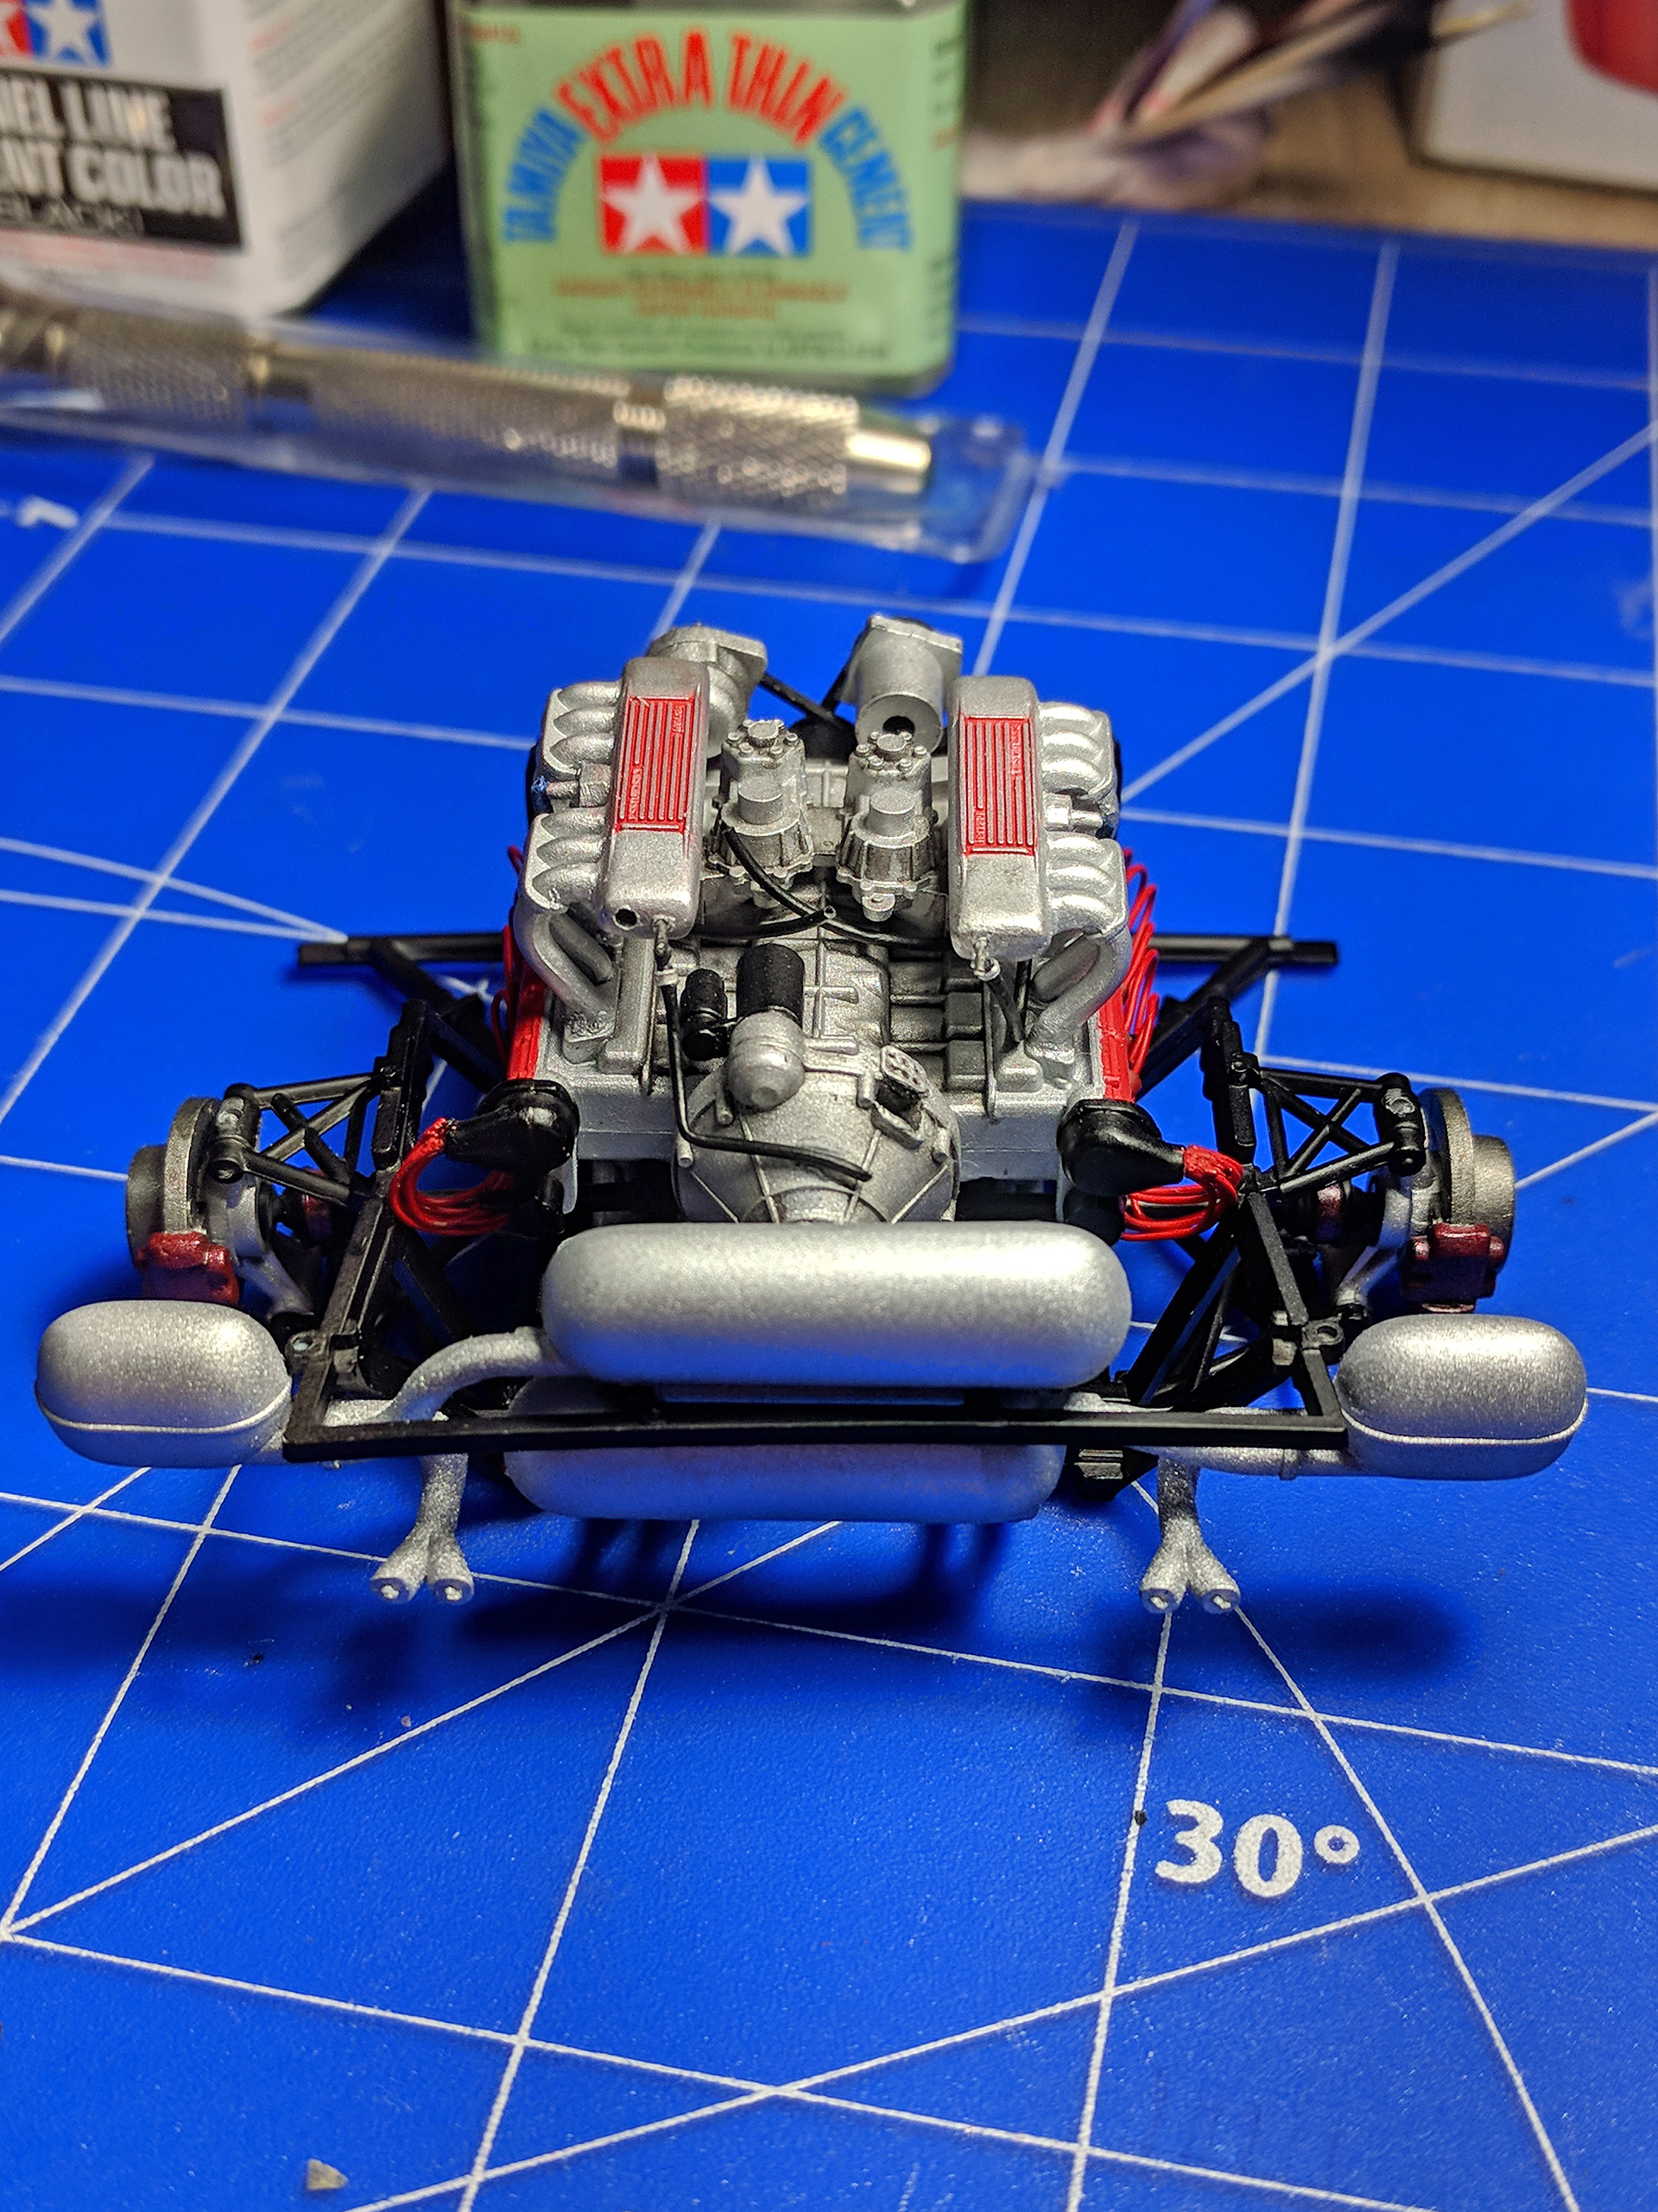
The pictures show the almost complete engine. A hose was added to the intake manifold, which I made of gray cotton string.
The cable tie, like the previous ones, is made from Coke can aluminum.
In the coolant tank, Tamiya forgot to mold a cap, so I made it myself. I also added the hoses that match those mounted in the original car and the serial plate decal attached to the kit.

Another element that Tamiya did not reproduce best is the air intake. The rubber sleeve was made only on the sides, while from the top it was completely gone. I don't know if it was caused by a damaged or badly designed injection mold or just a defect in my kit. I supplemented the deficiencies with insulation from a cable whose diameter matched perfectly. I have also added self-made cable ties.

I painted the firewall with Tamiya acrylics. I also glued imitation thermal insulation. In the scale cars modeling, silverware from cigarettes is usually used for this purpose, but due to the fact that I had difficulties to get them, I used silverware from chewing gums. It was glued to double-sided tape. When gluing, I didn't care too much about folds, because they are also found in the original. I put some Tamiya Panel Line wash on the fuel tanks.
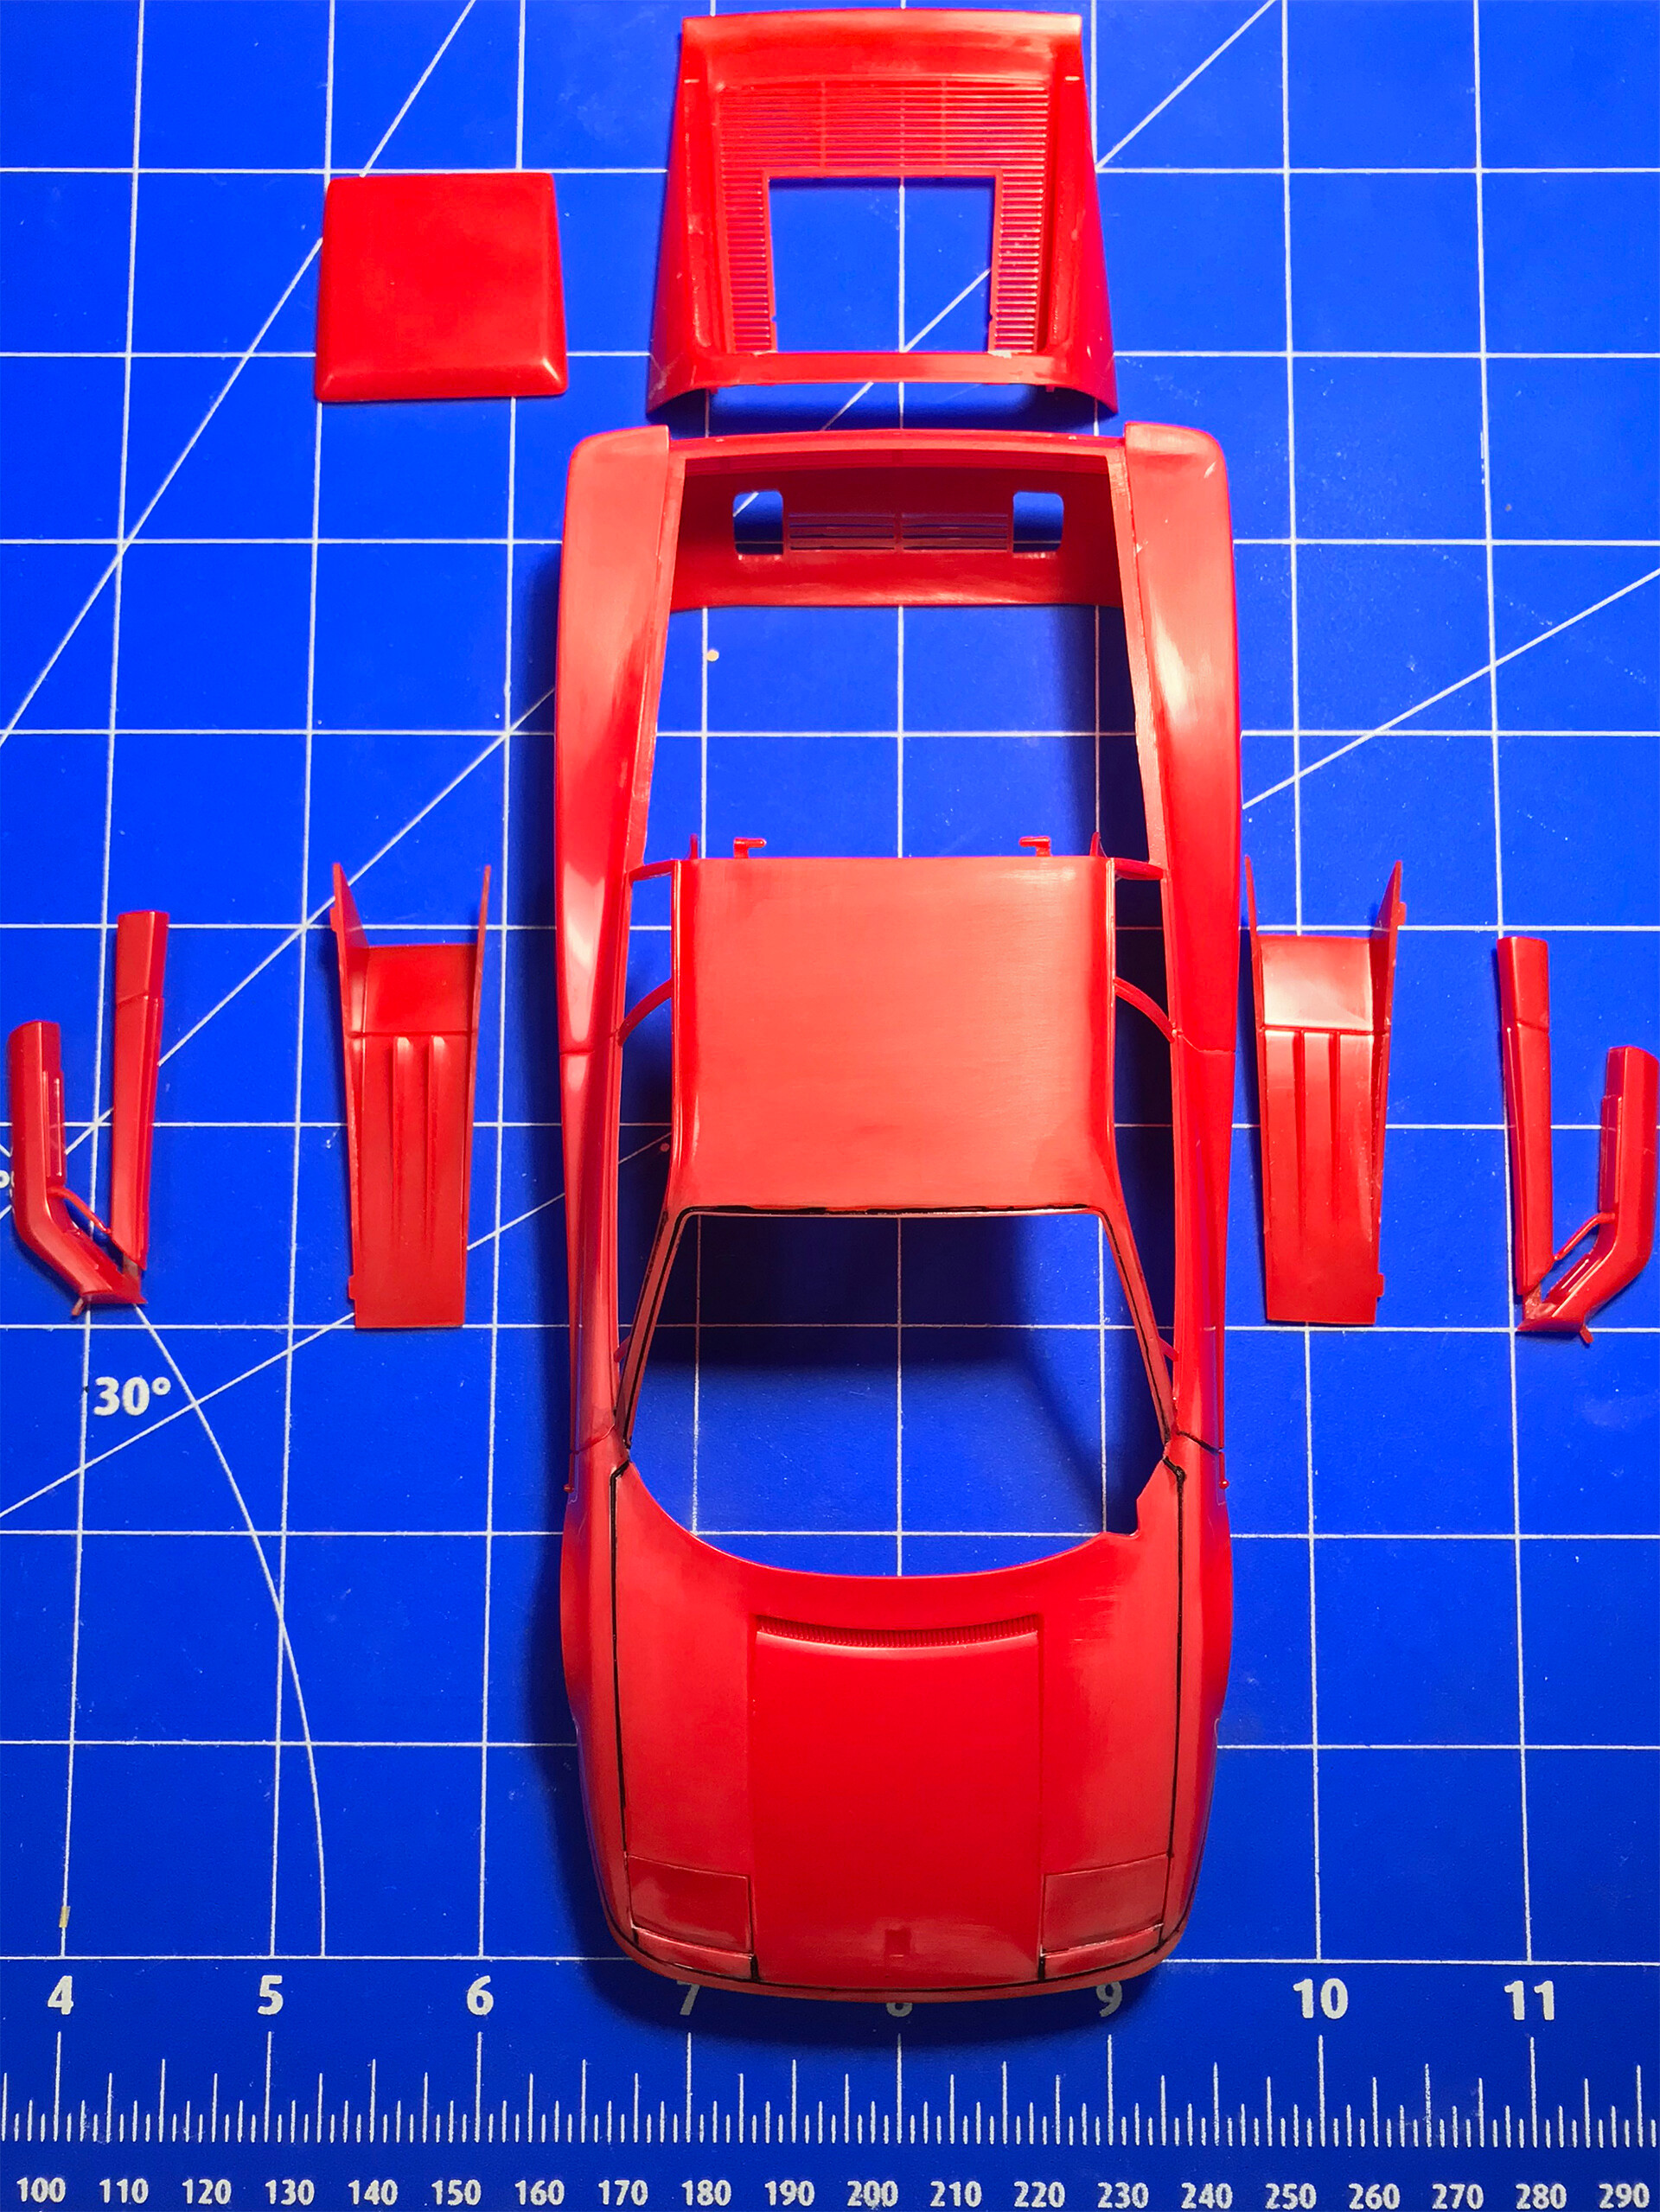
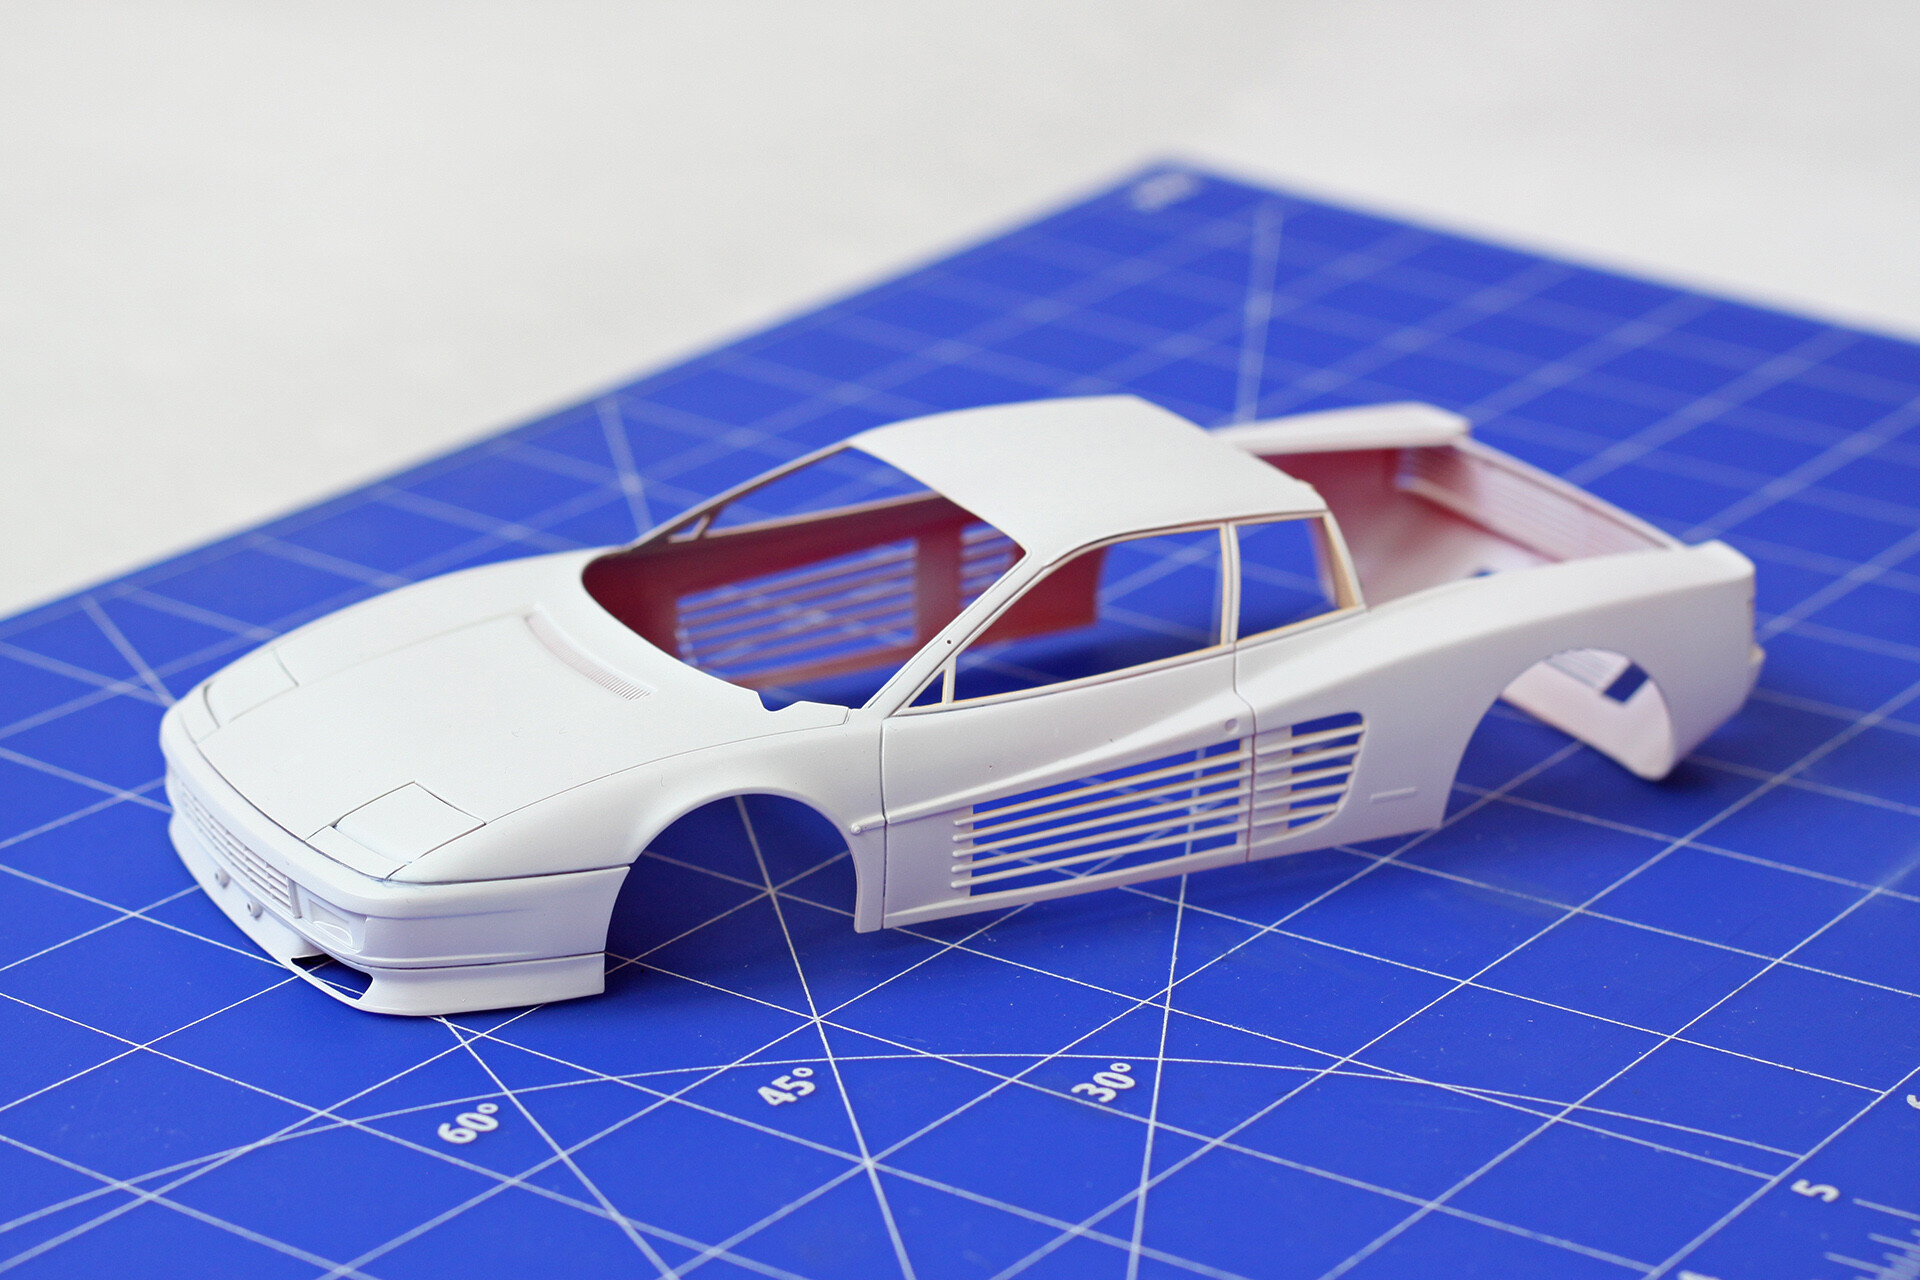
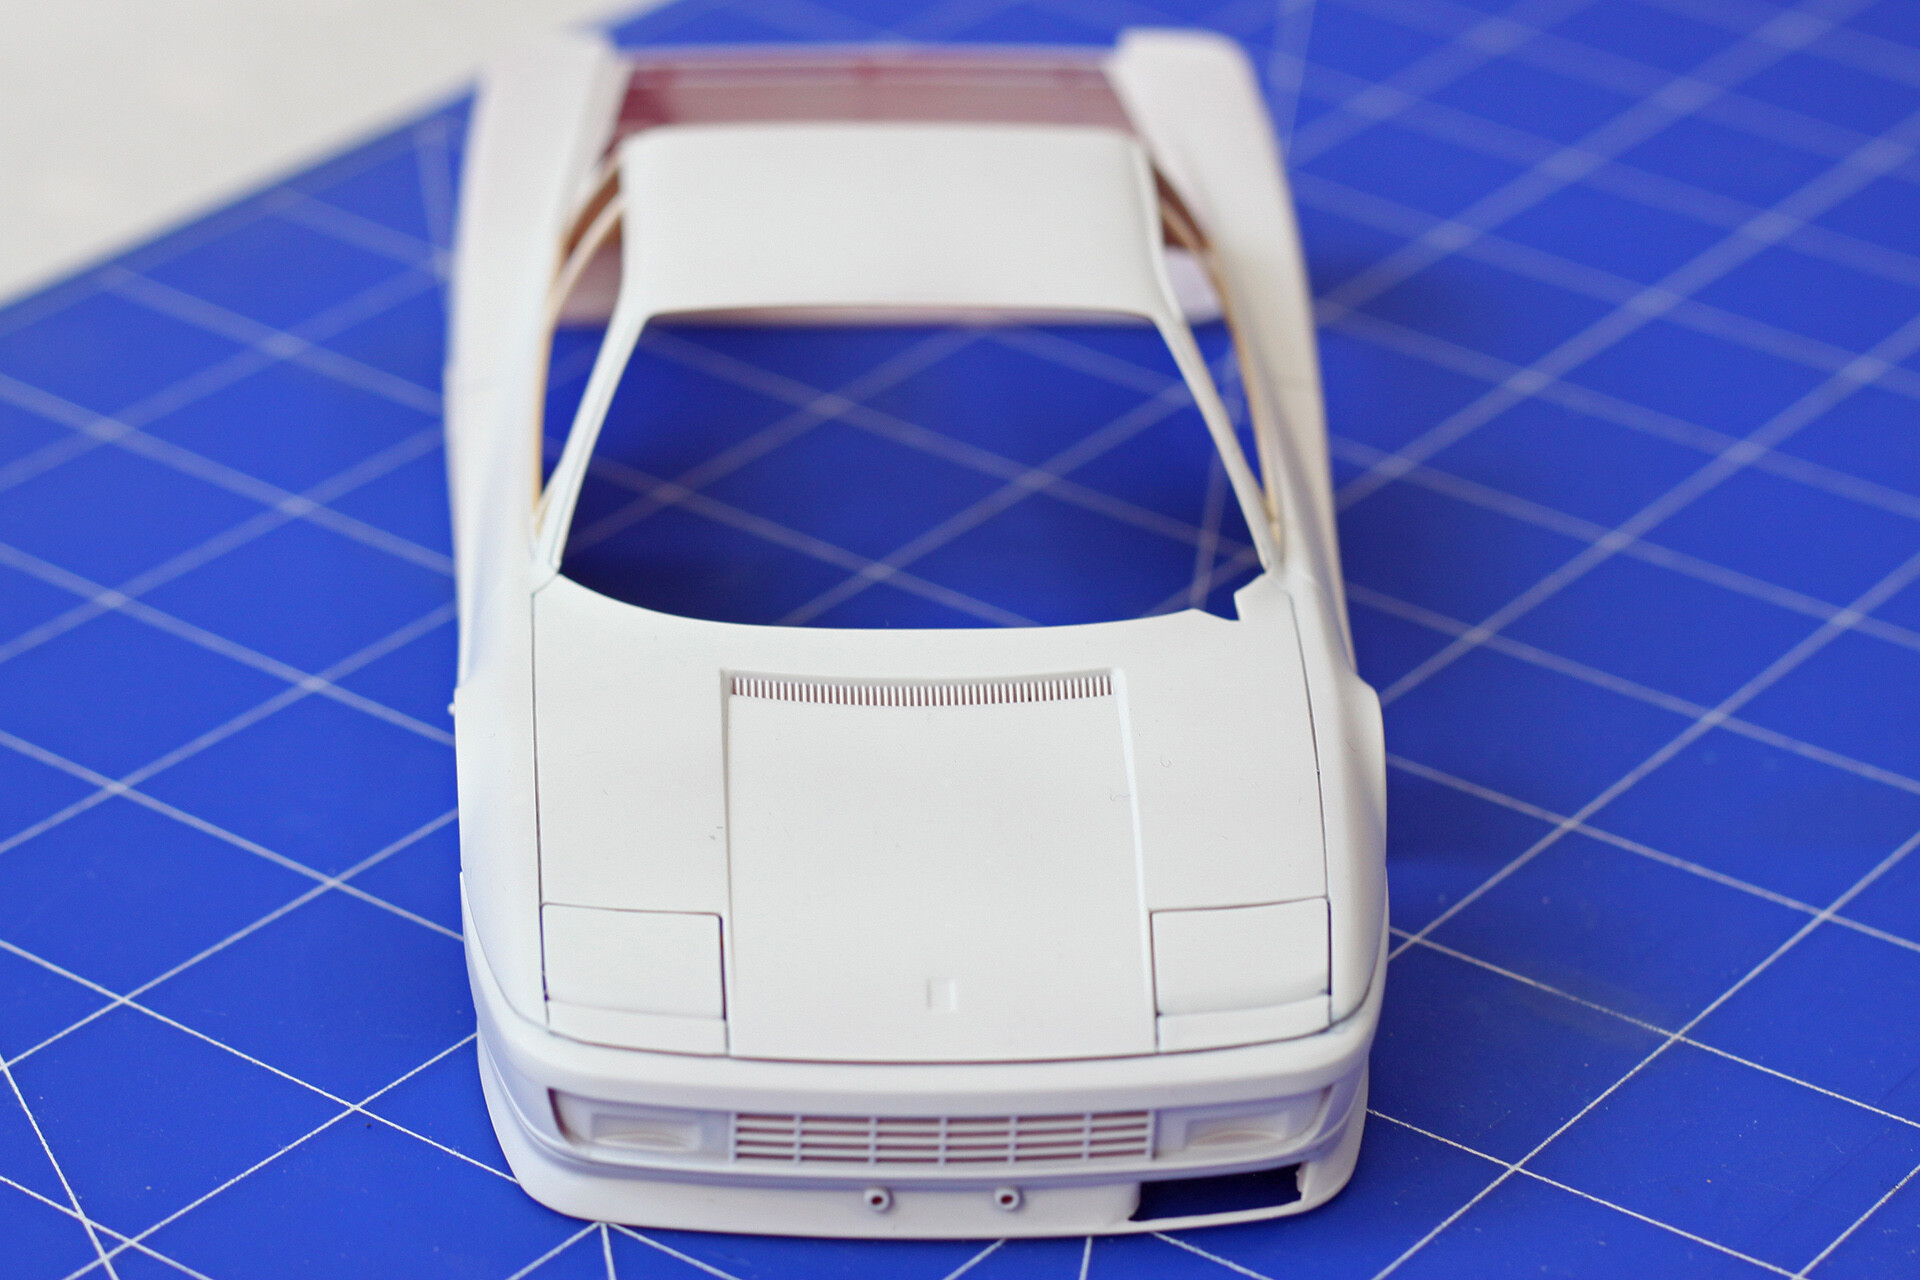
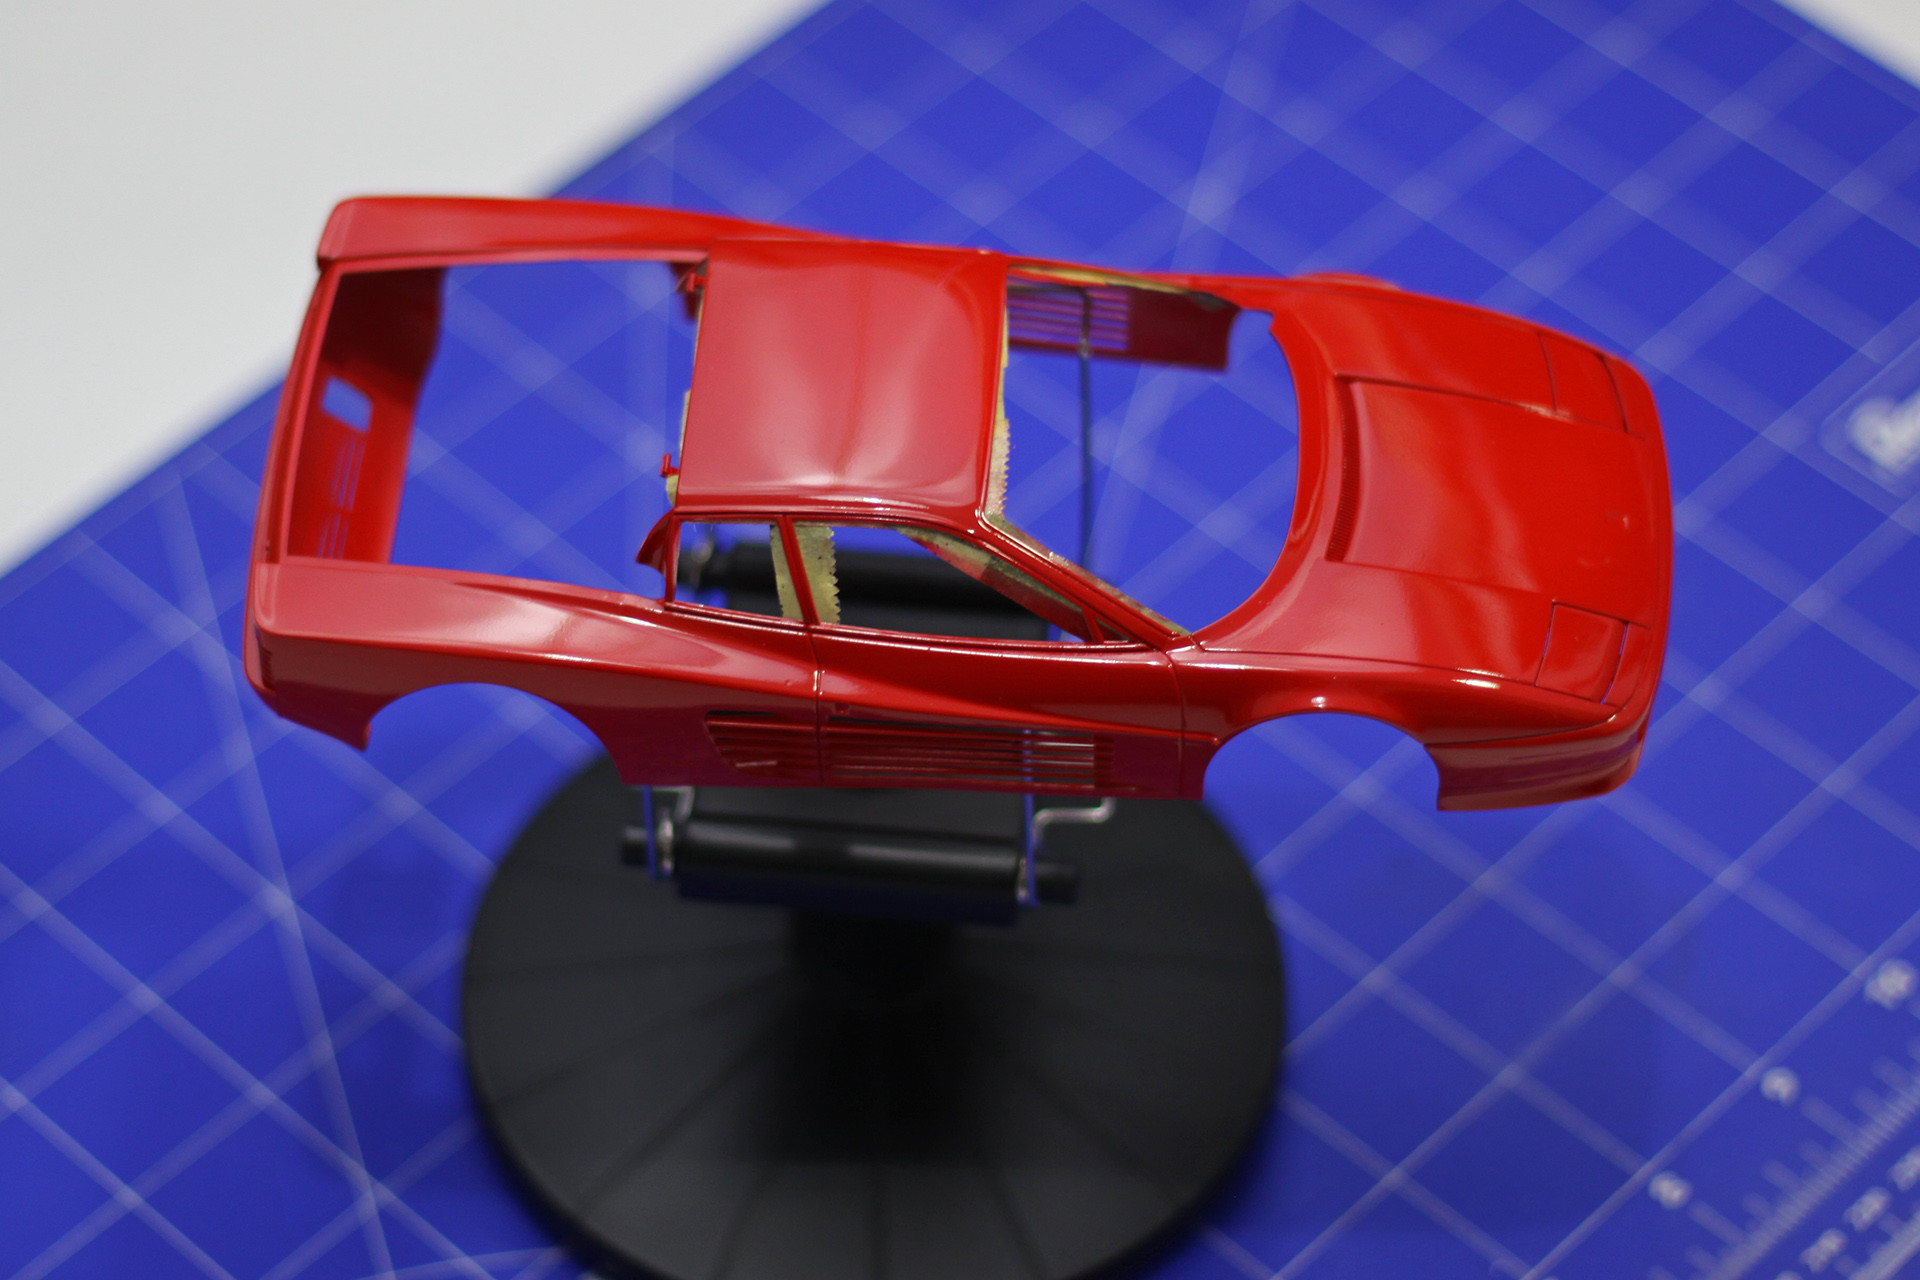
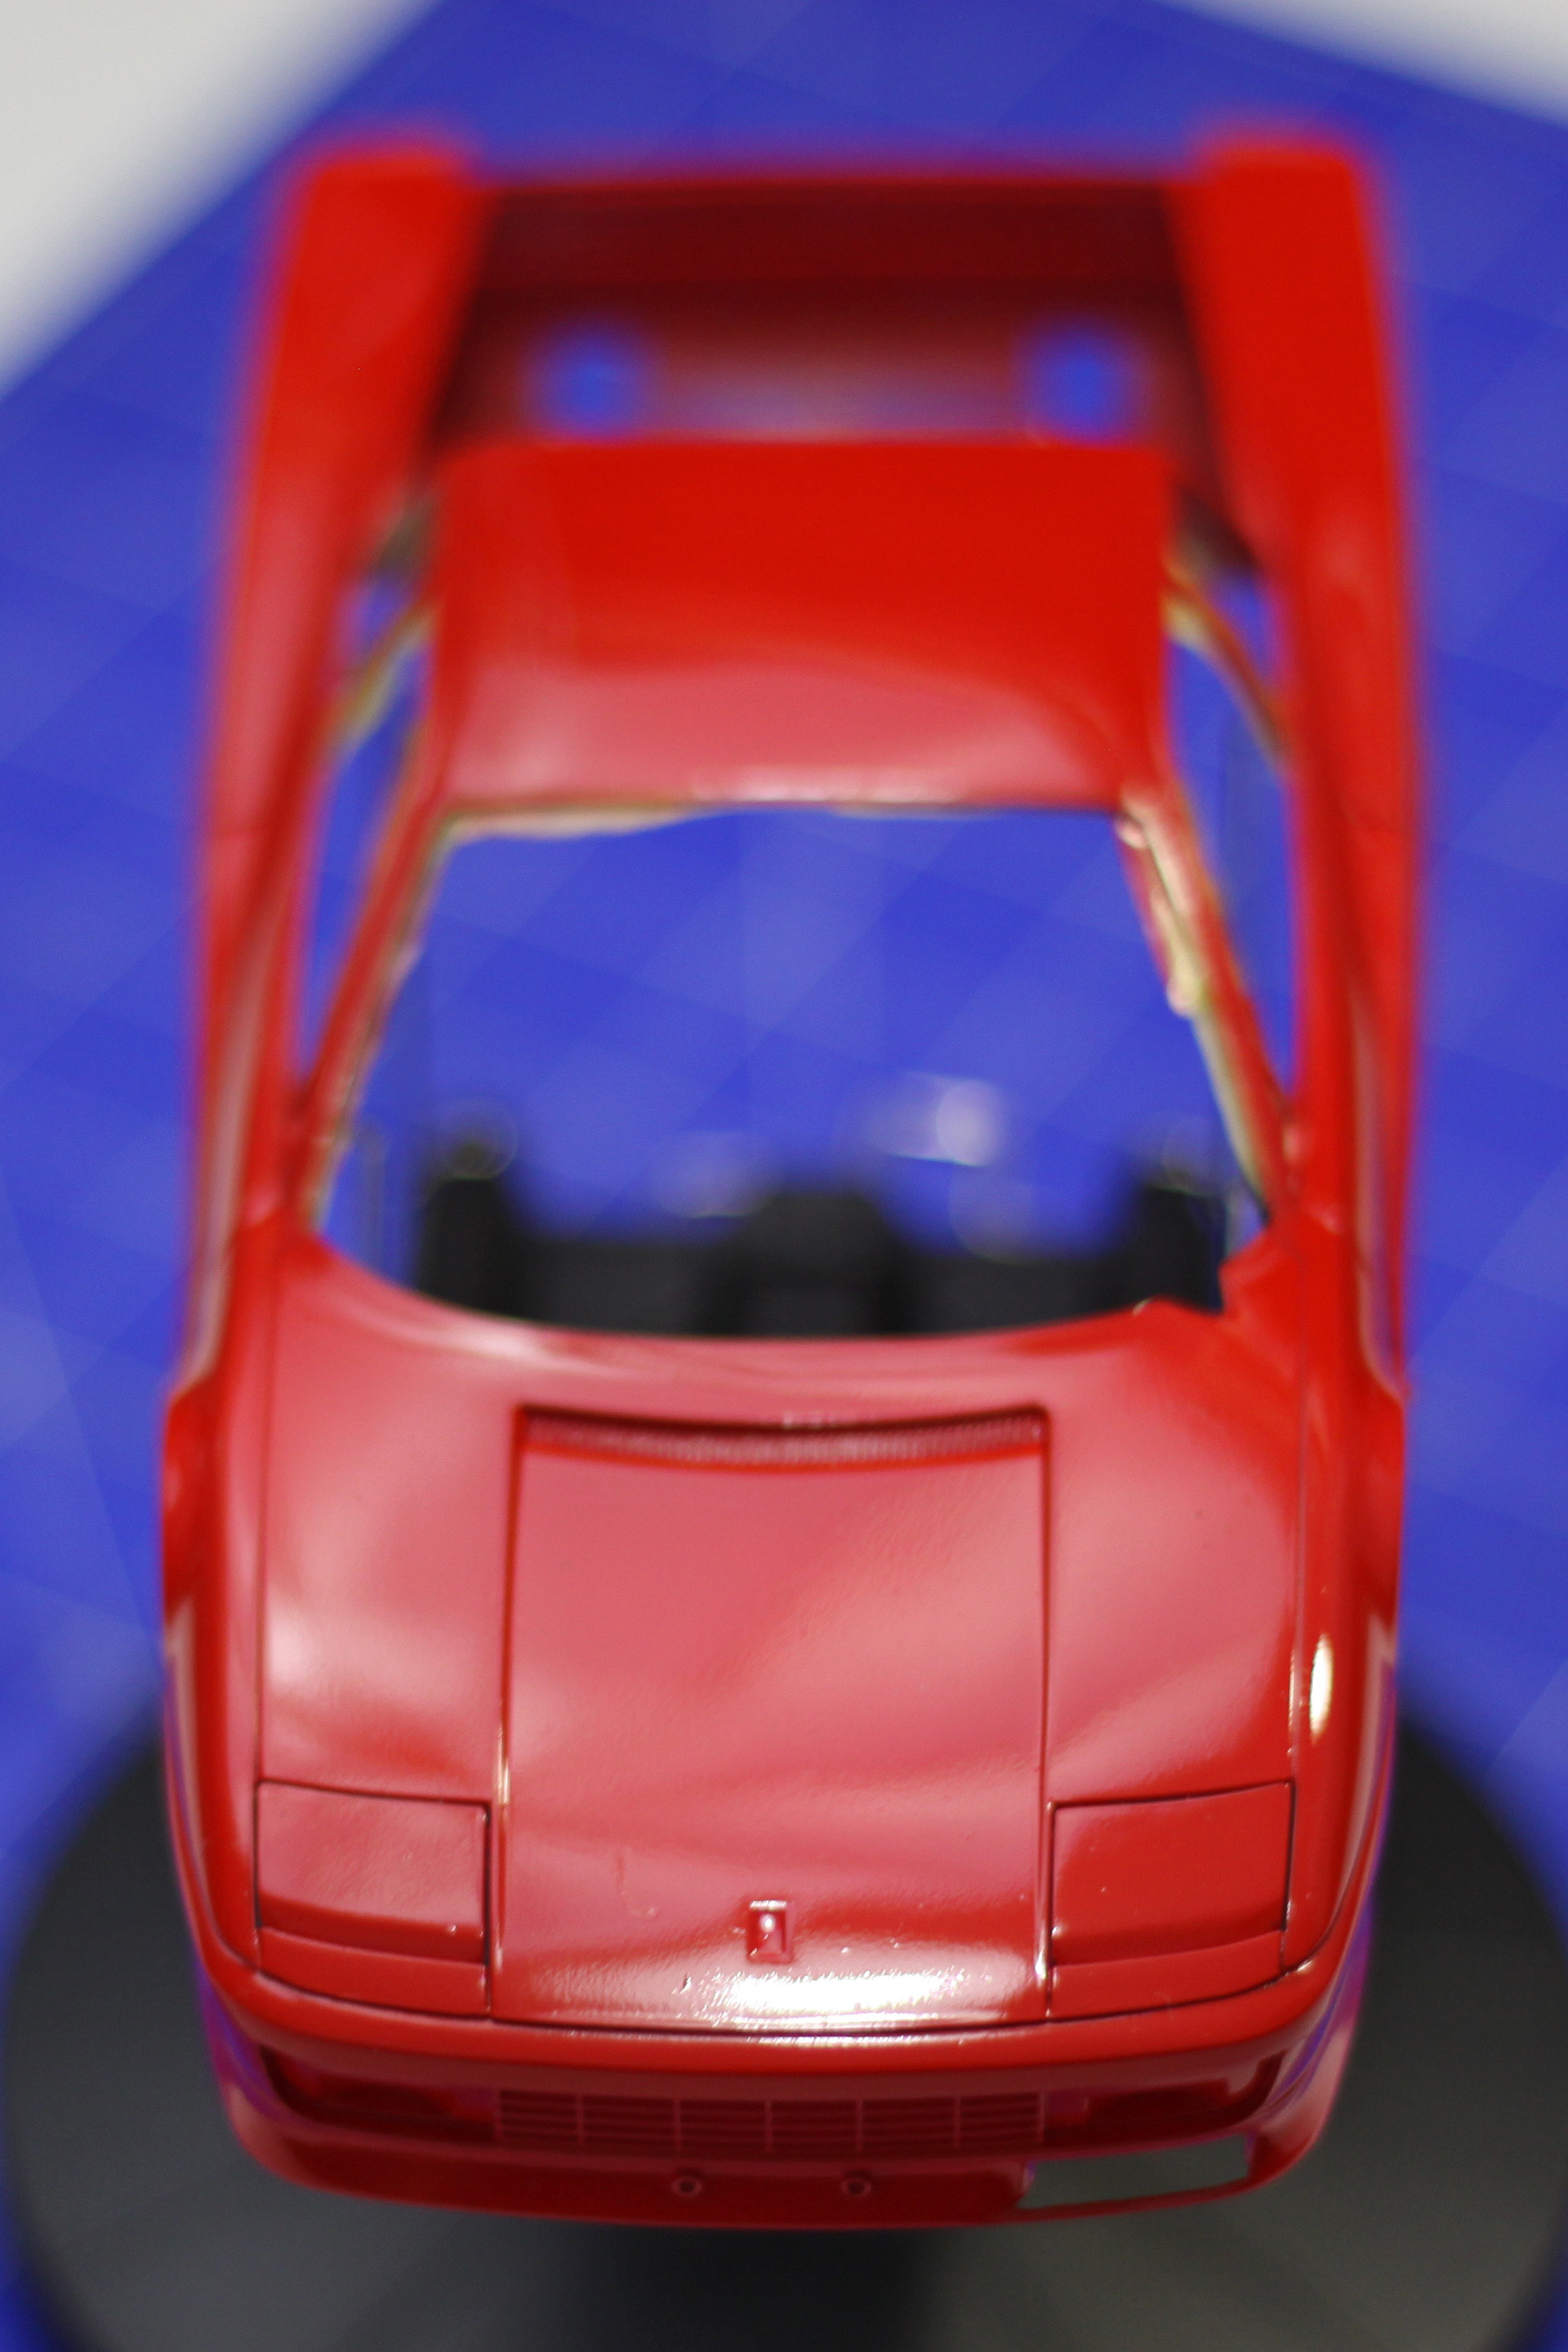
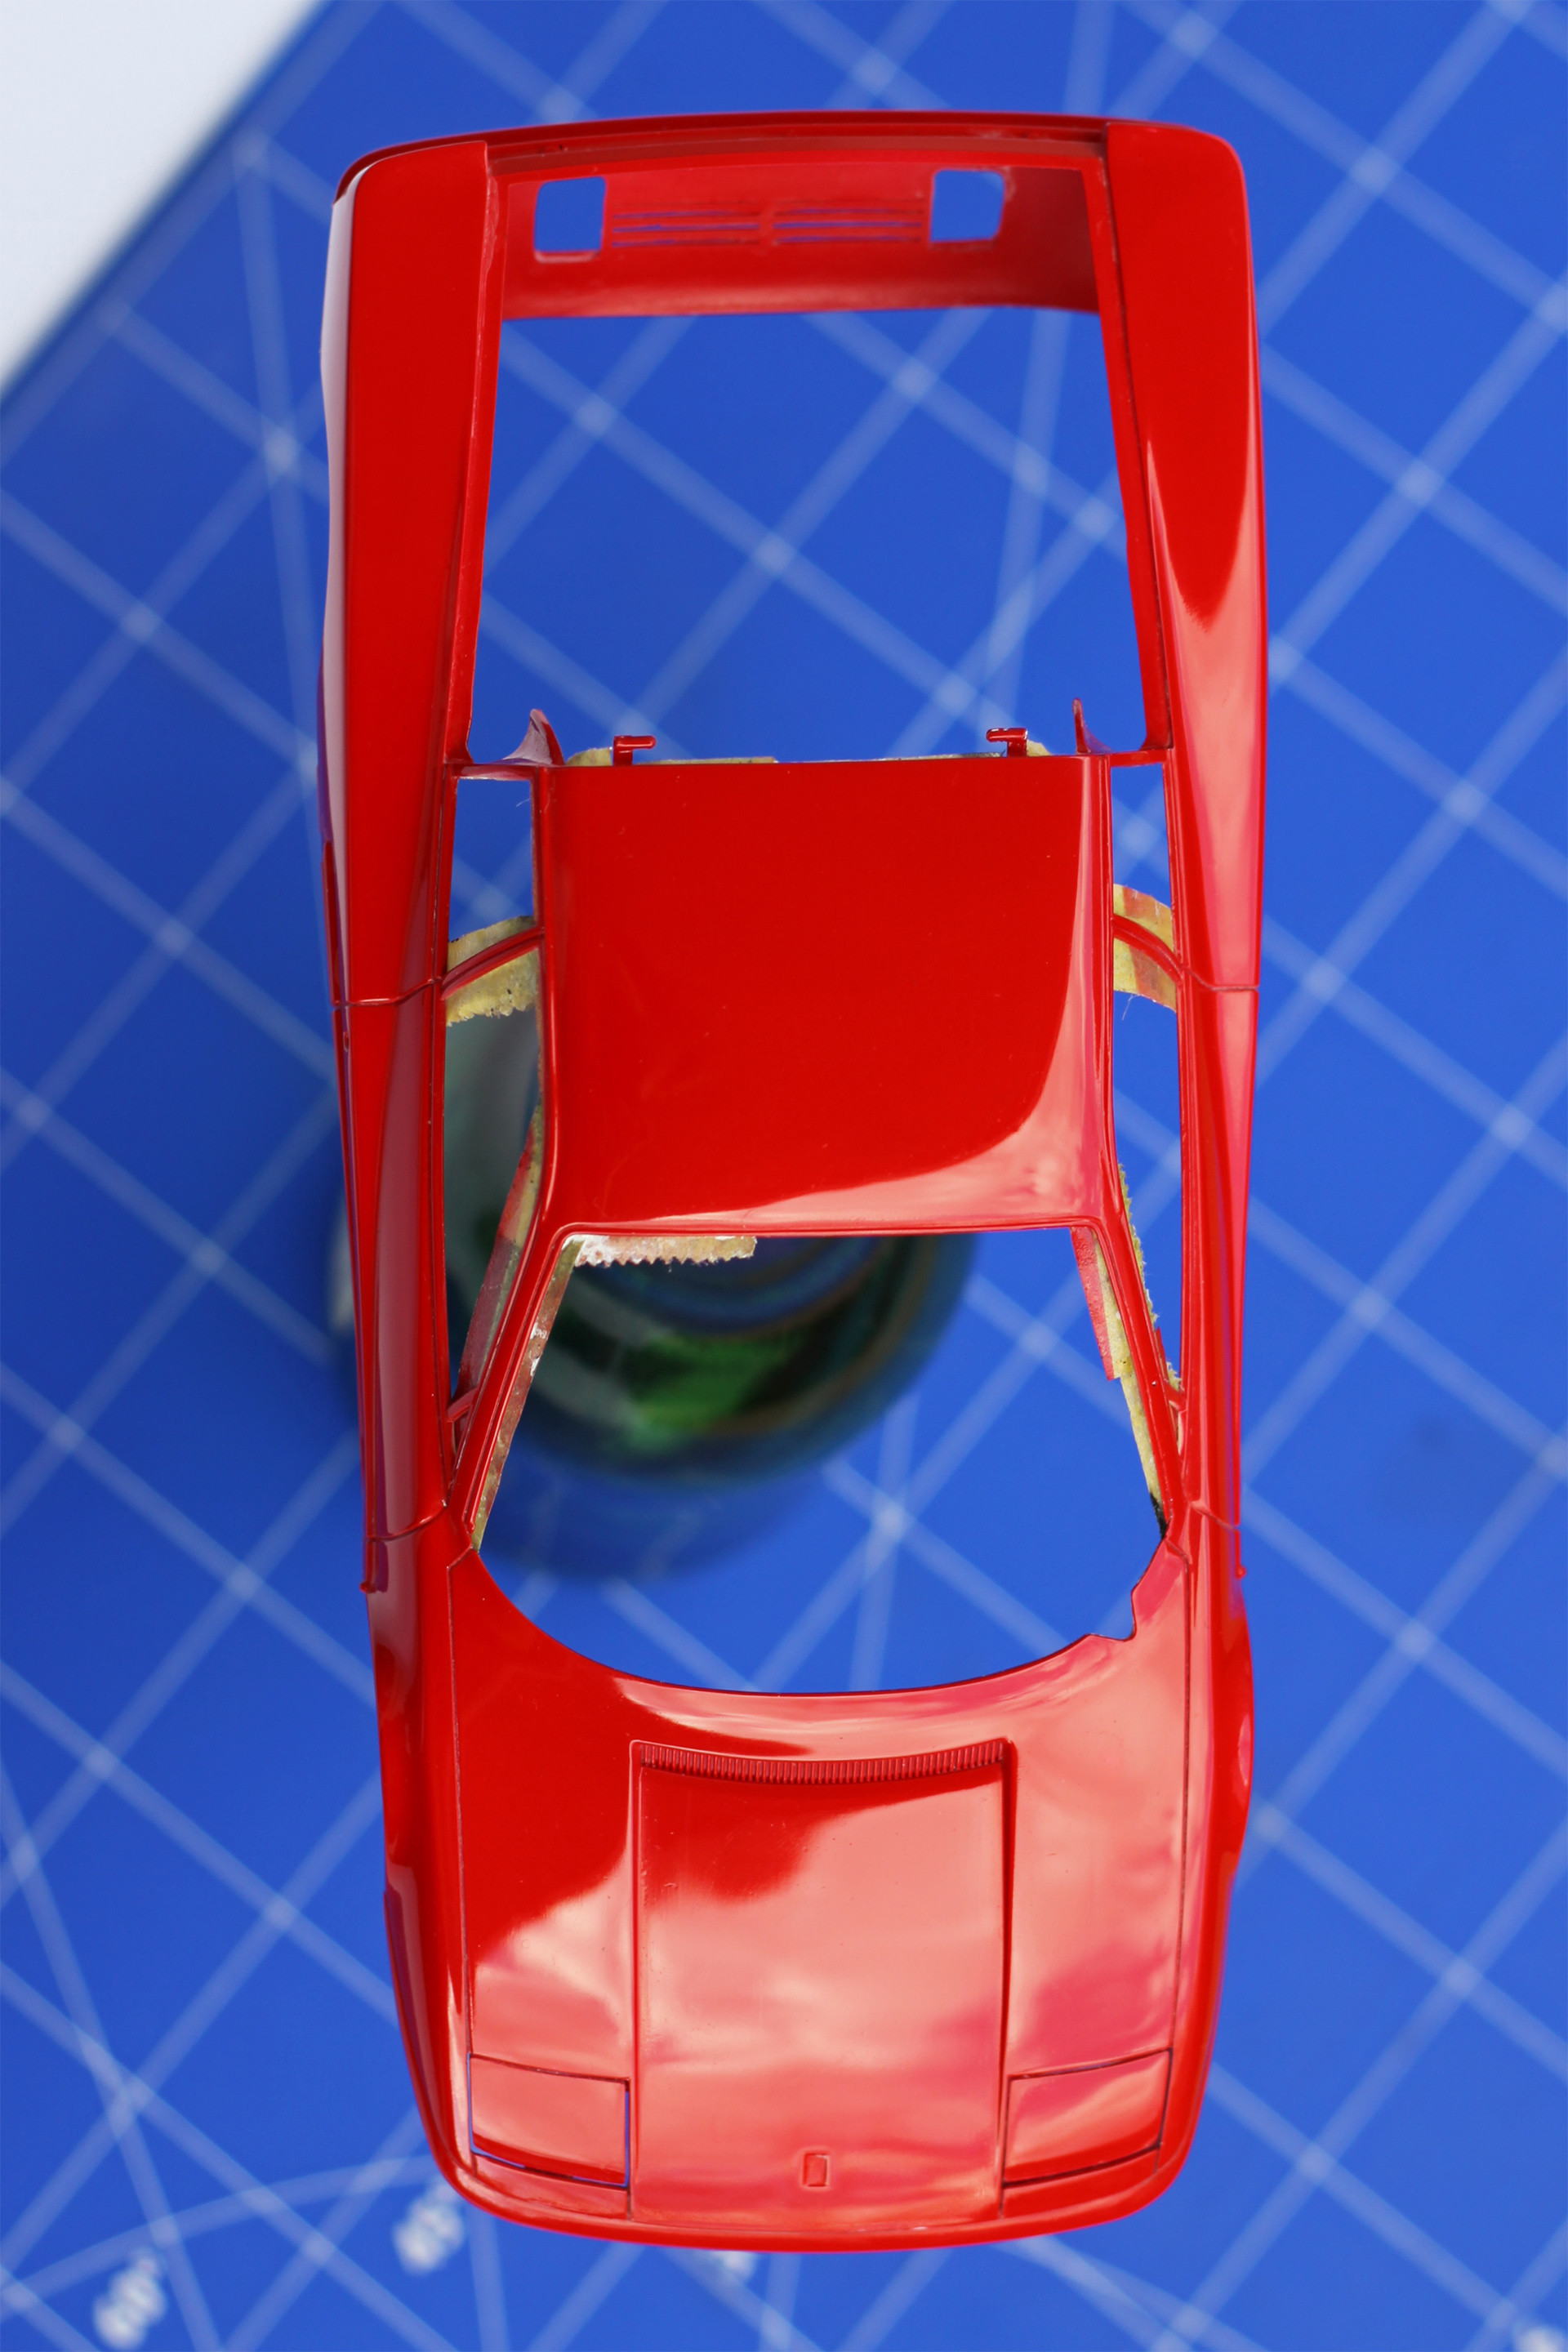
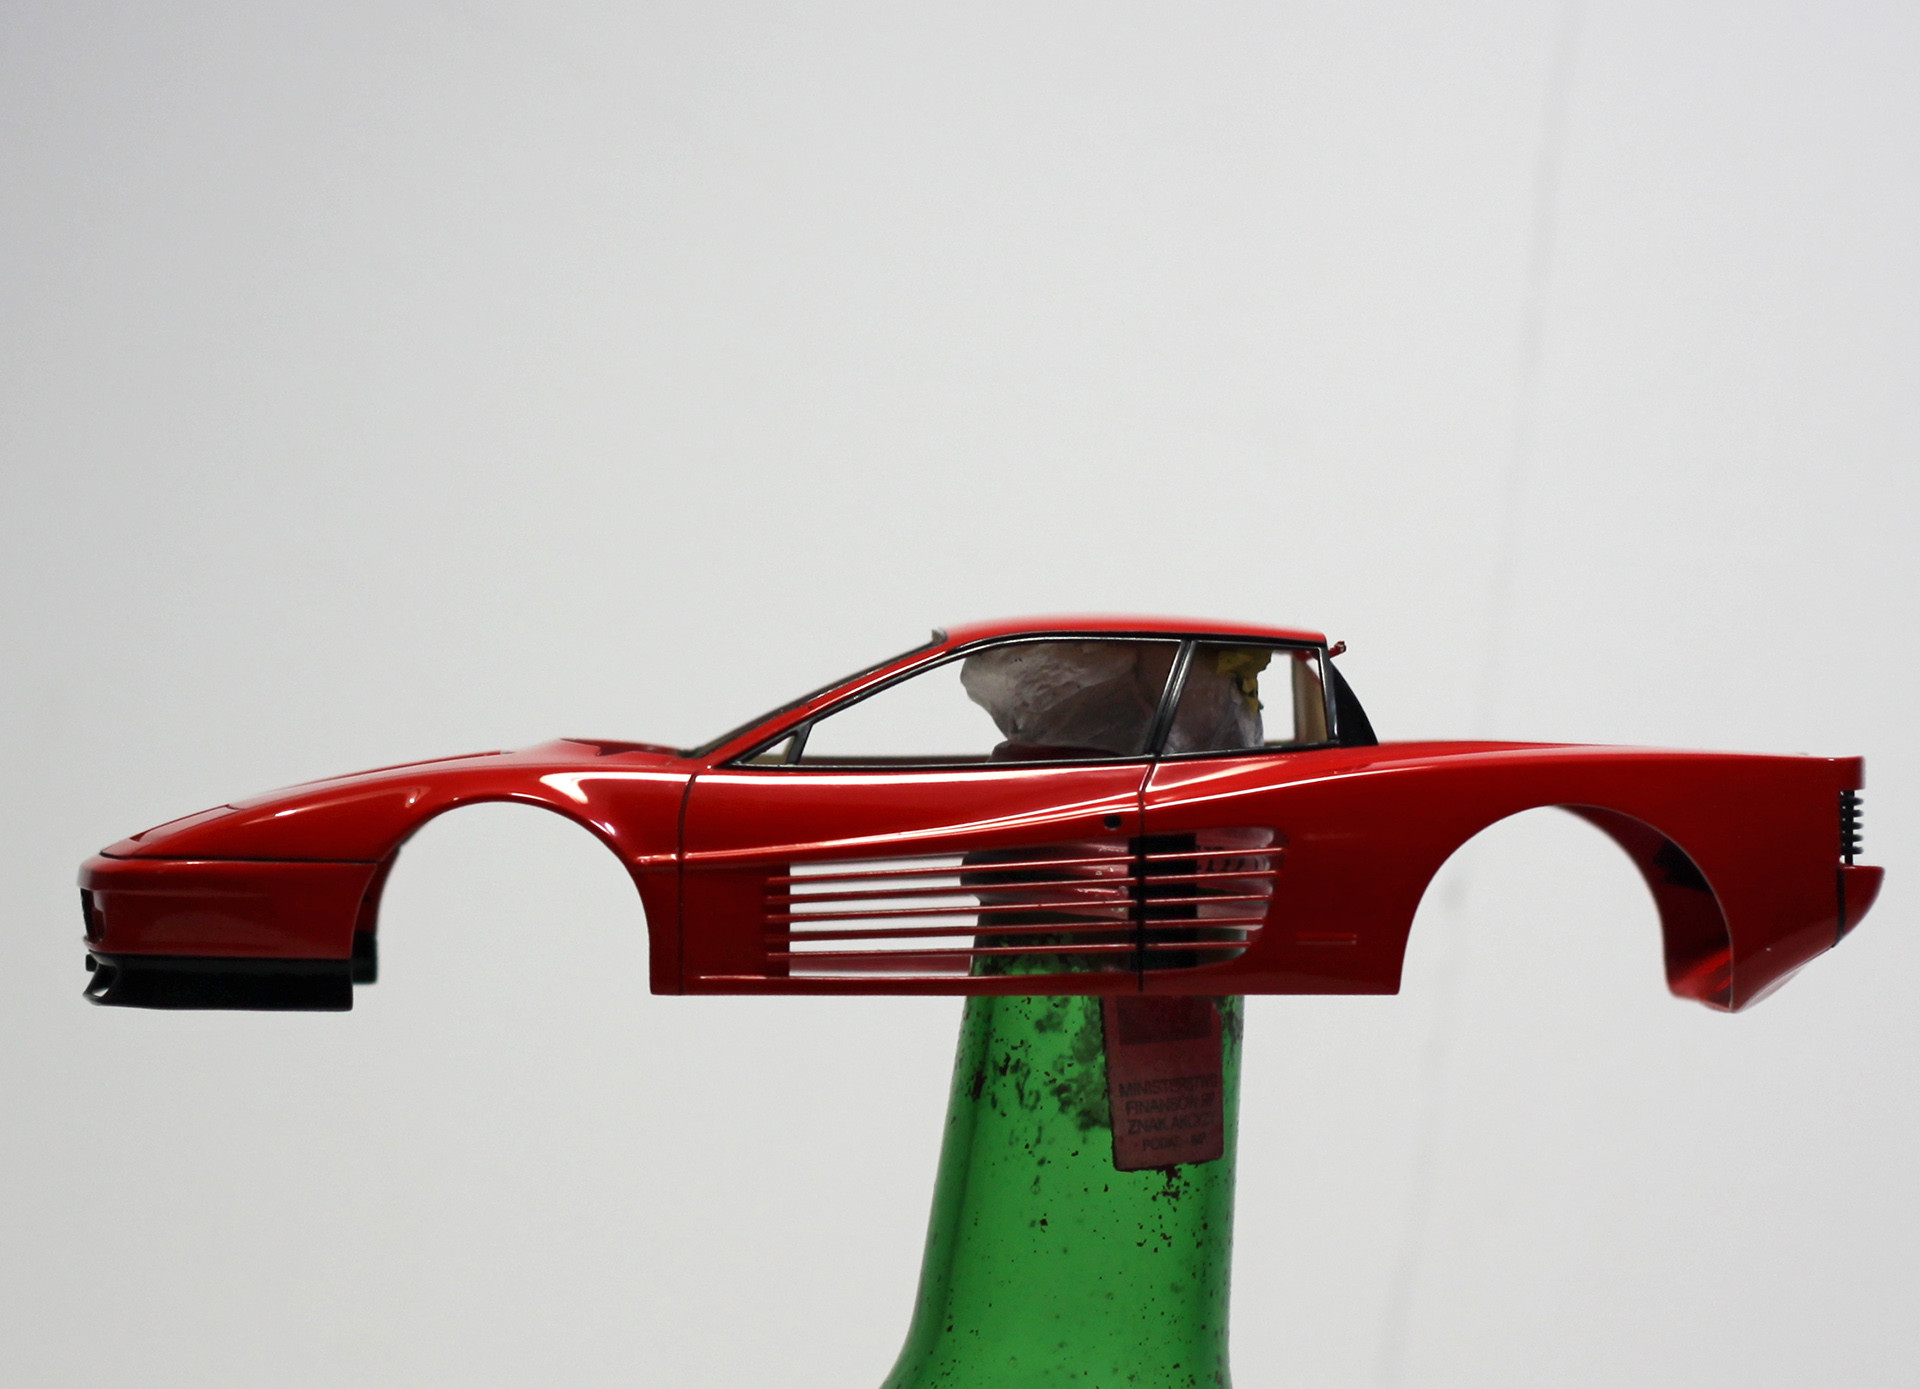
I started to prepare the body. All imperfections were sanded with files and with water paper 1500 and 2000. Earlier I traced all panel lines to see the master levels. Then I gently deepened them. I had to pay more attention to the windscreen seals, because at this point the panel line was clearly disappearing, but it finally I fixed it. In general, the fit of the model is very good, except for one element. The tailgate sticks out where it joins the roof edge. This can be gently corrected by applying a fairly tight hinge, but the small still gap remains.
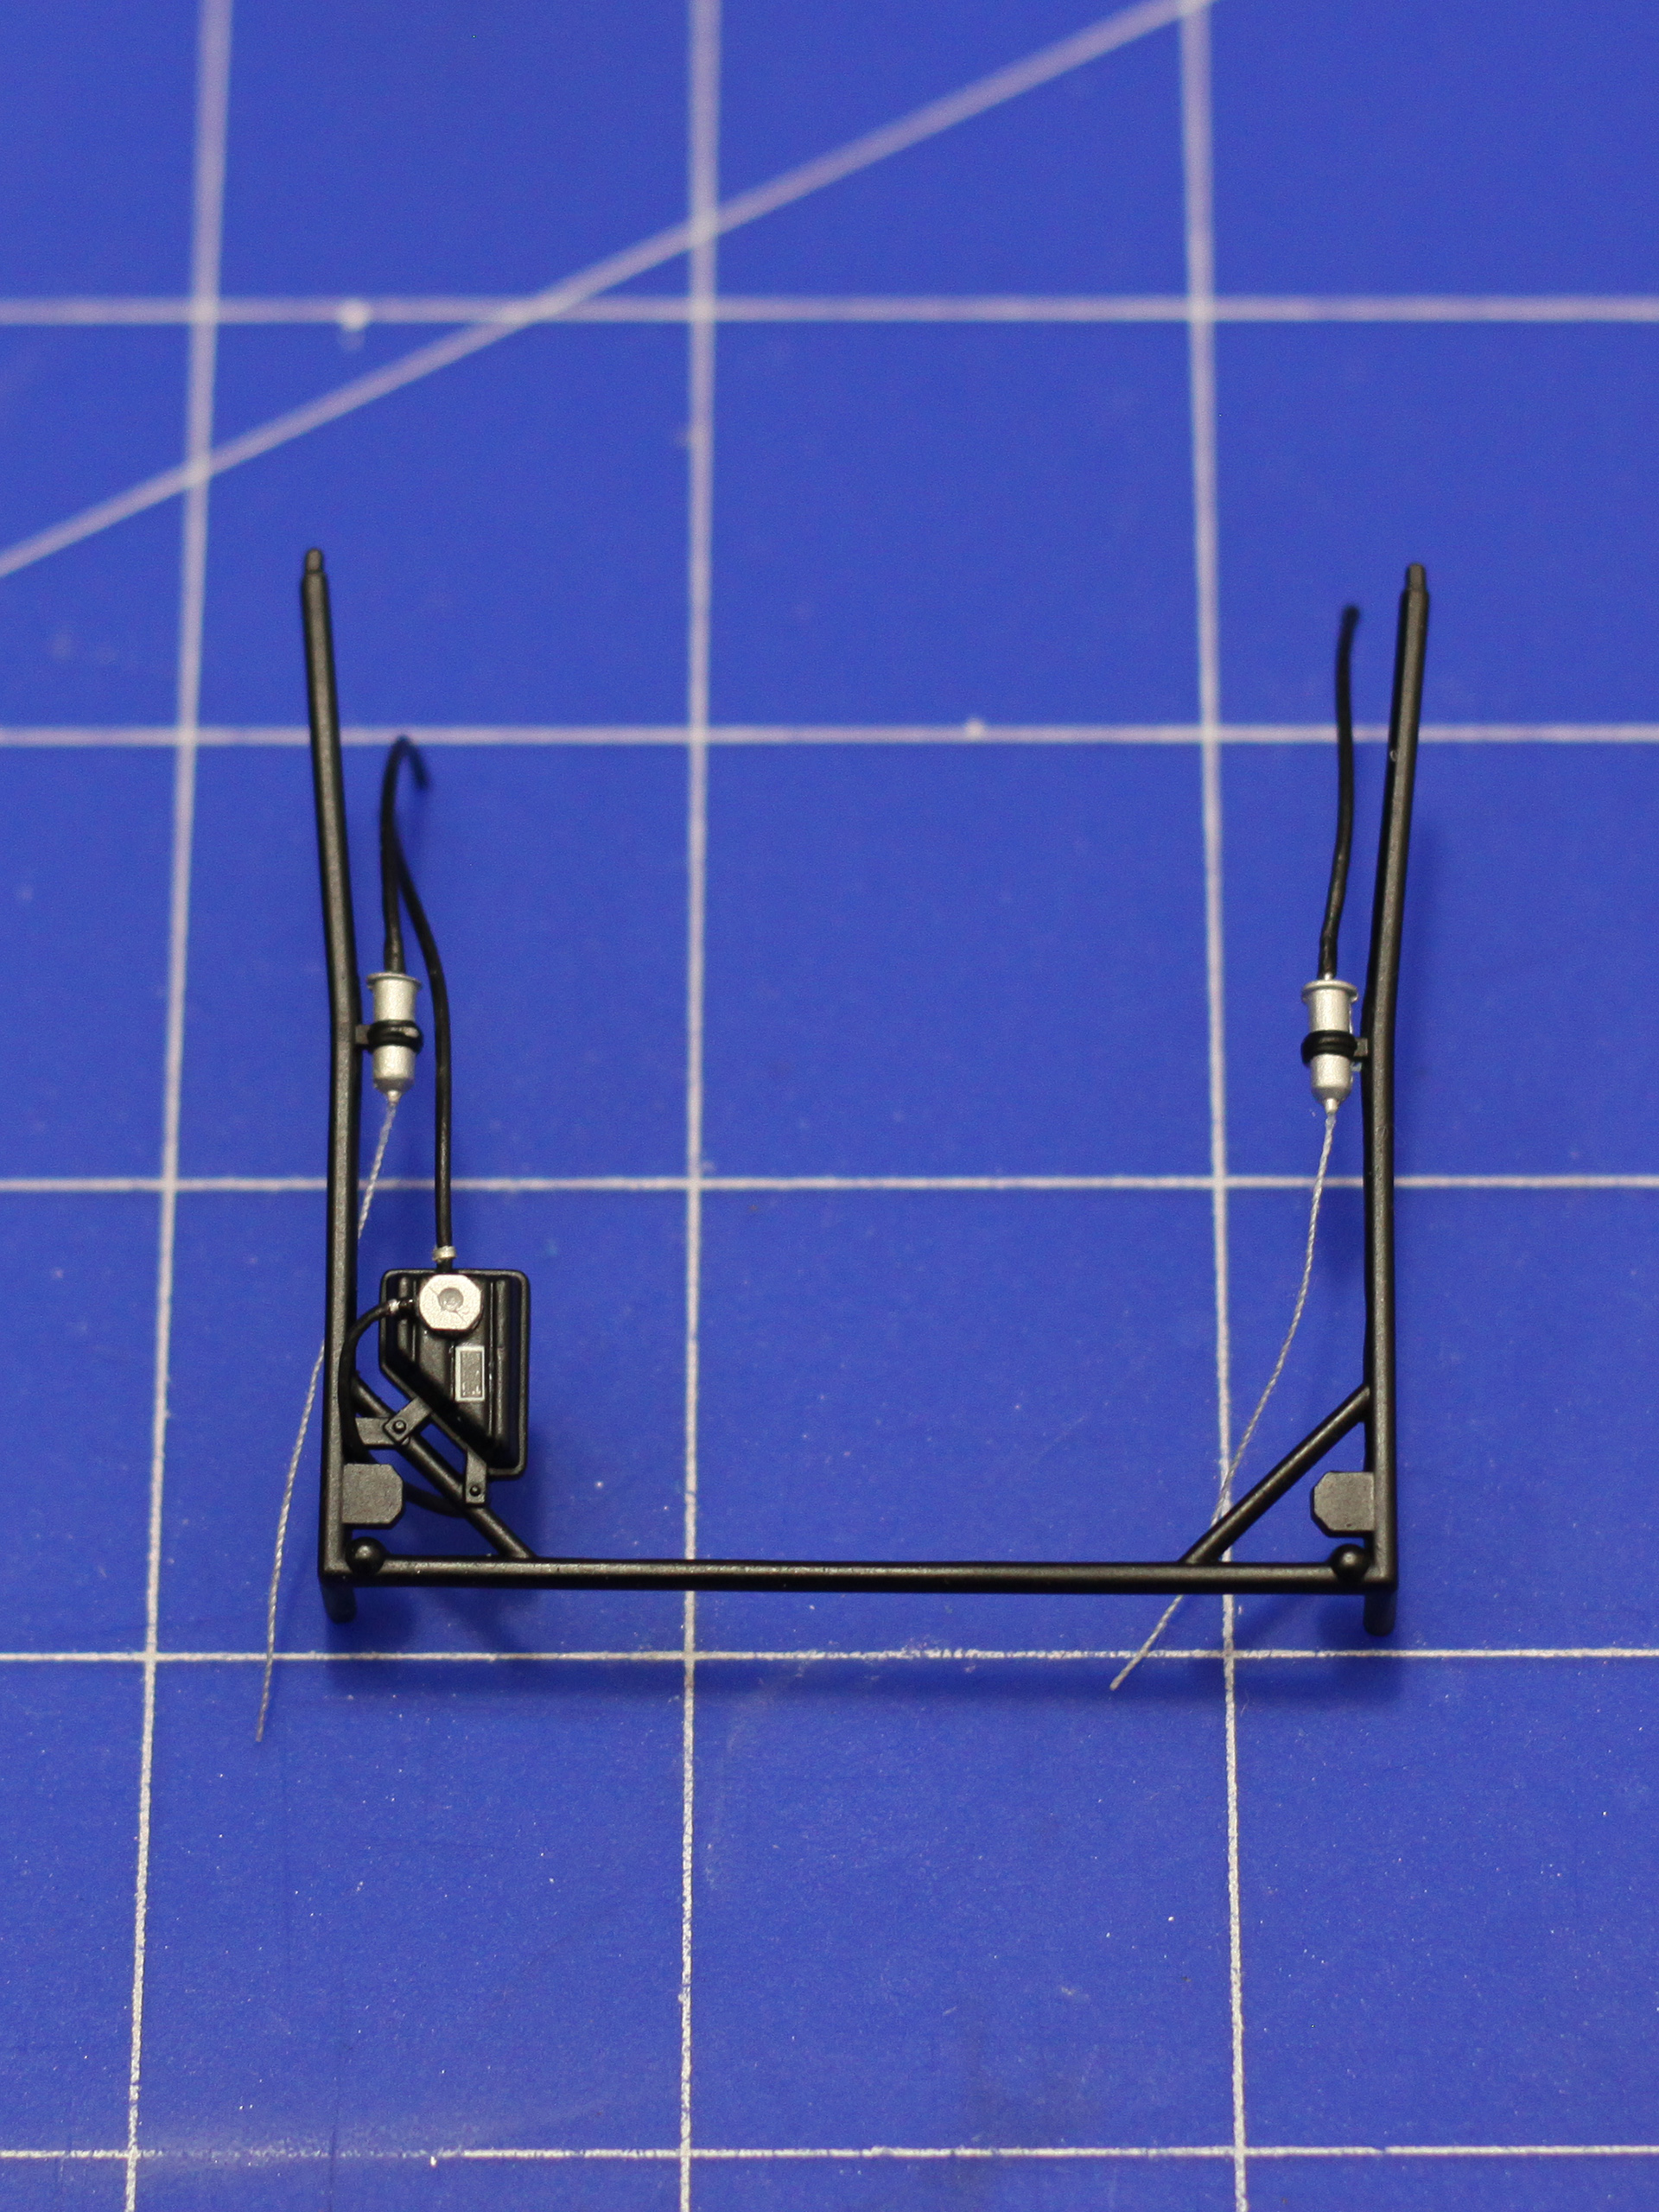
To avoid later problems of mounting the mirror, I made its additional mounting hole.
I also glued a small wire into the hole drilled in the mirror, which will be fitted into the hole drilled in the A-pillar.


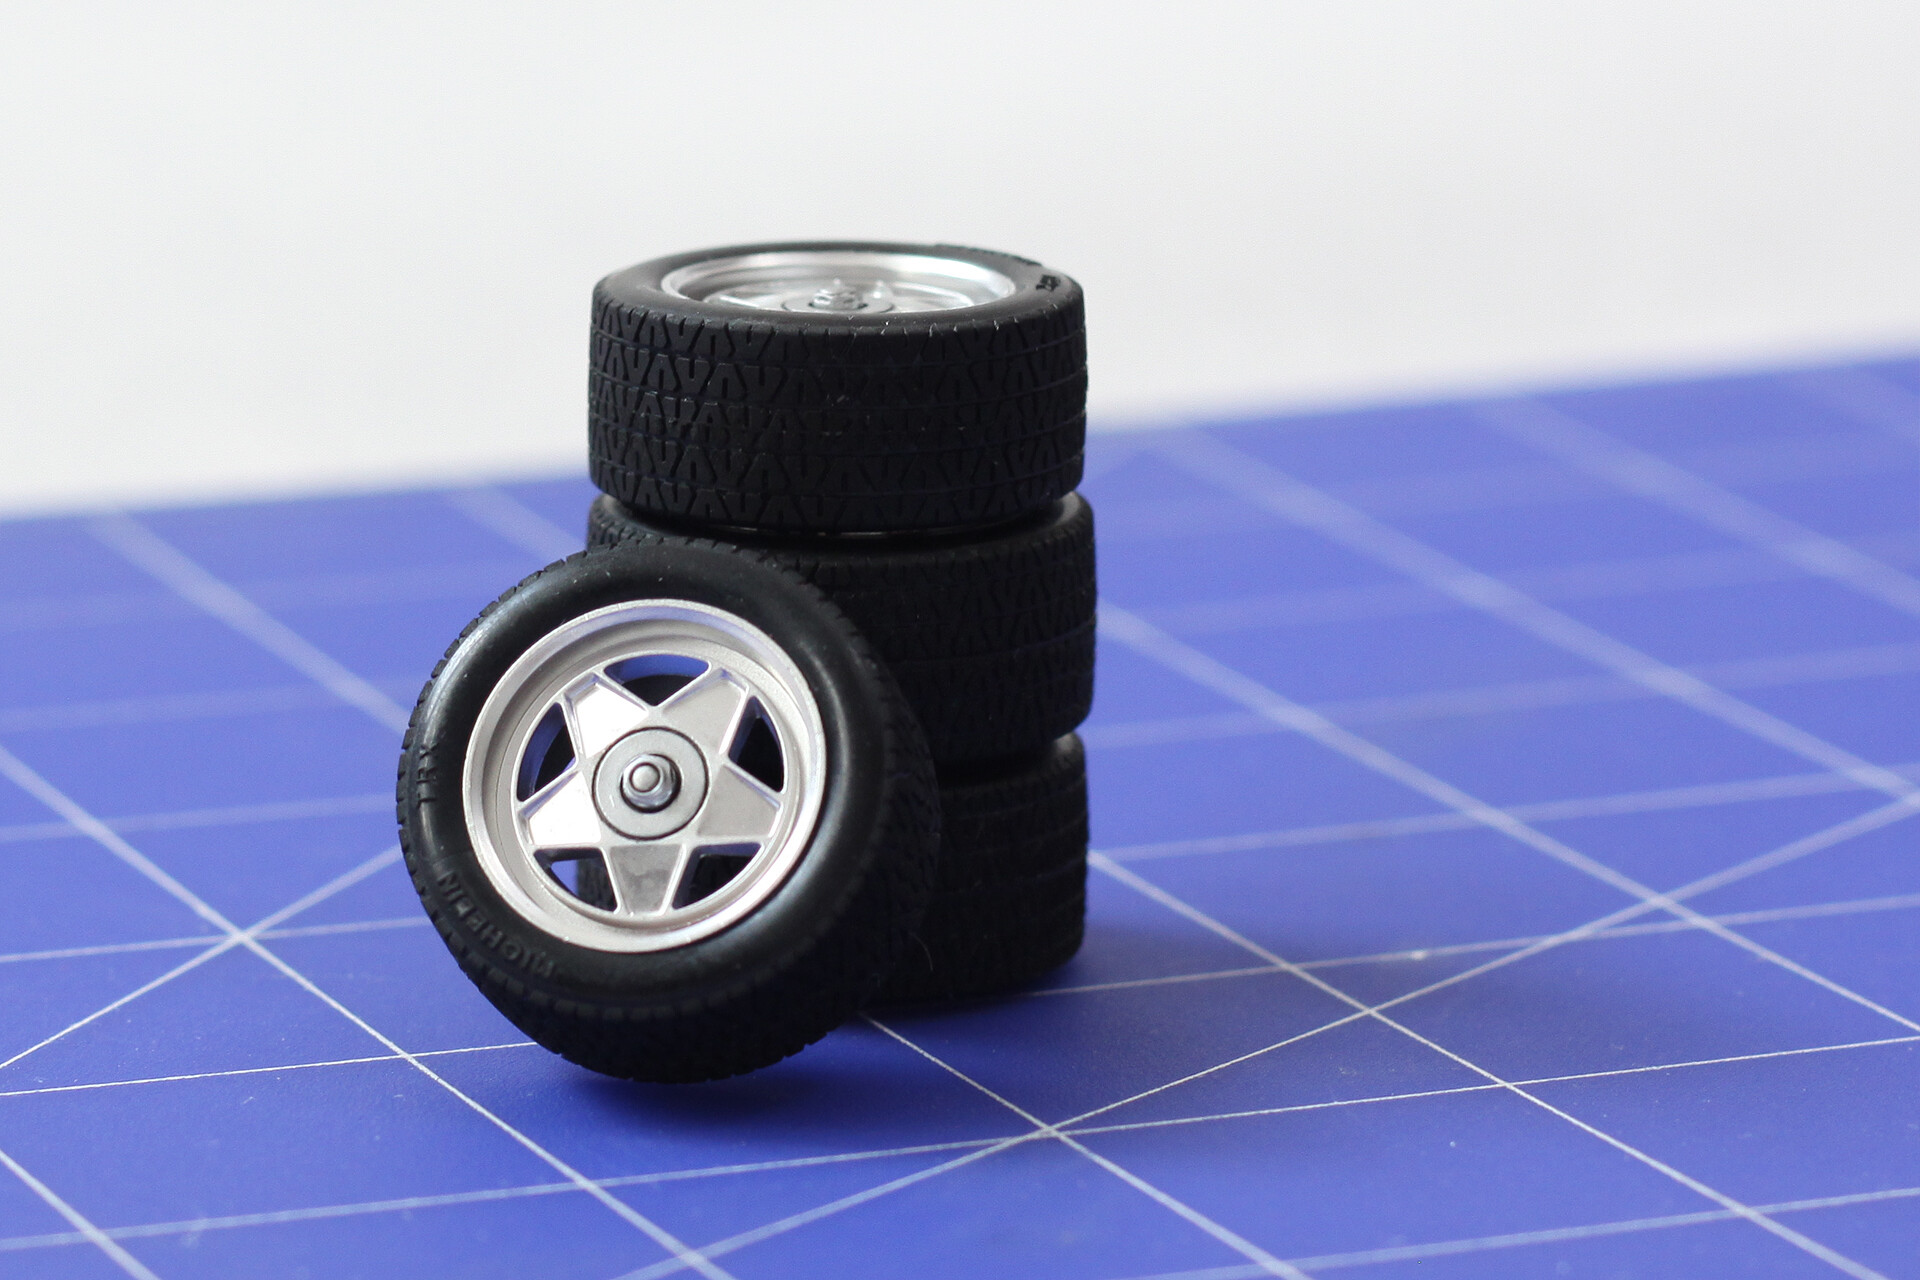
The rims were already chrome-plated at the factory and looked good enough that I decided to leave this coating. I only painted, as said in the instruction, caps and nuts with X-11 chrome silver. After experiences with painting the exhaust with X-11 acrylic from Tamiya, who left a coating with visible grain, I decided to try with enamel from the same manufacturer.

I applied the paint by an airbrush of course. Enamel in this color works much better than acrylic. The surface is uniform and reflects light nicely. Already after opening the jar, you can see a huge difference between them - acrylic looks like having silver particles similar to brocade floated there, while enamel looks like liquid metal.

In the end I applied a black wash. However, as I painted with enamel, I couldn't use Panel Line from Tamiya, who is also enamel. Wash must always be a different type of paint. If I used Panel Line, during washing I would also remove paint from the caps, additionally the thinner contained in such a wash could bite into the enamel from the layer below. To avoid this, I made my own wash with acrylic paint. I thinned the black semi-gloss X-18 with isopropyl alcohol. I use Mr Hobby Laquer Thinner to paint with an airbrush, but he also works with enamel, which is why I used softer isopropyl.
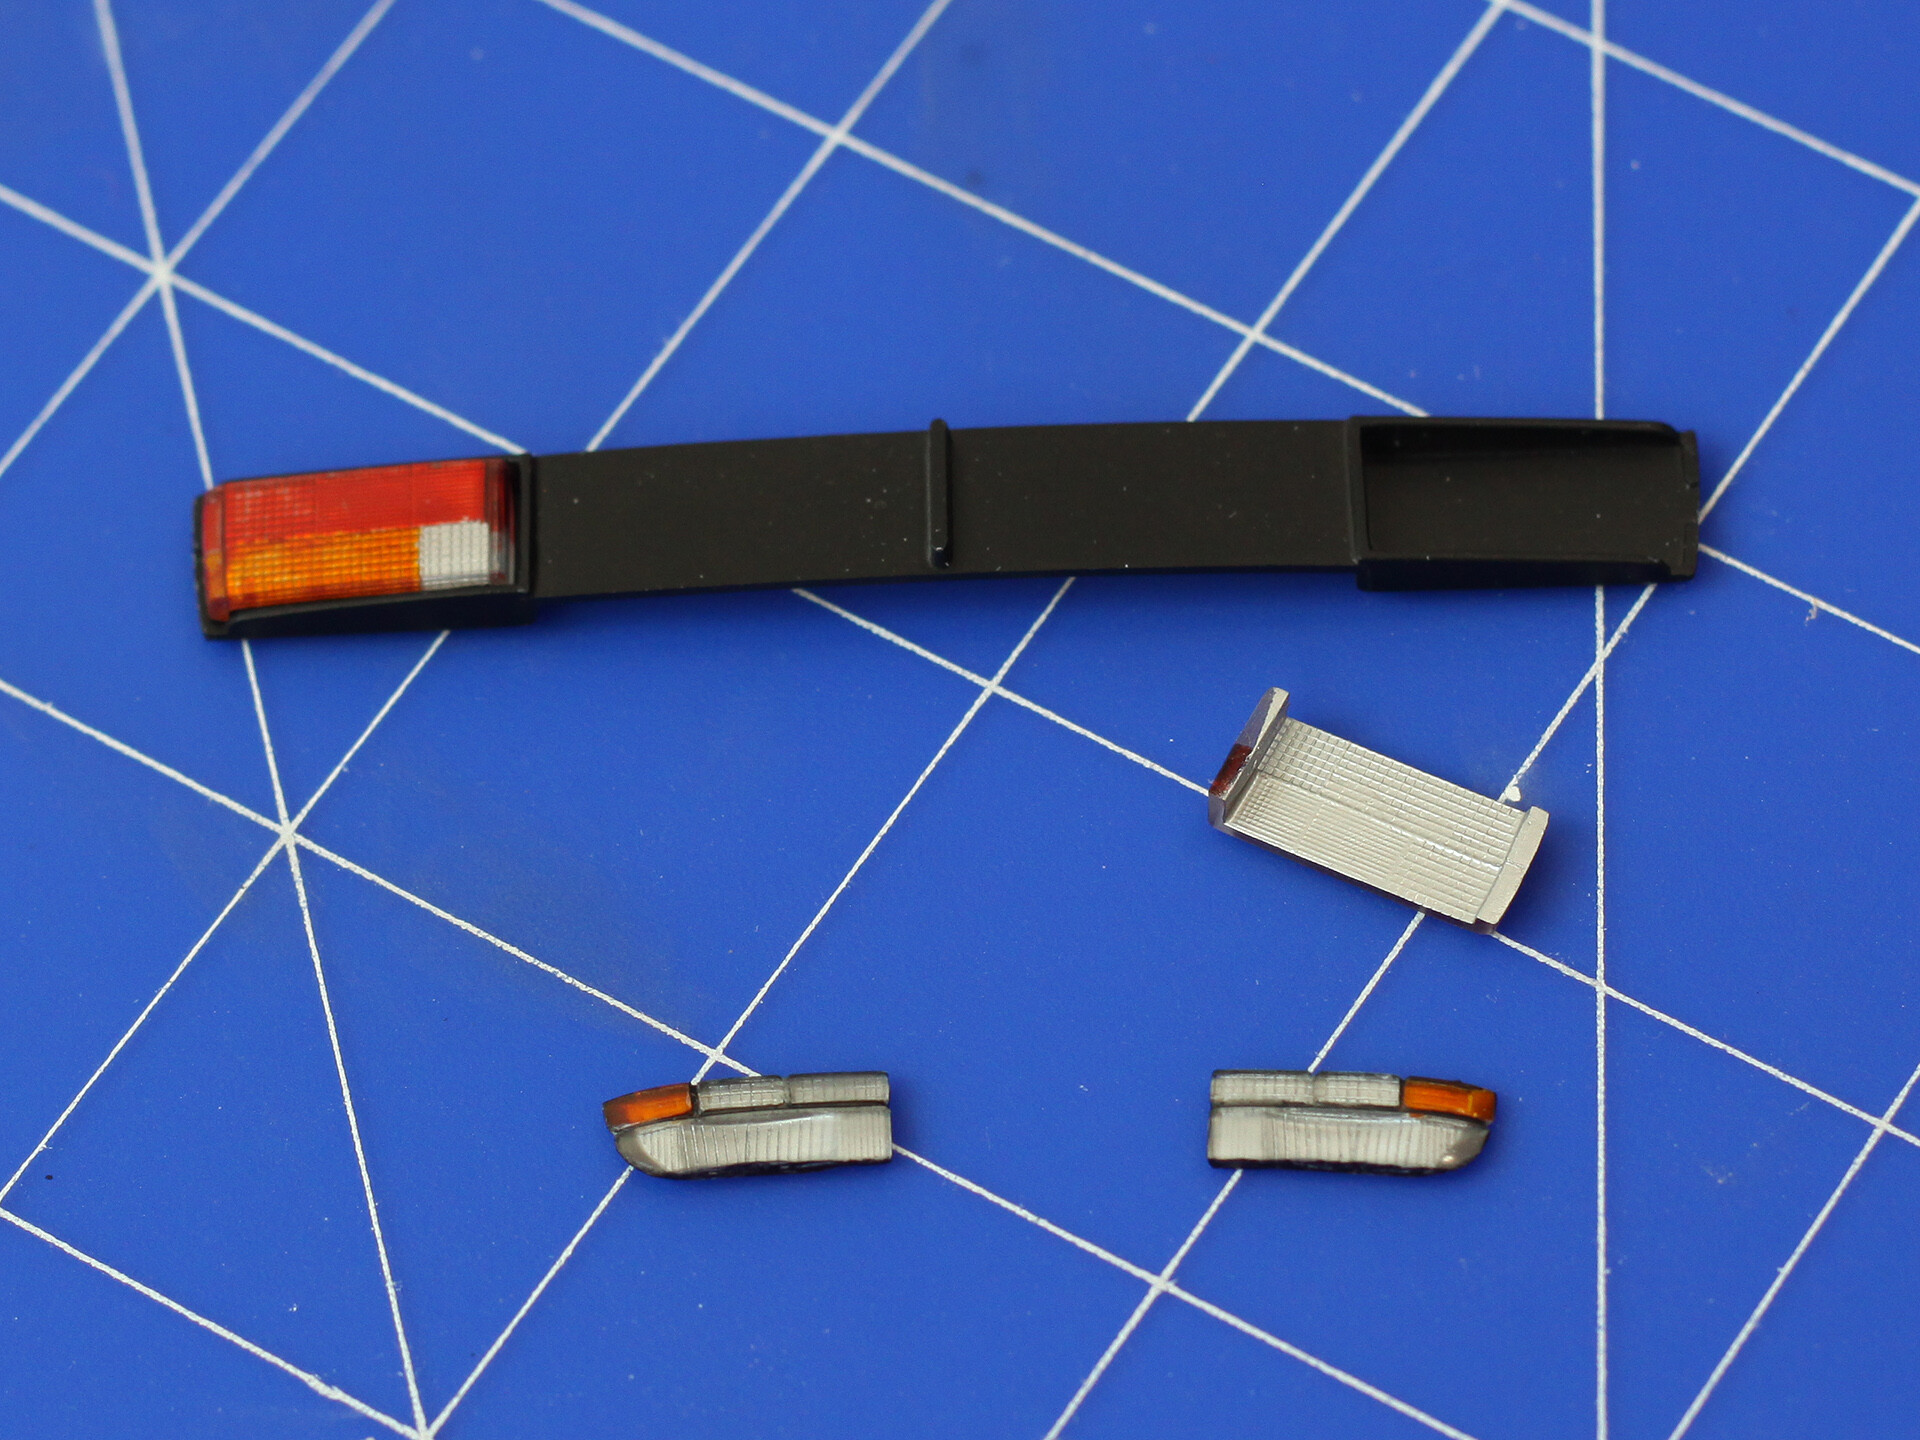
The lamps were brush painted with X-26 and X-27 clear paints. I applied two thick layers from the inside. Instead of painting lampshades on the body, I used the way I saw at the International Scale Modeller channel on YouTube (LINK). I applied silver paint (in this case X-11 enamel because of the reason described earlier) directly to the lamps from the inside. This gives a particularly good effect with lamps previously painted with clear color paint. The headlights were also washed in places where there are seals in the original.
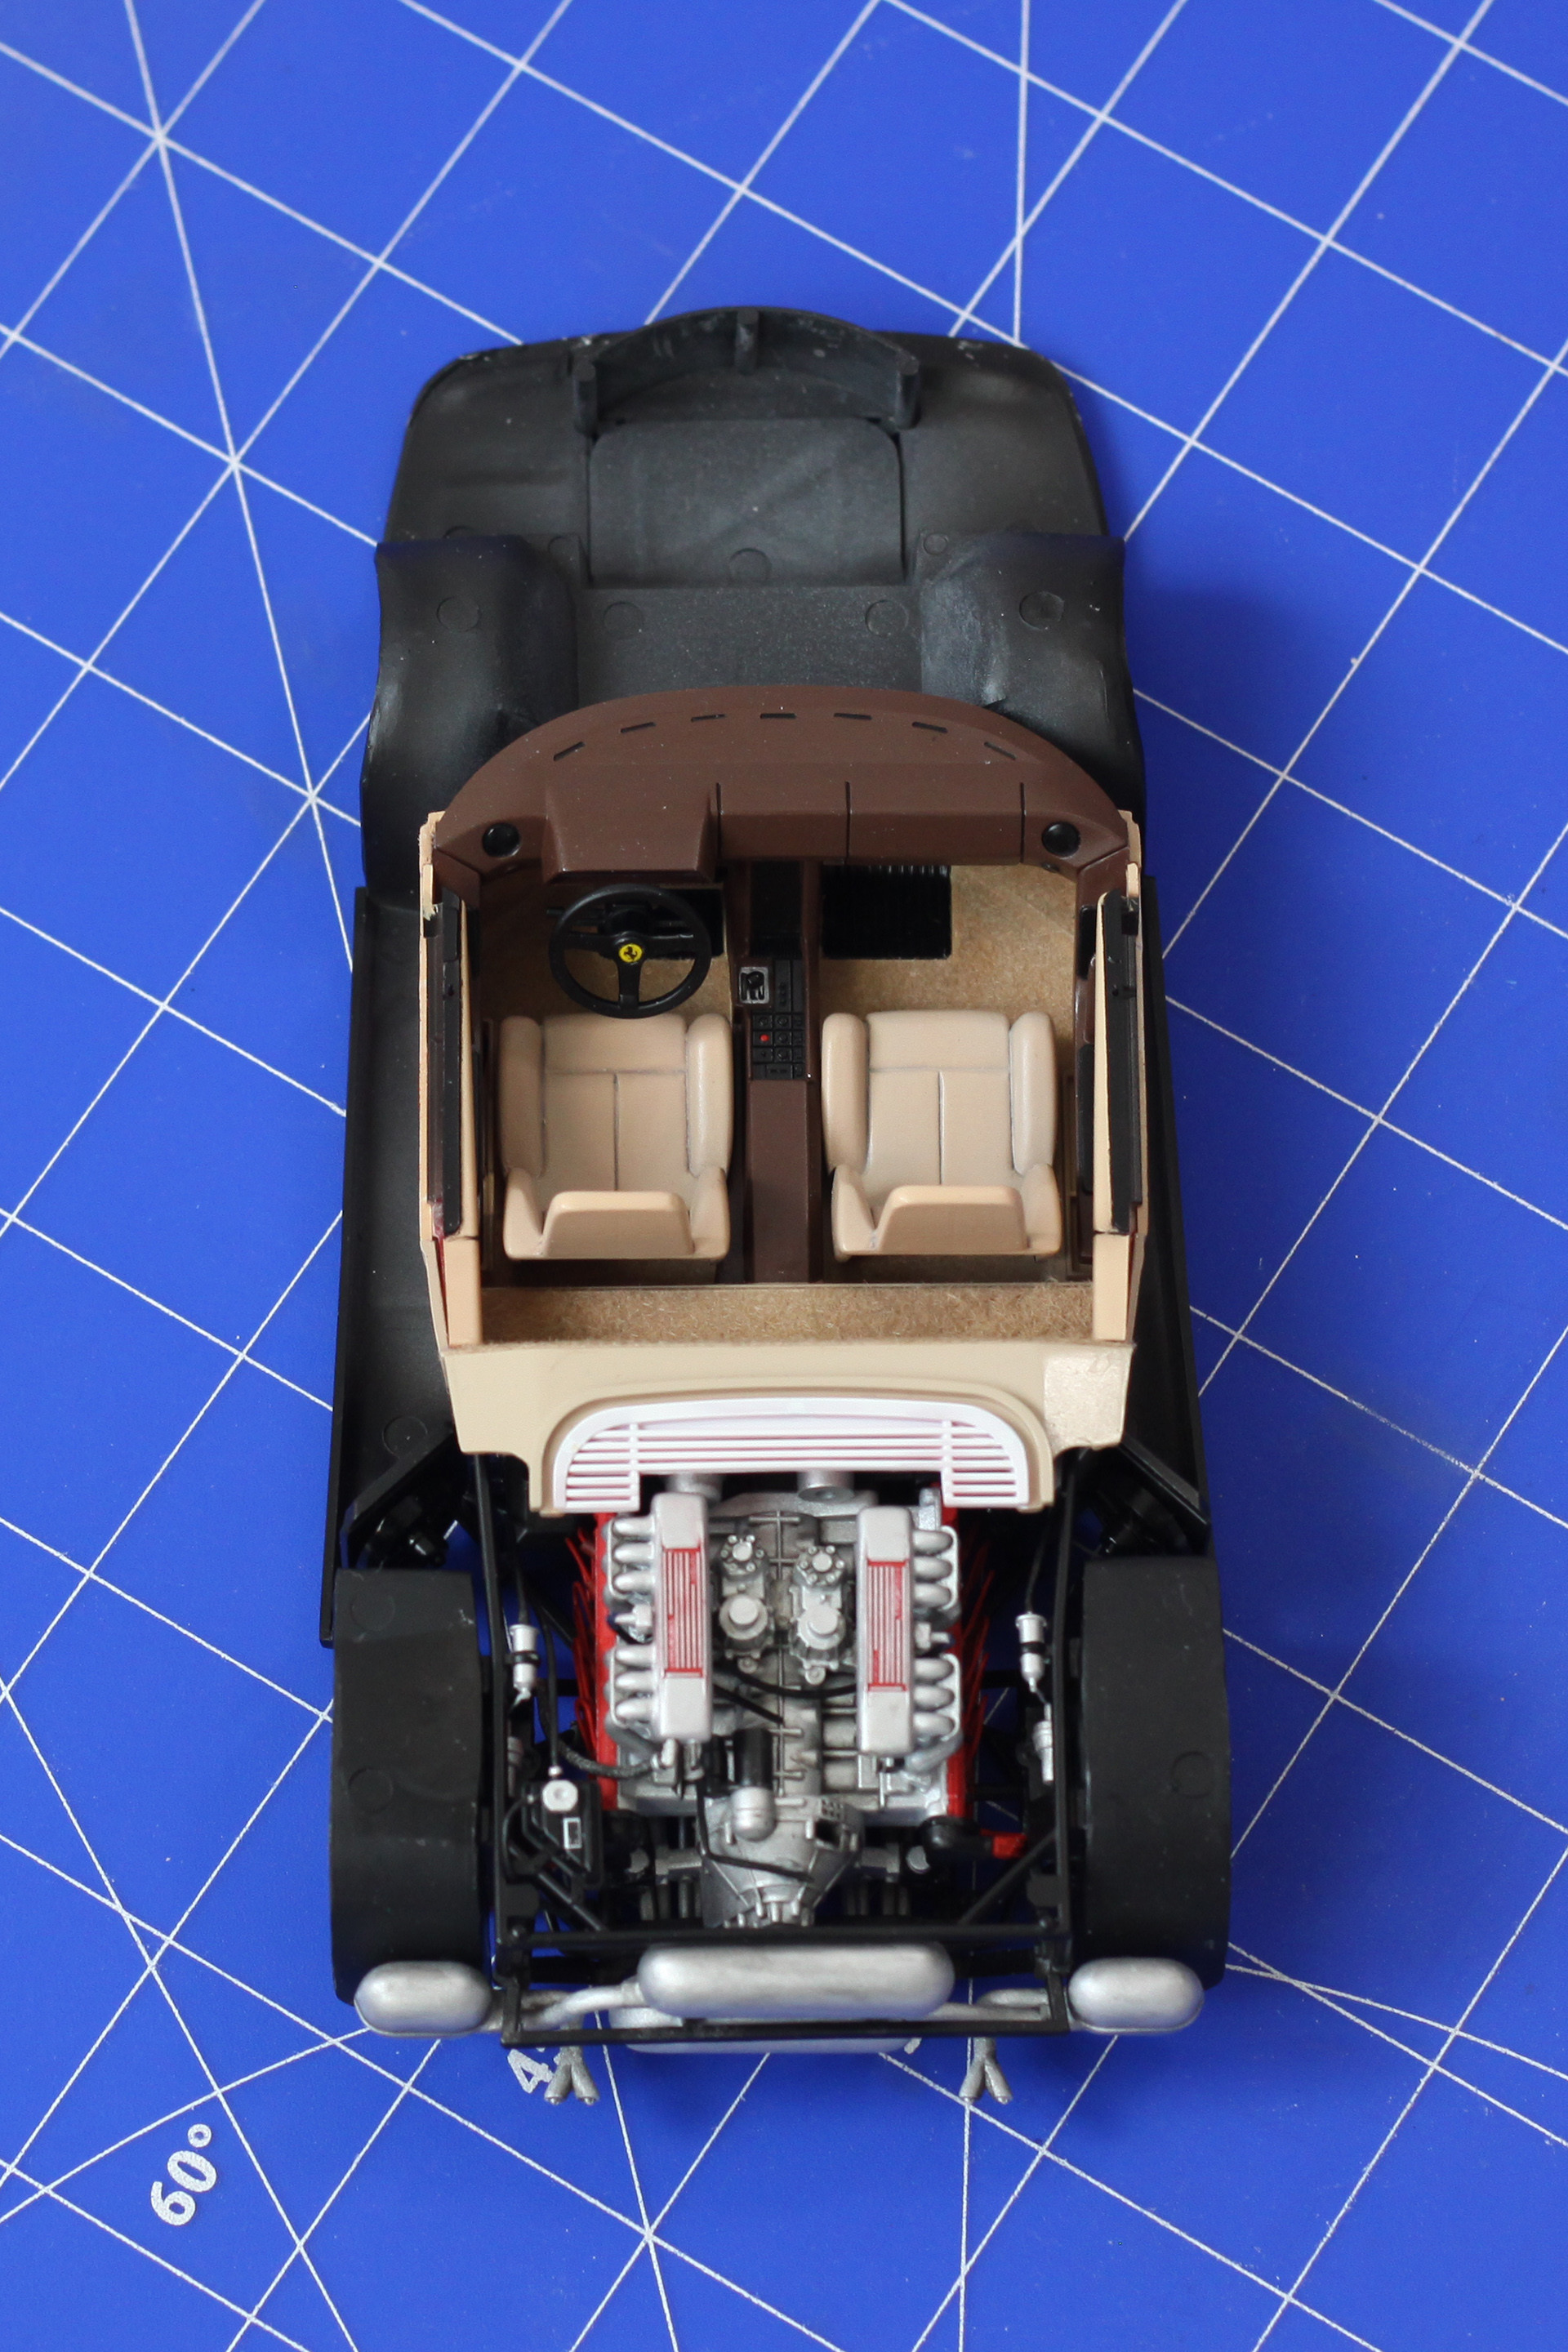
The chassis was painted, so the engine could finally find its place. I had to approach to gluing the motor frame several times. After a while, it was simply detached from the chassis. The weight of the whole engine is quite large, and the contact points to put a glue are quite small. Tamiya Extra Thin Cement wasn't strong enough. I resolved the issue by thick cyanoacrylate. By the way, I started using it to glue painted elements and I am very happy with it. It can be applied precisely and you don't need it to put too much. The holding force like every CA is very good. Tamiya Extra Thin Cement is a great adhesive for joining unpainted elements, but with those aleady done you need to be very careful because it can cause a lot of damages. The adhesive dissolves the paint, and in addition is very thin, so one drop can easily wander where you do not really want it. It just happened to me while gluing the chassis, which is why I had to spray some part of the chassis again.

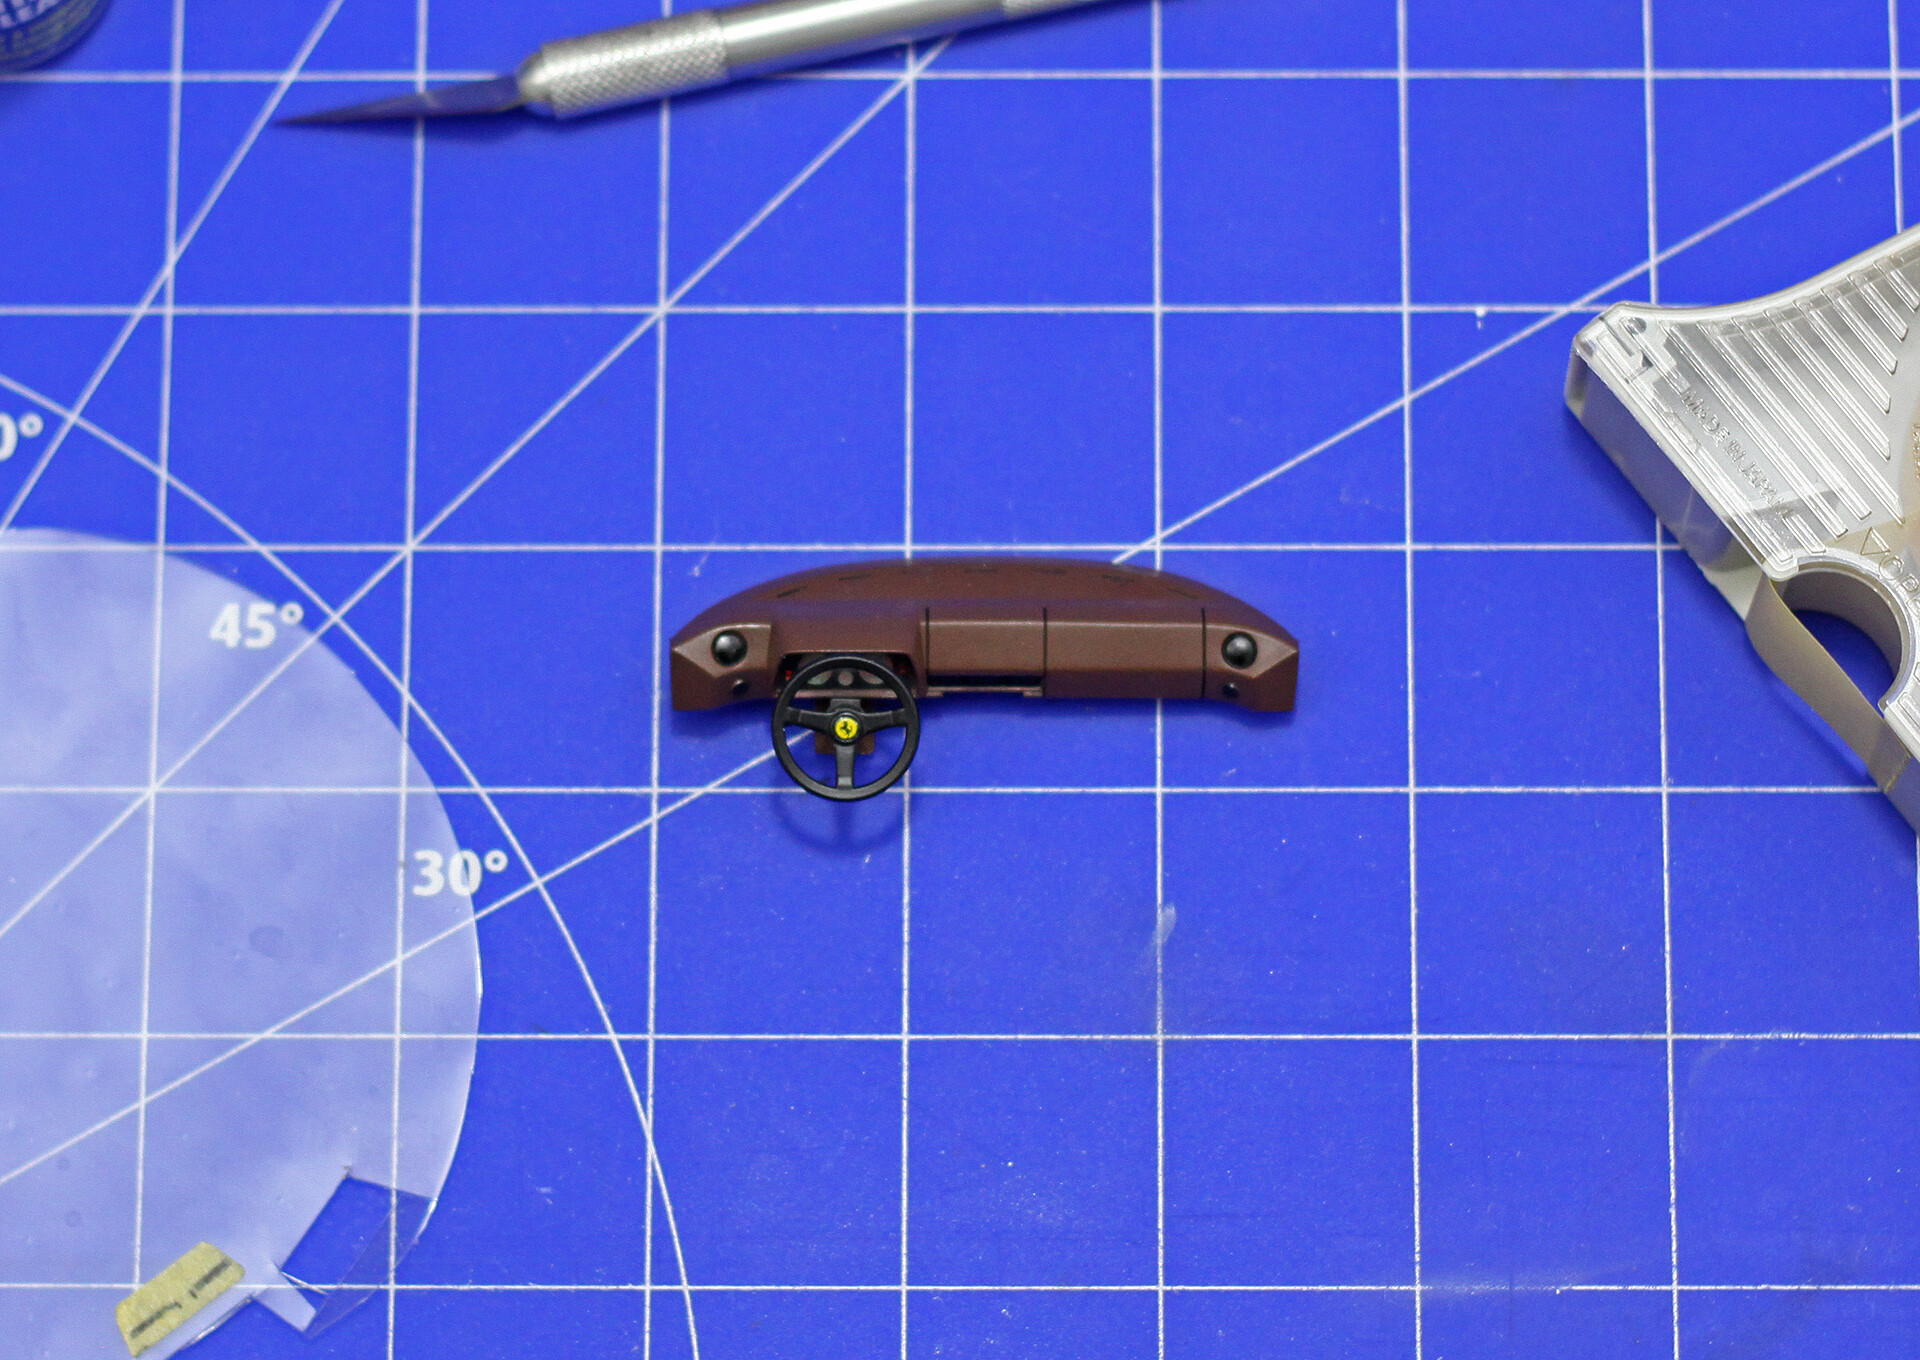
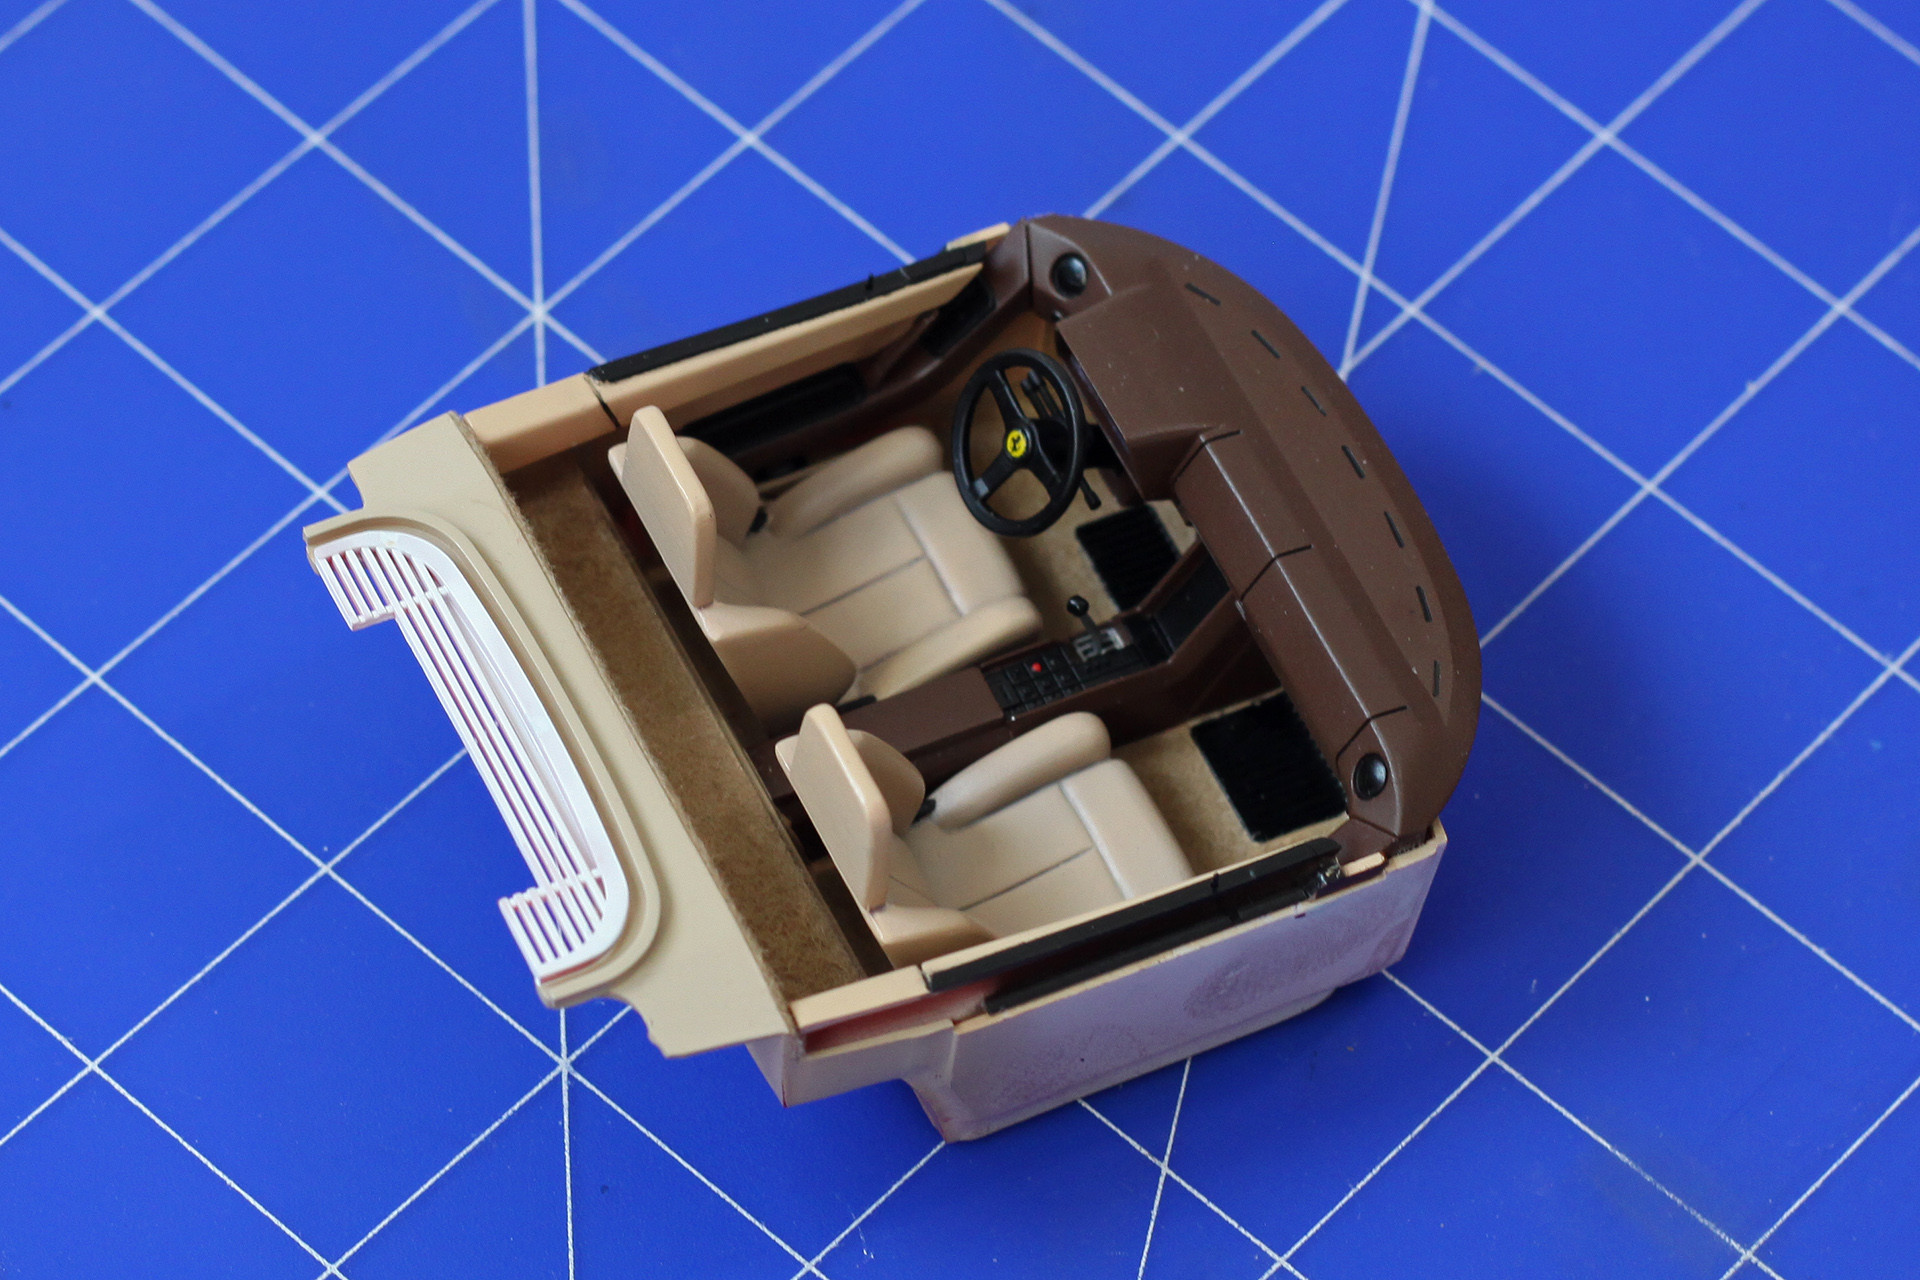
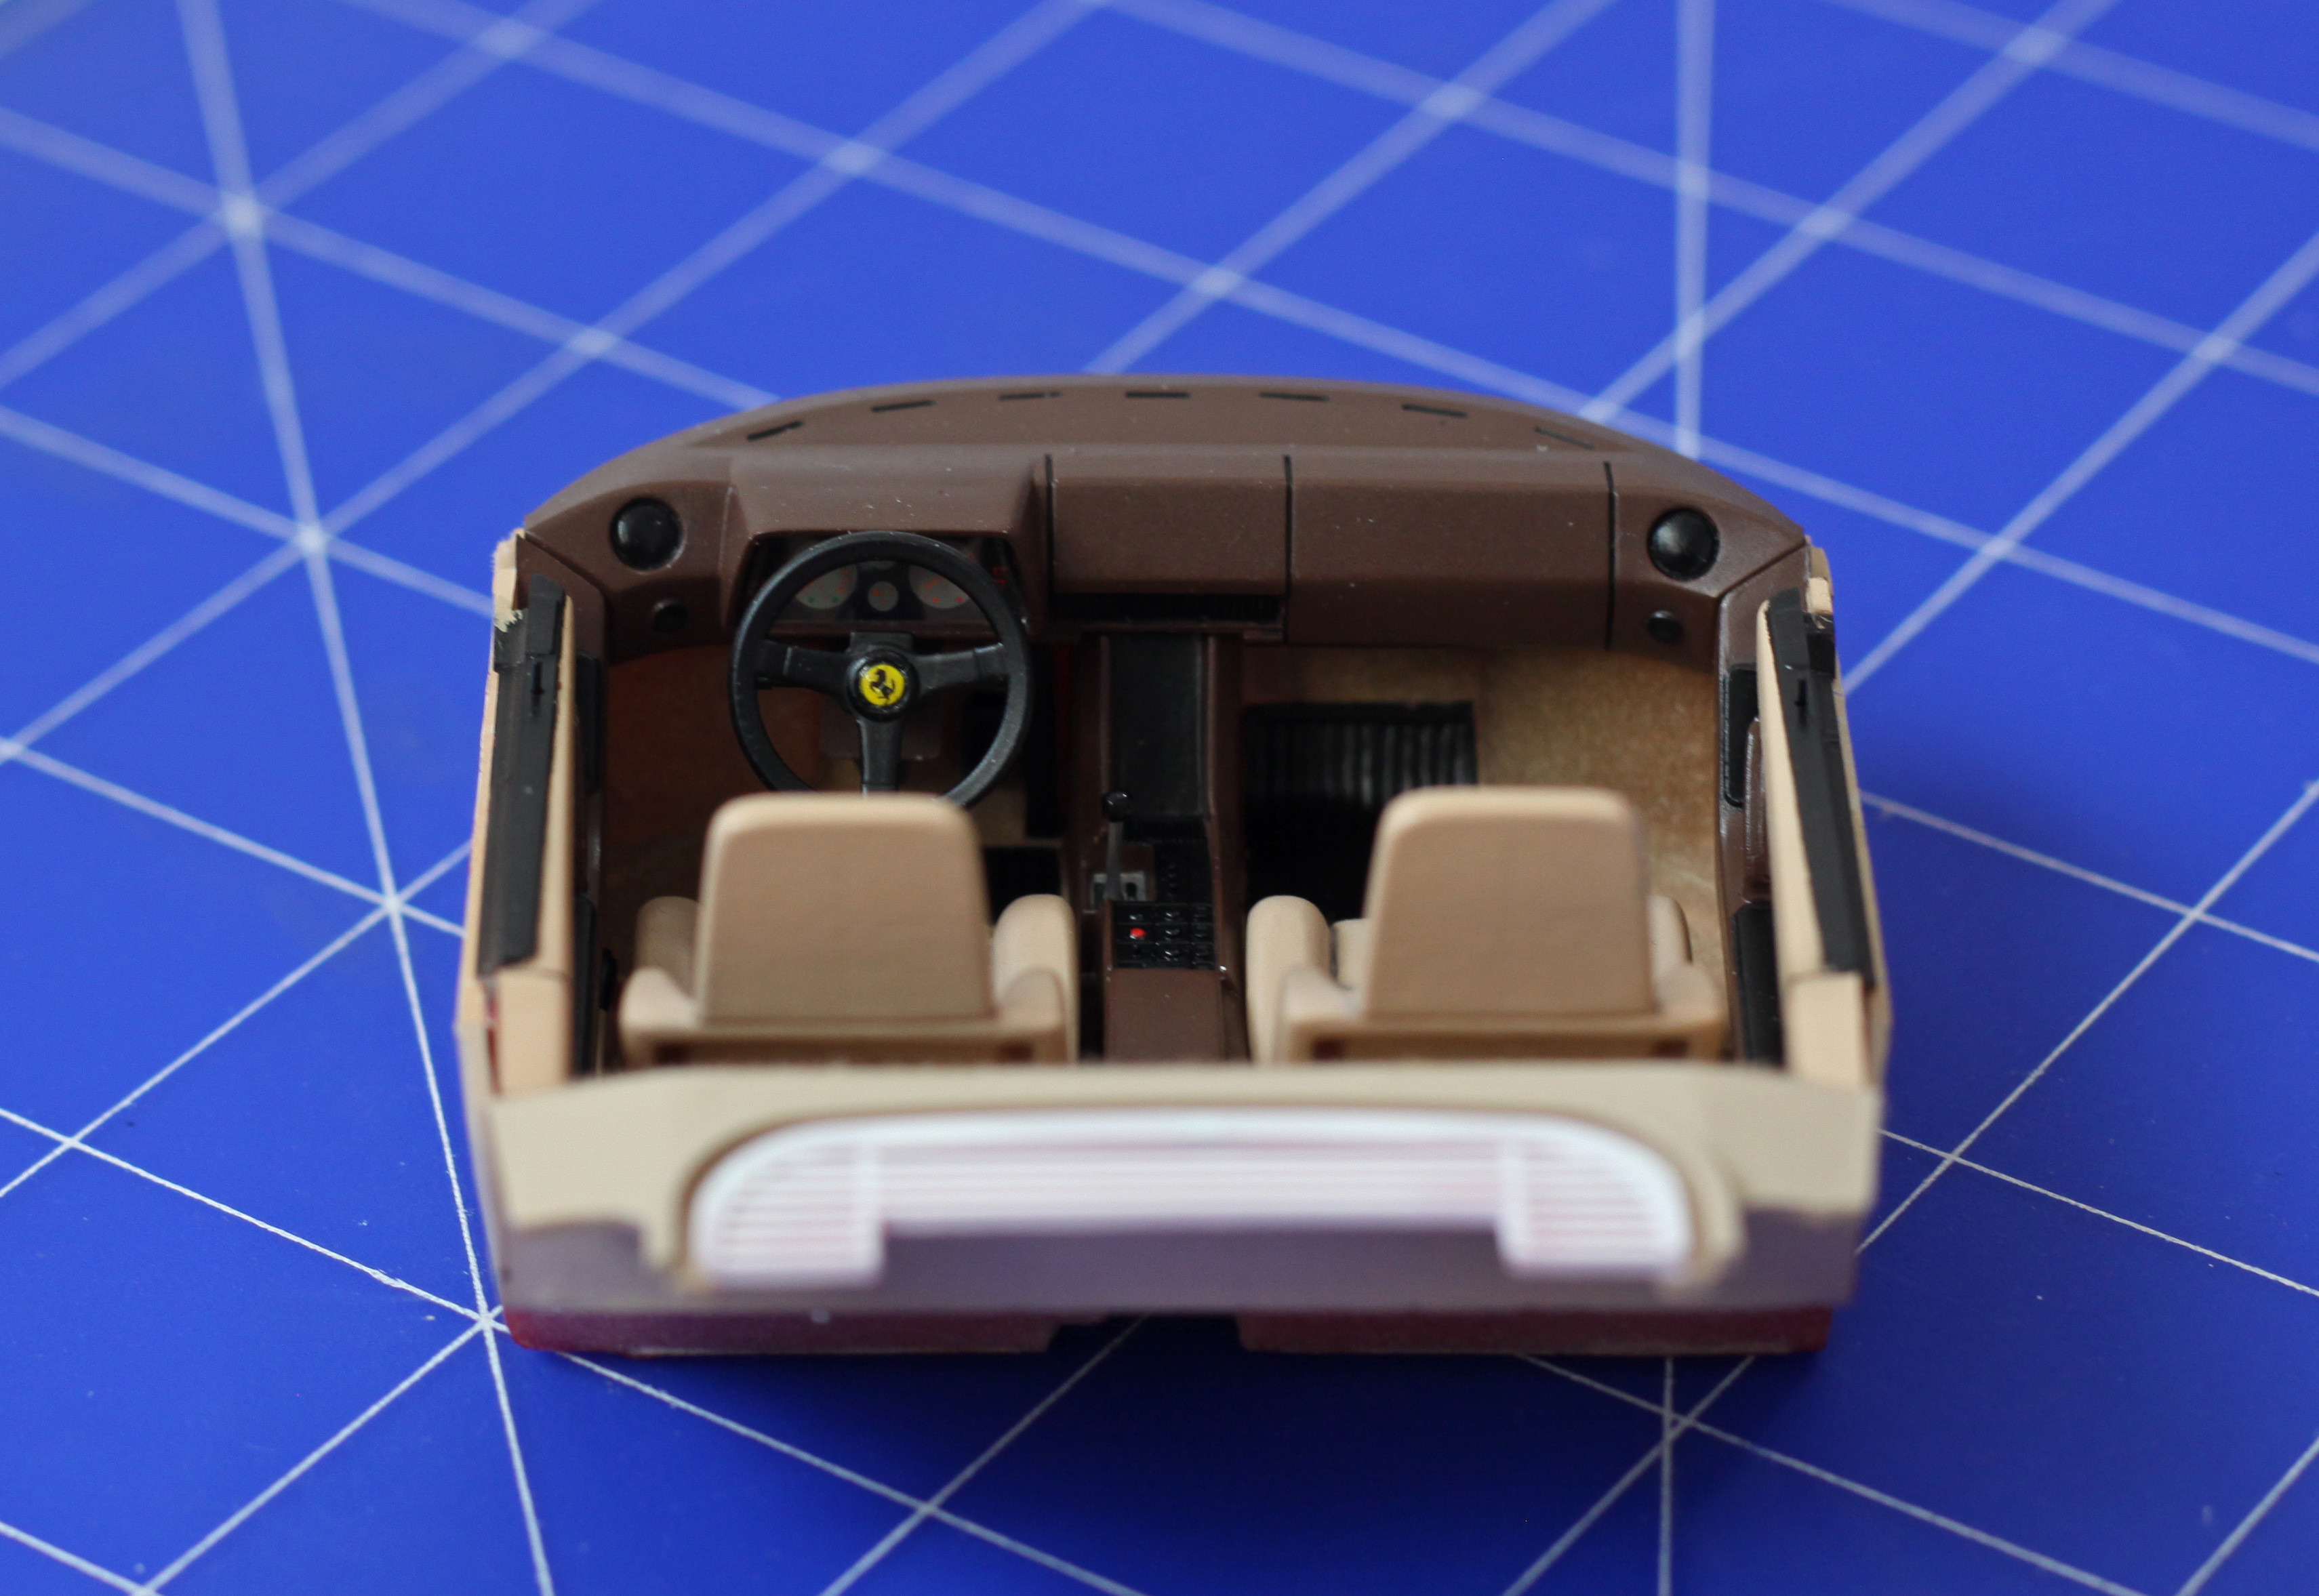
The chassis is finished so I started with the interior. A dashboard was painted with a primer and then a mixture of acrylic X-9 and XF-10 (1:1 ratio), i.e. brown gloss and matt - exactly as it is in the instructions. On the steering wheel came a Ferrari decal, which I covered with UV varnish later cured with a nail lamp. I cut a glass from the transparent sheet of plastic and placed it in front of speedometer. I left a small gap between them, which gives a sense of three-dimensional. It is a pity that it will not be too visible after folding the entire model.

Previously prepared body was covered Mr. Finishing Surfacer 1500 White thinned 1:2. The coating came out quite smooth, but before applying the color, it will be sanded to smooth it out more.


The interior is 90% finished, the only thing left is to paint the fragment belonging to the car body, which is the rear grille with a piece of sheet metal. I put a flock on the floor and back shelf. I put Panel Line on the seats’ seams, but the lines were way too dark and it did not look natural. So I covered them with a thin layer of paint, making them pale.


I started working on the body by painting the headliner. Then sanded up the primer. Although it seemed quite smooth, I decided to smooth it out with 5000 water paper anyway. At the same time, I removed a few stains that broke in when applying the primer.


As a basecoat for painting the body I used acrylic X-7 from Tamiya. I applied, if I remember correctly, about eight mists layers. Orange peel was minimal and should rather go down after sanding, but the I found some difficulties with stains, which got onto the coats again.
The basecoat has dried for over a week, so I started removin the imperfections. I sanded them with 5000 water paper and the deeper ones 2000 paper. I sanded only places with imperfections. The primer slightly exposed at one or two points, so I covered them with several thin layers of paint, which unified the surface.
Then I applied the X-22 Tamiya acrylic varnish to the body. About five layers. The first dry and the others were wetter. Varnish dried for about one and a half to two weeks, after which I started sanding and polishing. First, water paper 5000, then 6000 and 8000. Later on polishing with three Tamiya compounds Coarse, Fine, Finish.


I did not expect that masking this model will take so much time. I spent about 6 hours in total. Shutters on the doors were particularly tedious.


After painting all the black elements, when removing the tape, I noticed that in many places the glue remained. However, trying to remove it I got a shock, the remaining traces weren’t the remains of glue, but the result of its reaction with the varnish. I suppose that, despite the fact that the varnish dried for about 2 weeks, it was still too short. The only way to remove pits was to resand and polish these surfaces again.

Ultimately, the model was saved, but it cost a lot of extra work and unnecessary nerves.

In the next step I started to prepare all the details of the car body - emblems, indicators, license plates.
According to the instructions, Ferrari badge decal should be glued directly to the hood. However, I decided to have some fun and stuck it on a separate thin styrene plate, and then covered with a UV varnish.

Then I started to adjust the tailgate, which ended in... a total disaster. In sequence. I was not happy with the effect of Testarossa decal, so I covered it with a clear again. The effect was satisfactory enough, but the foil with the tape that I secured the rest of the element reacted with the coating, exactly the same as in the case of the body. It turns out that the curing time of X-22 from Tamiya must be counted even in months, not in weeks... Therefore, I had to sand and varnish again. Still, everything would be good if it were not for the idea that I encountered in many sources, namely the use of a fruit dehydrator to reduce the curing time of varnish. Technically after such an operation, the coating would be even harder than with natural drying time, but above all the whole process takes much less time. I approached the subject carefully. I placed the hood as far as possible the fan. I checked the elements after 5 minutes of drying. However, when I did it after the next five I noticed that the hood began to deform slightly. Flexing in her fingers did not restore it to its original state. When it cooled down, I tried to rescue it by slightly heating by a hair dryer and trying to bend, but only made matters worse. Some grilles have broken, and the distortion remains. I did not intend to buy a second kit for the hood itself, so I decided to do everything I could to bring it to the best condition. I knew it wasn't going to be perfect, but going back to the original assumptions - it was supposed to be a kit for learning, remembering a few things, and it was. Not without my mistakes, but it taught me a lot.

However, apart from my mistakes, I have to mention a few about the set itself. The inner door panel is about 3-4mm shorter than the outer one. Therefore, the B pillar is somewhere in the middle of the back shelf. Another thing is the rear window, which is a few millimeters too low and if you do not figure out any solution, there will be a gap between its upper edge and the roof. Assembling the chassis with the body is really difficult and it cost me a lot of nerves. The manufacturer did not provide any latches, and according to the instructions, glue should be applied between the threshold and the edge of the door. You have to really get tired to merge these elements effectively enough so that they do not diverge and at the same time no glue can be seen.

The project has just been completed.
More photos of the completed model here | Gallery
Author | Mateusz Uścinowicz
Next workbench | Ford Fiesta S2000

© 2025 | Cookies Policy | Terms & Conditions