
Toyota Celica GT-Four '93 Monte Carlo | Tamiya 1:24
Author | Adam Łokuciejewski
In the workshop the car that needs no introduction. This is the version Didier Auriol won the Monte Carlo rally in 1993. A similar Toyota was the first rally car that I saw in action - the Kormoran '96 Rally. I will do many things for the first time, so although I do not expect miracles, I will try to build a model as aesthetically as possible. I plan valorization to a limited extent, but it will come out in the wash. Here are a few words about this machine. Both photos and text were taken from an official magazine published by Toyota Team Europe in the 1990s.

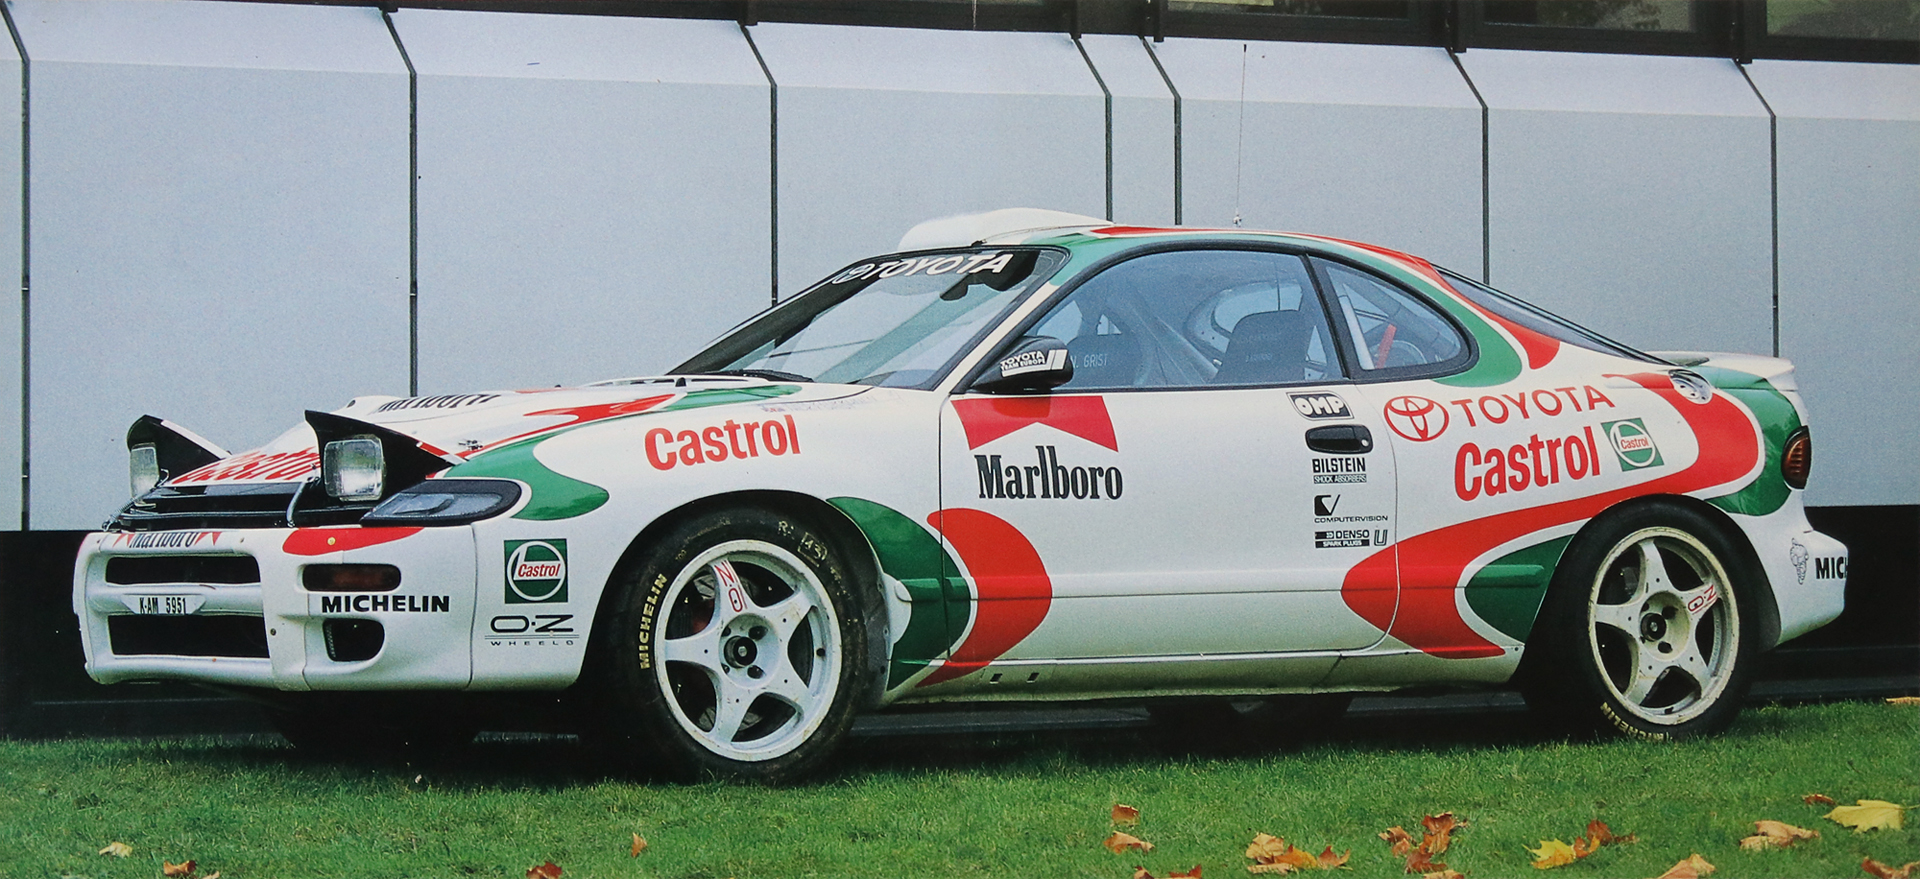
Celica GT-Four RC/ ST185 debuted in the first round of the WRC series in 1992, the Monte Carlo rally. The ST185 was destined to be more successful than its predecessor, the ST165; a version that made the Toyota team a top contender in WRC. The designers and engineers in charge of developing the ST185 had to clear numerous technical hurdles in order to provide a machine that met the demands presented to them. The finished product was also called "Carlos Sainz Edition" in honor of the achievements of the Spaniard who claimed the 1990 Driver's title with a Celica. He was the first world champion driving a Toyota.
Every manufacturer intending to compete in WRC is mandated to produce and sell a predetermined number of cars in order to qualify for Group A homologation. A total of 5000 GT-Four RCs were manufactured and sold in Europe, Australia and Japan to satisfy this requirement. The model was a logical development from the mass produced version, which was introduced to the market in September 1989. Upon the request of Toyota Team Europe (TTE) modifications were mainly dedicated to improved cooling efficiency. When looking at the car, the most prominent features are the front grille with wide openings and the air duct icorporated into the hood design. This duct promotes the dispersion of heat from the engine compartment.
Toyota's engineers were plagued with a series of problems until midway through the car's debuting year, preventing any showing of its best potential. Then, at Catalonia rally, with the suspension and the drivetrain modified, the Celica GT4 RC began running at its predicted strength. Although a little late in the season, the car won five events and placed econd in the 1992 ranking. The record of five wins was an encouraging results for the next season.
Source: Toyota Team Europe
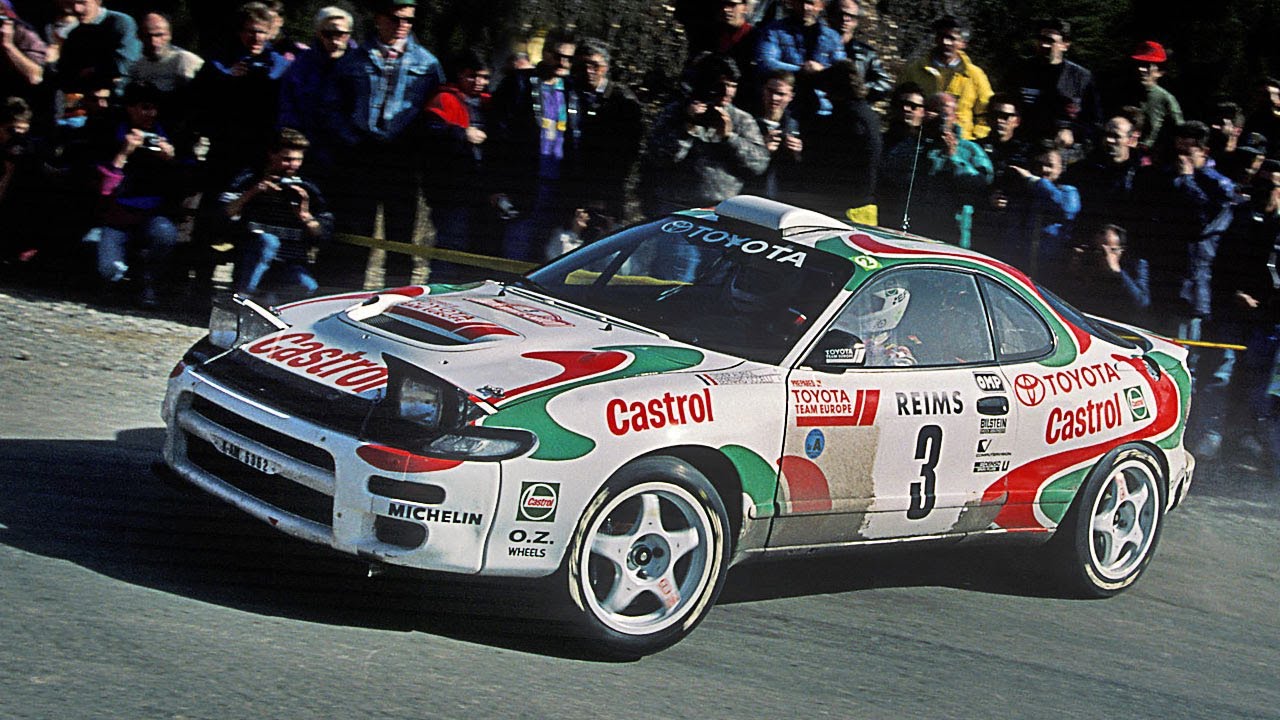
The color sheme was totally changed for 1993. The car was dressed in the corporate colors of crown sponsor for the first time in Toyota's rallying history. Another change was a move from Chez Pirelli to Michelin, which ensured competitive equality in terms of tyres.
Toyota gained its sixth win of the year at Rally Australia, clinching the long awaited Manufacturer's Championship. Apart from this achievement, a new traction control system was tested at the 1000 Lakes rally, expressing the company's eagerness for pursuing the best in advanced technologies.

Source: Toyota Team Europe
At the beginning, I started by sanding the imperfections and cutting out the hole under the license plate in the trunk lid, because this was how it looked in reality. I also cut out the side air intakes in the front bumper. I used Dremel, steel and cosmetic files and sandpaper. Unfortunately, I don't have good photos before the modification, because at that time I did not expect to make a report here. I also drilled the fuel filler cap, door locks and removed the antenna base. The lamps were unfortunately poorly fitted and required a lot of putty and sanding.


Then, after fixing some imperfections and washing the chassis in the dishwashing liquid, I painted them with a primer (Mr. Finishing Surfacer 1500 White). I made its mounting element to the body by cutting off parts of the frame and drilling holes in it for the wire, which I glued with cyanoacrylate. This was necessary because Tamiya did the original mounts in the bumper, exactly where I cut the holes before.


After sanding, filling and priming, I painted the floor with Tamiya X-2 glossy paint. It came out quite nice, but the orange peel is a bit too big in my opinion. I applied about five dry layers and one wet coat. The paint was probably not thinned enough.

Despite the fact that the chassis on the photo above looks good, I decided to improve it. I sanded everything with a 3M sponge with a gradation of 3000 and sprayed once more with mored thinned paint (Mr. Color Leveling Thinner). Now I am happy with the effect.
I also painted the engine cover with a Gunze C-series. I plan to put a Kevlar decal on it.

Then I started for the roof air intake. I sanded plastic rivets and drilled 0.5 mm holes.


I can't deal with the rear spoiler. Every time I put on the putty (Tamiya Putty White), after a few days the putty sits down and is irregular again. If the putty sticks well, then weird things happen after priming. And that is over and over again. I do not understand this reaction...

I finished the exhaust system. I decided to leave the muffler according to the instructions, which makes me feel a little uncomfortable, because the instructions are unfortunately not compatible with the original car. I painted the clamps silver (Tamiya X-11) and added a line panel here and there. In addition, I did the first tries of some suspension components.


Below the engine masking. I recommend storing the tape like Micron 2 mm in a plastic bag. I did not know that and three days on the desk made the dust stuck to the whole roll. Millimeter fiber with a 2 mm tape makes a difference to such fiber on tape for room painters :)


I painted the steering rack and engine and dry pre-assembled the chassis. There are still shock absorbers, discs and Kevlar decals on wheel arches and engine covers, which can be quite challenging, because I will do it for the first time.


Below, the engine cover almost fully wrapped by a Kevlar decal. I need a break from her for a while, because putting decal took me a lot of time. I think it worked out well, especially because I did it for the first time, and the element was not the simplest one. I used to Mark Setter Neo and Softer Neo. The decal is Belkits.

I inserted the Hexagonal bolts V.2 from scalecars.online


Finally I finished the seats. I still need to put varnish on Kevlar decals. I started by removing traps and cutting out holes for the belts. Then I sprayed the seats with gray Mr. Surfacer 1200 primer, which I thinned less to get a thicker texture. Then flat black Gunze C and Recaro decals, which were painted with several coats of flat Tamiya XF-86 acrylic paint. When the paint dried I sanded up the "step" on the decals and applied one more varnish coat.
The next step was laborious cutting of the templates and covering the backs of the buckets. It took many hours, but finally the effect is very good, although not perfect.


The spoiler, after the problems I mentioned earlier, unfortunately have not survived the next repair. The issue was finally resolved by the two-component Milliput Standard epoxy. I have no experience with such specifics, but this one did well.


The primer finally landed on the car body.


Body painted with Tamiya LP-2 varnish. In my opinion, this is definitely a better paint than the acrylic X-2 that I treated with the chassis.
The next step is painting the front and lights. A lot of masking and time. The headlights - AK477 Chrome, directly on glossy black enamel, which I painted the inside of the lampshades first.

After ripping off the foil and masking tapes, Celica finally started to look like a car. It turned out very well.


First decals on board.


The mirrors are almost ready. Sanding, primer, black base, carbon and clear GX100. Finally, polishing with 3000, 6000, 8000 papers and three Tamiya Polishing Compound - Coarse, Fine Finish.

Photo: Peter Bovyn


For the brake discs I used a set of photo-etched plates from MF-Zone. To add realism, I taped them over the Dremel and sanded them with 400 sandpaper. The instruction says that the front brakes should be painted blue - this is a mistake, they should be metallic red. For this purpose, I used the Tamiya LP-46 (Pure Metallic Red). Unfortunately, the photos do not reflect the attractiveness of this color.


The chassis is coming to an end. The shock absorbers were also painted with LP series paints. I decided to mask the springs, not replace them. It may not give such a spectacular effect, but with a bit of patience and precision, it also looks very good.


I covered the front wheel arches with Kevlar and added fasteners using scalecars.online rivets (SCO-R008).
In Tamiya models, we often have a hole between the body and the wheel arches, and it is no different in the case of the GT-Four. Here you can even insert your finger. I decided to do something about it and for this purpose I cut stencils from 0.25 mm polystyrene. You can download their template and print on A4 if you want to save a few hours of work: Wheel arches (Toyota Celica GT-Four)


I have painted the wheels probably three times. I decided that they looked the best after two coats of paint - the first dry, the second wet. Without clear coat. Thanks to this, the details are not flooded.
The original "bolts" have been reamed and replaced with scalecars.online bolts (SCO-R004), and the valves (SCO-R002). I printed the hubs myself - this detail has changed a lot. And when I printed them, we decided to put them in our Store, why not!? Maybe someone will decide to improve this item in his own model.
Additionally, I drilled a hole in each arm with a 0.2 mm drill. In other words, each rim (except for the spare wheel) has an additional 10 holes.


Halogen lamps were painted with glossy enamel, and then with AK chrome. I did it twice, because the first time I didn't spill a perfectly black base, so the chrome was only good, not very good;) In addition, the lamp covers were polished with papers and Tamiya Polishing Compounds, which made a difference. Unfortunately, it is difficult to capture these subtleties in photographs.


Author | Adam Lokuciejewski
Next workbench | Skoda Fabia S2000

© 2025 | Cookies Policy | Terms & Conditions